❑The Subscriber Information page has three (3) tabs from which the Panels tab may be selected.
•The Panels tab which contains the list of CSIDs being monitored for this Subscriber; plus Events, Notes, CSID Zones, Physical Zones, Call List, Call Order, Medical Info, Floor Plan, Testing, Areas, Alarm Events, On Test and Report options
✓Once you have finished with one of these optional pages, Tap or Click the Panels tab to return to that page.
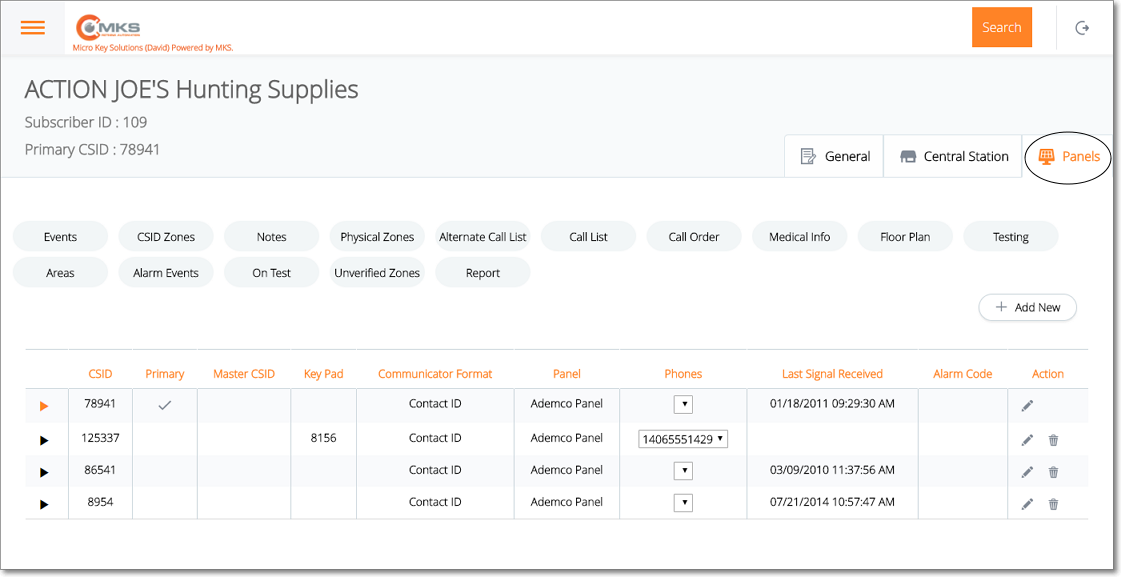
Web Dealer Access - Subscriber Information - Panels tab
✓The fifteen (15) options on the Panels tab are used a follows:
➢Note: In most cases, a specific CSID must be selected before Choosing one of these options.
1.Events - Supervising the Opening and/or Closing schedule(s) at a Subscriber's Premises is one of the primary functions of a Central Station and this is where those supervision rules may be viewed, added and/or updated.
2.CSID Zones - This is where CSID Zones - which provide the means to identify Exceptions to the standard predefined Panel Zones for the Communicator Format programmed into the Control Panel installed at the Subscriber's Premises - may be identified.
3.Notes - This is where a Temporary Note, to be displayed when that Subscriber's Alarm System is activated (sends an Alarm Signal to the Central Station) may be entered and/or updated.
4.Physical Zones - This is where the Physical Zones - which identify a specific location, piece of equipment, or alarm sensor within this Subscriber's Alarm System - may be defined.
5.Alternate Call List - The CSID for an Alternate Call List (which provides additional People To Call) may be entered in the Edit CSID page accessed from the Panels Tab by when a listed Subscriber Panel (i.e., CSID) is edited
6.Call List - This is where the names, telephone numbers, and other important information about the People To Call (in addition to those being Dispatched) in the event of an Alarm may be entered and/or updated.
7.Call Order - This is where the normal Calling Sequence for notifying the People To Call may be entered and/or updated.
8.Medical Info - This is where the Medical Information for Clients being monitoring for this Subscriber may be entered and/or updated.
9.Floor Plan - This is where the image, schematic, or other identifying file may be uploaded and attached to this Subscriber's record.
10.Testing - This is where the Account Testing information for this Subscriber may be entered and/or updated.
11.Areas - This is where any discreet, separately monitored sections with the Subscriber's premises may be identified.
12.Alarm Events - This is where a list of Alarm Events may be view - based on a User defined Date and Time Range.
13.On Test - If any Accounts have been placed on test, when the ON Tests page is displayed, those "On Test" Accounts will be listed and where new ones may be entered and/or existing ones updated
14.Unverified Zones - List the currently Unverified Zones for this Panel CSID and allows you to reset its status.
15.Report - This option displays the list of available Monitoring related Reports may which may be viewed, and/or exported as a PDF file.
+ Add New - Tap or Click this button to open the Add Panels entry page (see the "Adding a Panel CSID" below for that information).
✓Once you have finished with one of these optional pages, Tap or Click the Panels tab to return to that page.
▪When the Subscriber Information page is accessed (by Choosing Subscriber as the Select Login Type in the Web Dealer Enhanced Access module) the Central Station tab will appear as shown immediately below.
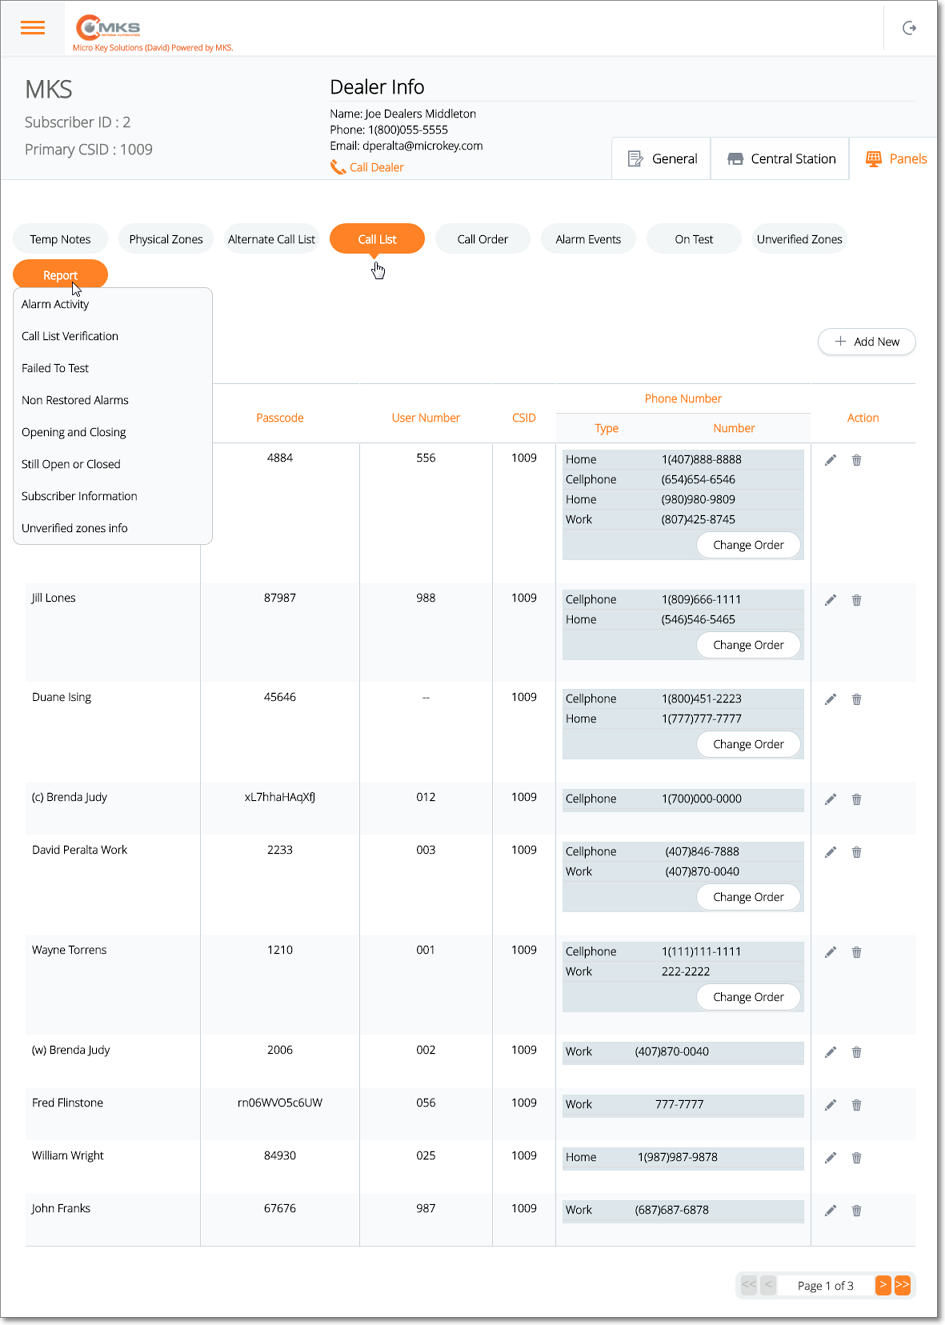
Web Dealer Enhanced Access - Subscriber has opened the Subscriber Information - Panels tab
▪The nine (9) options on the Panels tab are used a follows:
➢Note: In some cases, a specific CSID must be selected before Choosing one of these options.
1.Temp Notes - This is where a Temporary Note, to be displayed when that Subscriber's Alarm System is activated (sends an Alarm Signal to the Central Station) may be entered and/or updated.
2.Physical Zones - This is where the Physical Zones - which identify a specific location, piece of equipment, or alarm sensor within this Subscriber's Alarm System - may be defined.
3.Alternate Call List - The CSID for an Alternate Call List (which provides additional People To Call) may be entered in the Edit CSID page accessed from the Panels Tab by when a listed Subscriber Panel (i.e., CSID) is edited
4.Call List - This is where the names, telephone numbers, and other important information about the People To Call (in addition to those being Dispatched) in the event of an Alarm may be entered and/or updated.
5.Call Order - This is where the normal Calling Sequence for notifying the People To Call may be entered and/or updated.
6.Alarm Events - This is where a list of Alarm Events may be view - based on a User defined Date and Time Range.
7.On Test - If any Accounts have been placed on test, when the ON Tests page is displayed, those "On Test" Accounts will be listed and where new ones may be entered and/or existing ones updated
8.Unverified Zones - List the currently Unverified Zones for this Panel CSID and allows you to Reset its status.
9.Report - This option displays the list of available Monitoring related Reports may which may be viewed, and/or exported as a PDF file.
❑Using the Action Icons
•Edit - Tap or Click ![]() to display the Edit CSID page of the Panels tab
to display the Edit CSID page of the Panels tab
✓Once a new Panel CSID has been added, you will often need to edit that basic information to provide additional information.
✓See the Edit CSID page chapter for those instructions.

Web Dealer Enhanced Access - Subscriber Information - Panels tab - Edit CSID section
•Trash - Tap or Click ![]() to remove this Panel CSID from the Panels tab list.
to remove this Panel CSID from the Panels tab list.
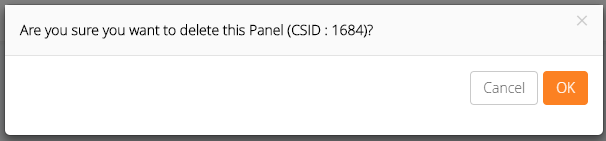
✓OK - Tap or Click to Confirm that this is the desired action.
❑Adding a Panel CSID:
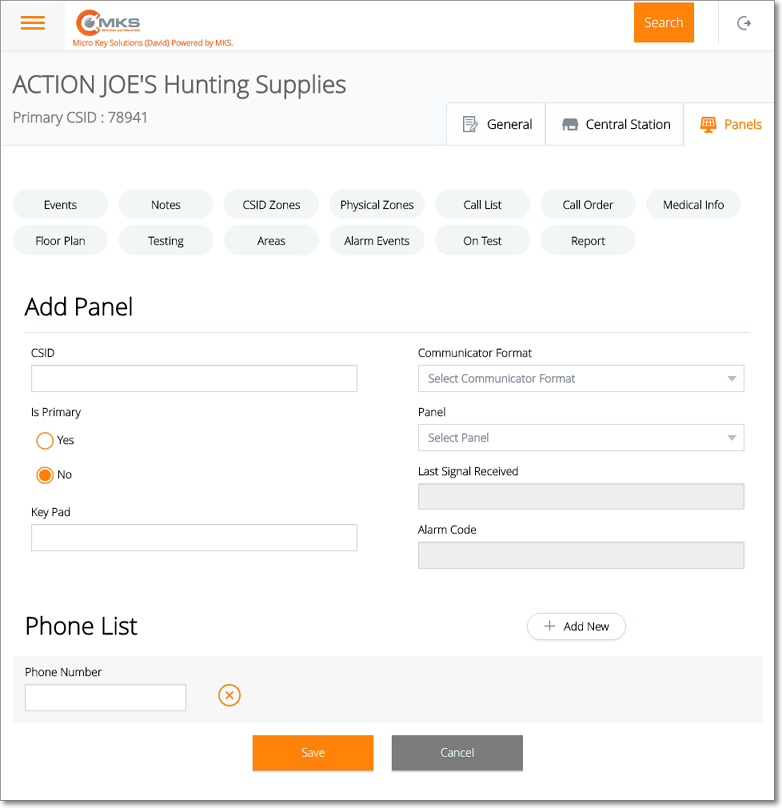
•Add Panel
+ Add New - Tap or Click this button to open the Add Panels entry page
✓CSID - Enter the Subscriber's CSID which may be up to 40 characters in length may be manually entered.
✓Is Primary - Answer Yes if this CSID is the Primary CSID for this Subscriber - the one that is to be shown initially on the Subscriber Information page.
▪One, and only one, of the Subscriber Panel(s) CSIDs is designated as the Primary CSID.
✓Key Pad - Enter the master Key Pad Code for this Control Panel.
✓Communicator Format - Use the Drop-Down Selection List provided to Choose from the list of the Communicator Formats the one that is being transmitted by the system's Control Panel.
✓Panel - Use the Drop-Down Selection List provided to Choose from the list of the Installed Equipment Codes representing the Control Panel programmed with this CSID.
✓Last Signal Received At - This field is maintained by the system and represents the most recent signal received for this CSID.
✓Alarm Code - This field is maintained by the system and represents the most recent Alarm Condition Code received at the Central Station for this CSID.
•Phone List - This is used to enter the telephone number(s) that will transmit their Caller ID when an Alarm Signal is sent.
+ Add New - Tap or Click this button to add a Phone Number
✓Phone Number - Enter the numbers - no automatic formatting is implemented, nor required.
▪Repeat to add more Caller ID Telephone Numbers for this Panel, if additional ones may be used.
•Save - Tap or Click the Save option to record any changes or updates to this information.
✓A confirmation message will be displayed when the changes have successfully been posted to the database.
✓Tap or Click the OK button to continue.