❑Many Central Stations provide monitoring services for other Alarm Dealers. and many Alarm Companies accept Credit Cards, Debit Cards ACH and EFT payments that are processed through Payment Gateways
•To improve service, these Monitoring companies, in addition to monitoring the Accounts of those Dealer's alarm system customers, frequently offer Recurring Billing and remote "Lock Box" services, as well.
✓Financial Institutions that help with Acquisitions sometimes insist that the acquired Alarm Dealer's Subscriber Monitoring Fees are processed through a "Lock Box" for better tracking of cash flow and acquisition loan viability.
✓Other Subscribers may automatically pay their Recurring Revenue charges by using Auto Drafts (paying by Check or Credit Card) and/or individually using the E-Payment process within MKMS to make those payments, all of which are processed through one or more Payment Gateways.
✓These remotely processed Receipts are then transmitted to your Company by electronic file using a specific predefined format.
•These Financial Institutions and Payment Gateways provide an Import File which enables MKMS to update Subscriber, Invoice and Receipt information when those payments made by Subscribers are successfully processed by and through one of those Payment Gateways.
✓This file (check with Support for the latest structure for this file's format) is a comma delimited text file containing the information required to properly import those Receipts directly into MKMS.
❑Understanding the Standardized Payment Import File Format:
•Subscriber ID - (12: filled with preceding zeros before the actual Record Number) - This is the record number assigned by the system for each Subscriber record that has been entered in MKMS.
•Amount - (12: 9 numbers {filled in with preceding zeros}, a decimal, and then two more numbers) - No commas are permitted, just numbers and a decimal.
•Payment Method - (1) - One number representing the method of Payment as per the list below:
1 = American Express
2 = Cash
3 = Check
4 = Discover
5 = Electronic Transfer
6 = Master Card
7 = Visa
8 = Other
•Check Number - (10: filled with preceding zeros before the actual Check Number)
❑Using the Payment Import dialog:
a)From the Backstage Menu System Select Maintenance and Choose Receivables then Click the Pay Import option, then Select Regulus/Wells Fargo Import Menu, or
b)From the Quick Access Menu, Select Maintenance and Choose Receivables then Click the Pay Import option, then Select Regulus/Wells Fargo Import Menu
•Finally, Click on the Import Payments option.
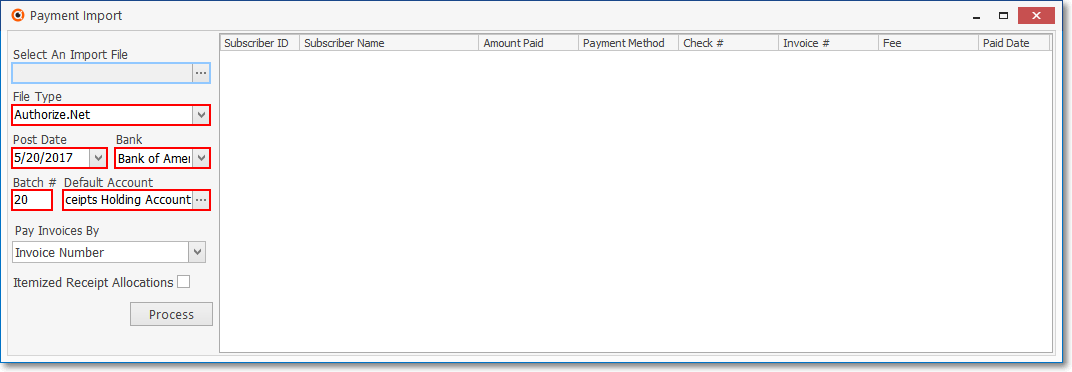
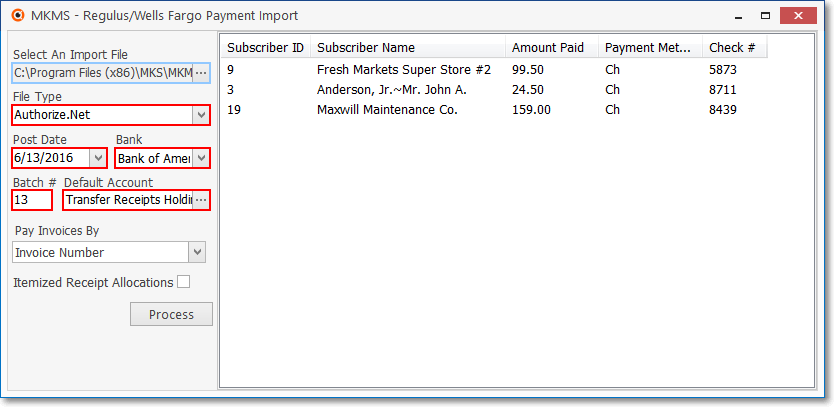
Standardized Payment Import Form
•Select an Import File - Use this File Browser to locate the import file containing these Payment Import transactions.
✓See the Regulus Import File page for file format instructions.
✓See the InnoEPay and related chapters for that information.
•File Type - Using the Drop-Down Selection List provided, Choose the appropriate File Type (e.g., Authorize.net, IsPayd, PMX, Regulus, Wells Fargo)
•Post Date - By default, this will be Today but the Date may be changed using the Drop-Down Calendar/Date Entry field provided.
a)Click on the Date field and type the desired Date using a MM/DD/YYYY format; or
b)Use the Drop-Down Calendar/Date Entry field provided to Choose the desired Date
•Bank - Use the Drop-Down Selection List to Choose the Bank into which these Receipts (imported payments) will be deposited.
•Batch # - By default, it will be the Day Number of Today's Date. You should change this Batch number, as appropriate.
➢Note: See the "Batch Number Assignment" discussion in the Receipts chapter for more information about Batch Numbering.
•Default Account - Use the Drop-Down Selection List to Choose the Subscriber record that has been established as the Holding Account to which any Unassigned Receipts will be posted.
✓See the "Why create a Holding Account?" discussion below.
•Pay Invoices By - Choose the method to be used to confirm a "match" (i.e., Invoice Number, Oldest Outstanding Invoice).
•Itemized Receipt Allocations - Check this box to implement automatic Itemized Receipt Allocation.
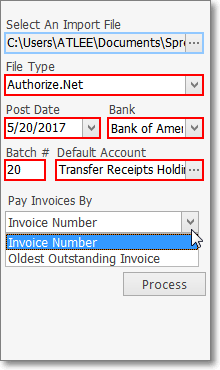
Pay Invoices By options
•Make this the default for all unassigned receipts? - If you want the selected Subscriber Account to become the default "Holding Account" for any Unassigned Receipts - those that cannot be matched to an existing Subscriber - answer Yes. This can be changed later, if necessary.
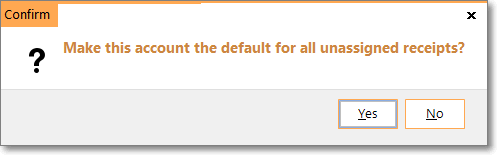
Make this account the default for all unassigned receipts?
•Process - Click the Process button to start the importation of the receipts.
•Confirm - Click Yes to Confirm that the date you entered is the one you want to use.
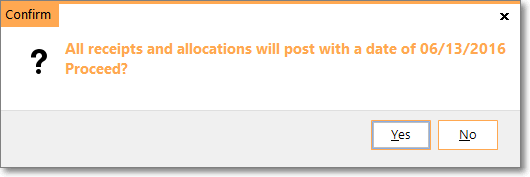
Confirm the Posting Date for these Receipts
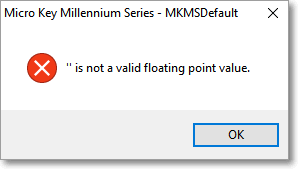
✓If the Import File that was selected is improperly formatted, an error will be displayed and the procedure will then be terminated.
•You will see transactions as they are imported and will be notified when the process is completed.
Standardized Payment Import Process Finished
•Click the Close ![]() box on the top right of the Payment Import Form when finished.
box on the top right of the Payment Import Form when finished.
❑Unassigned Receipts - If there are any Unassigned Receipts, you will be told with a message within an Information box.
•For those Receipts that the Import Payments utility could not associate with a specific Subscriber record, use the Assign Receipts utility to specifically assign those Receipts to the appropriate Subscribers.
❑Why create a Holding Account?
•For a number of reasons - almost all of which relate to bad data - some Receipts may not be properly linked to a Subscriber during any of the available Import Payments procedures (e.g., Import Payments, IsPayd Import).
✓These orphaned Receipts will be posted to a User designated Holding Account - a Subscriber record specifically entered for that purpose.
•From this Holding Account, you will be able to Transfer these Unassigned Receipts to the appropriate Subscriber(s) using the Assign Receipts capability in the Receipt Transfer Form (see the Transferring a Receipt to a different Subscriber discussion in the Receipts chapter).
✓This Receipt Transfer dialog is used to identify and relocate (i.e., Transfer) the Receipts that were assigned to the Holding Account (which was created and designated specifically for that purpose).