❑Forms are used to encapsulate a set of related information for:
1)Data entry (e.g., Receipts Form); and/or
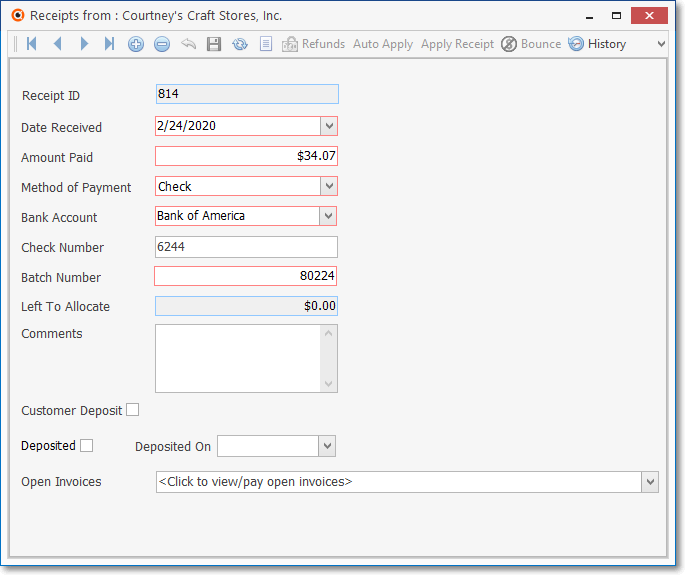
Receipts Form
2)Executing special processes (e.g., Auto Billing Form).
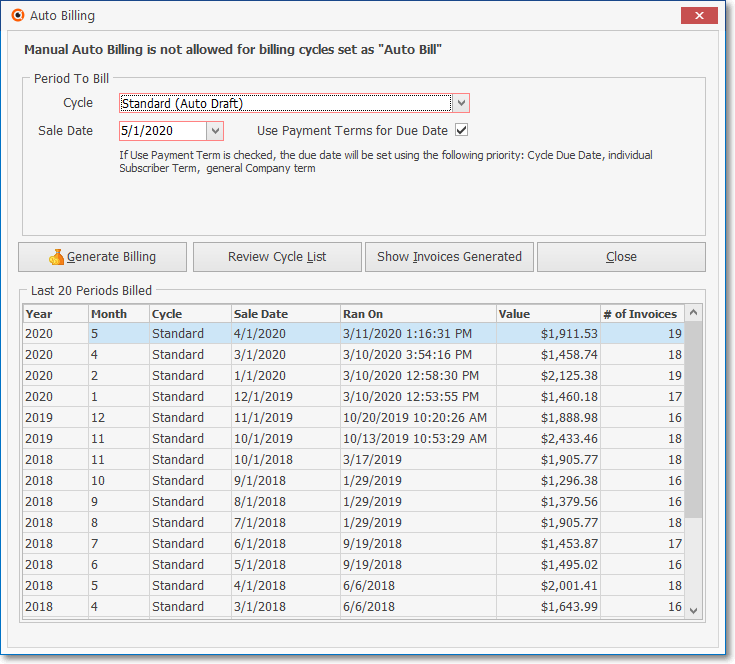
Auto Billing dialog - Multiple Recurring Billing Cycles implemented
❑Tabs are used to save space - Some Forms may have tabs which provide space for, and fast access to additional information about the Master subject.
•In this example, a Master Form (a Subscribers Form sample appears below) may have Tabs and/or Data Grids.
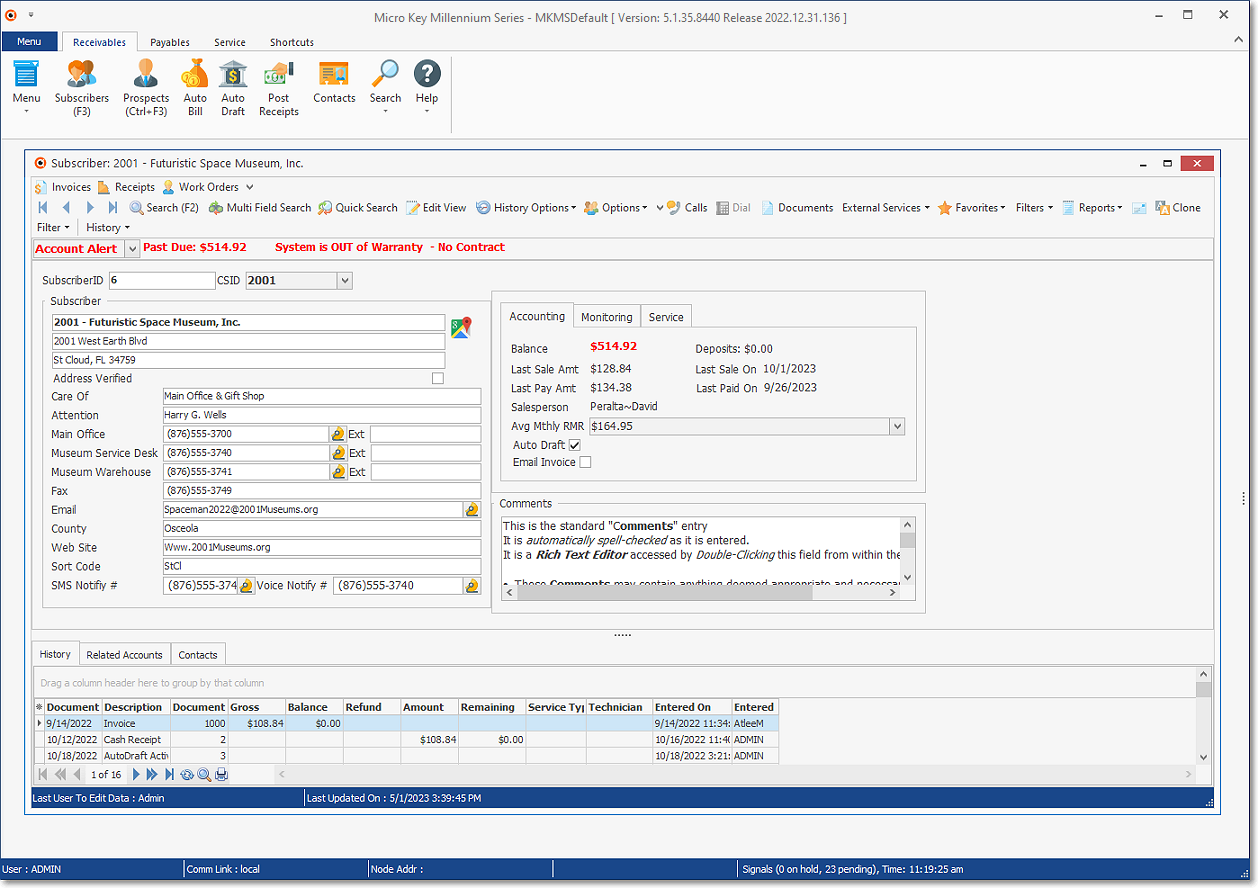
MKMS Desktop - Receivables tab - Subscribers Form - Navigation & Actions Ribbon Menu options, Accounting, Monitoring & Service tabs, and the History Data Grid
•Using a Tab to display specific data view reduces screen clutter by showing only the data you need to see for your current purpose, but allowing instant access to the additional information when required.
✓The Fields displayed on a Master Form may sometimes be defined by an Administrator using the Field Access tab within the Employee Group Form.
✓The Edit View Icon provides access to All Fields
❑Data Grids and Lists - Data Grids contain a List of Line Items representing specific information associated with its Master Form such as:
a.Sale Items (representing what was Sold) on an Invoice, or Purchase Items (for what was Purchased) on a Bill
b.All, or a selectable History (e.g., Invoices, Receipts, Alarm Signals, Proposals, Service Requests) for a Subscriber ; or the Purchase Orders, Bills, and/or Payments History for a Vendor.
c.The Data View tab on most Reports.
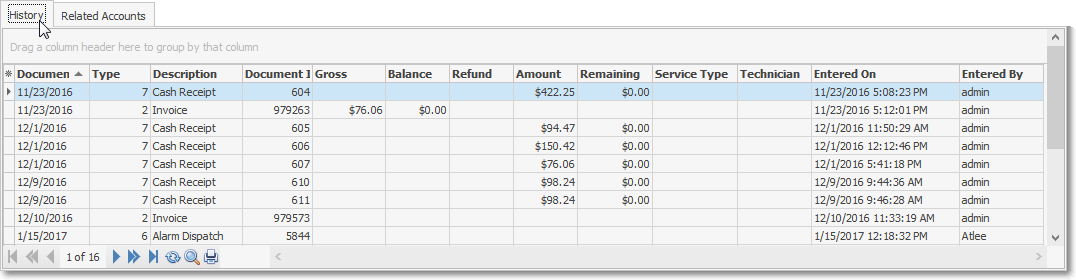
Subscriber Form - History Data Grid
•There is often an additional Navigation Menu located at the bottom of a tab and/or a sub-tab which provides record movement Icons and may also have Insert, Delete, Save, Cancel, Refresh, Reorder, Search and Filter Icons.
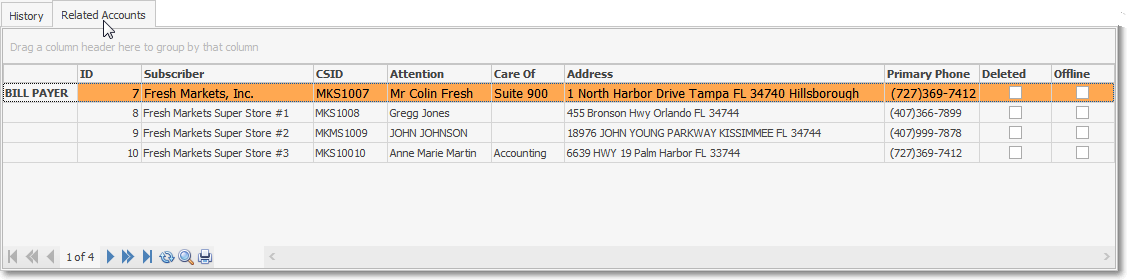
Subscriber Form - Related Accounts Data Grid
•Custom Grid Filters - The information Listed within the Grid may often be filtered - as needed - to define which records are displayed within that Data Grid,
•Data Grids have many other capabilities, some or all of which may be available based on the purpose and/or function of that specific Data Grid.
❑Maintenance and Special Purpose Forms
•These Forms are typically single purpose dialogs used when you need to predefine a set of codes or rules that will be used by the system thereafter.
•These special purpose Forms contain a Navigation Menu (see below), sometimes special purpose Icons, and a set of fields to enter the codes and/or rules that are required.
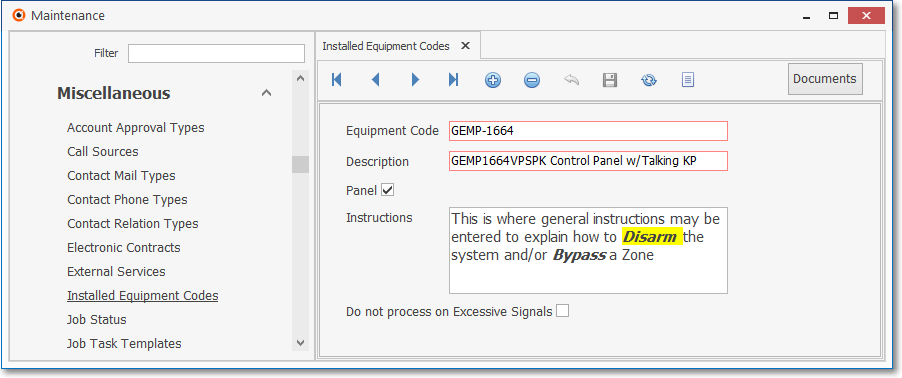
Typical General Maintenance Form
•Navigation Menu - The Navigation Menu is always located at the top of this type of the Form.

✓This generic type of Navigation Menu - primarily used in the General Maintenance Menu - provides the normal Record Movement, Insert, Delete, Cancel, Save, and List options; as well as a Print and Export function if the List Grid is displayed. Some Maintenance Forms also have special options (see the Documents option in the example Form above)
•To enter a new record:
![]()
✓Click the Add Icon to start an entry within the Record Editing View.
✓Enter the required information.
![]()
✓Click the Save Icon to record the entry.
✓Any number of records may be identified, as required.
•List Icon - The Navigation Menu on most Maintenance Forms also has a List View (displaying a Data Grid) option which provides a tabular listing of the records which can be rearranged, sorted, filtered, printed and exported.
![]()
✓See Grids & Lists - Print Preview - Export Data for more information on using the List (Grid) option.
❑Report Set-up Dialogs often use multiple tabs to set Report Printing Options, provide a Preview of the requested information, and offer a tabular Data View of that information for easy manipulation and exportation.
•Options (the dialog that displays all of the available data and printing options for a specific report) usually have tabs.
➢Note: On many report dialogs, once a set of Options are Chosen for the Report, they become the new default set of Options.
These default Options may be reset at any time by simply making a different set of Choices.
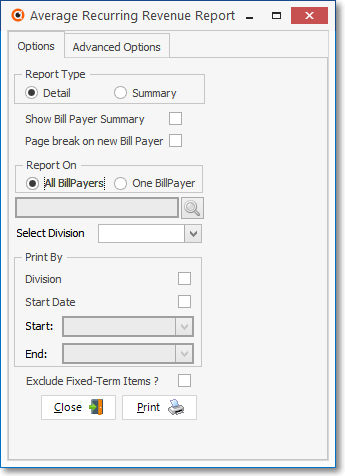
Report printing dialog with Options, Preview & Data View tabs
•Preview options - For Report dialogs that have the Options and Preview tabs (among others), the most common Preview tab options are:
✓Up Arrow/Down Arrow - hi - Moves the report one line up, or one line down, respectively.
✓Page Up/Page Down - Moves the report to the previous or next page, respectively.

Report Form - Preview tab
✓Home - ![]() - Using either the screen Icon or your Keyboard's Home key, moves the report to the top of the first page.
- Using either the screen Icon or your Keyboard's Home key, moves the report to the top of the first page.
✓End - ![]() - Using either the screen Icon or your Keyboard's End key, moves the report to the bottom of the last page.
- Using either the screen Icon or your Keyboard's End key, moves the report to the bottom of the last page.
✓Arrows - The arrows allow you to move back and forth, from page to page.
✓Number - Indicates the page number you are viewing.
✓Fit To Page - Click the first button after the arrows to size a full page of the report to fit the screen.
✓Zoom To 100% - Click the second button after the arrows to display the page at 100% (of the printed view).
✓Fit To Page Width - Click the third button after the arrows to size the page of the report to fit the full width of the screen.
✓Zoom To Percentage - Click the fourth button after the arrows to re-size the page of the report by percentage.
✓Print - Click the Print button ![]() to Print (to a File or a Printer) the displayed Report.
to Print (to a File or a Printer) the displayed Report.
✓Email - Click the Email button ![]() to send the Report to an Email Address of your choosing.
to send the Report to an Email Address of your choosing.
✓Charts - Pie and Bar Charts may be produced when printing some reports.
▪Report Charts must be set to True ("T") in Company Settings to activate this feature.
✓To Exit the Preview tab and Close this Report dialog Form, Click the Close box ![]() on the right at the top of the Preview tab.
on the right at the top of the Preview tab.
•Data View options - This tabbed view provides a tabular (spreadsheet style) presentation of the selected data.
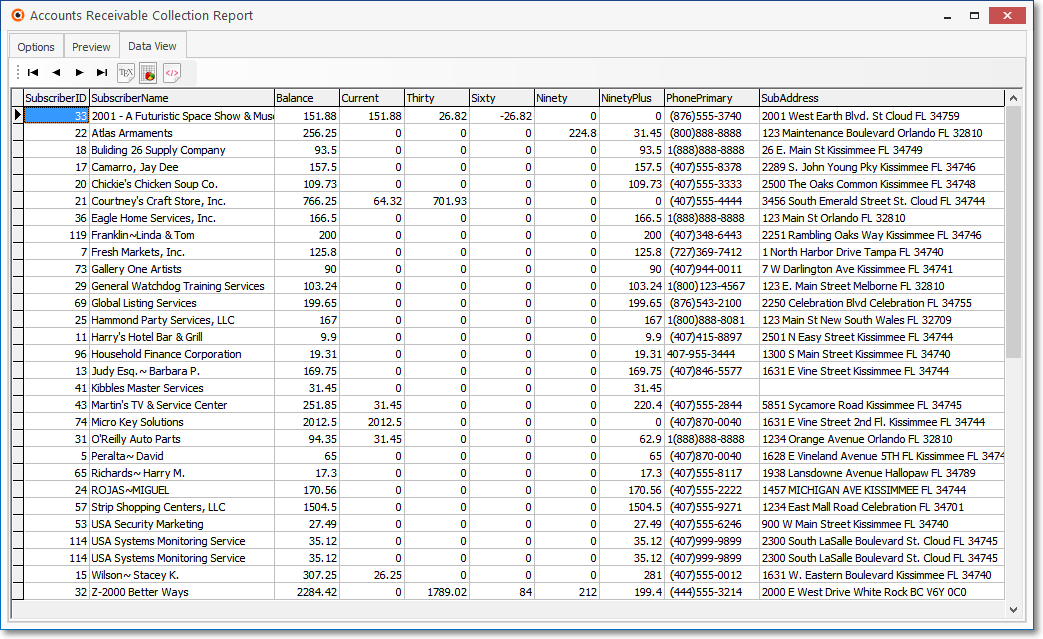
Accounts Receivable Collections Report - Data View tab
✓Arrows - Click the arrows to move through the record.
✓Export - Exporting the data from this Data View Form (note the "fly-over" help available on these buttons):
▪Export to CSV - Click the first button after the arrows to export the data to a Comma Separated Values (CSV) file format.
▪Export To Excel - Click the second button after the arrows to export the data to an Excel (.xls) file format.
▪Export To Html - Click the third button after the arrows to export the data to an HTML formatted file.
✓To Exit the Data View tab and Close this Report dialog Form, Click the Close box ![]() on the right at the top of the Data View tab.
on the right at the top of the Data View tab.