❑As you are Printing Invoices, Service Requests Form, Subscriber Statements, the Prospect Information Report and Proposals (among others), when you Select the Print option, notice the Print button has a small down arrow ‚ to the right of the word Print.
•If you simply Click the Print button, the system's standard Invoice, Service Request Form, Subscriber Statement and Proposal, etc., format will be utilized to create the requested items.
![]()
✓However, if you Click the small down arrow ‚ to open the Custom Report Print Options Menu, you can Choose a previously created Custom Report Format, or Choose to make a new one of your own design.
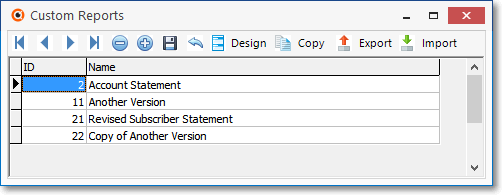
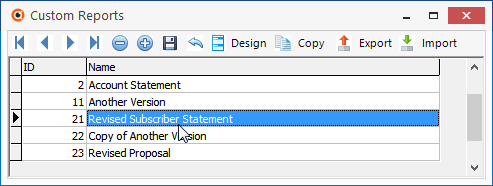
✓Either Select (Click on) on the existing Custom Report Format that you want to be used to print the requested report/form, or Select Custom Reports to open the Custom Reports dialog shown below:
Custom Reports dialog
❑Creating a Custom Report Format
•When printing Invoices, Service Request Forms, Subscriber Statements, the Prospect Information Report and Proposals (among others) from their corresponding Reports menu, the format used to print those Invoices, Service Request Forms, Subscriber Statements, the Prospect Information Report and Proposals (among others) may all be modified using this Custom Reports dialog.
•There are three alternatives when working with Custom Report Formats:
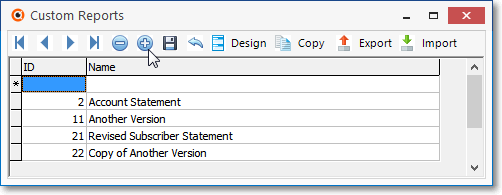
1.Add a New Custom Report Format based on the original design of the default format of the currently selected Print Report dialog (i.e., the Invoice, Service Request, Subscriber Statement or Proposal format).
▪To do so, Click the Add Icon ![]() to start creating a new Custom Report Format.
to start creating a new Custom Report Format.
Custom Reports dialog with new report line shown
▪Click on the Name field which by default will appear as "(New Report)".
▪Enter the Name that is to be assigned to this new format.
▪Click the Save Icon ![]() to record this new Custom Report Format's Name.
to record this new Custom Report Format's Name.
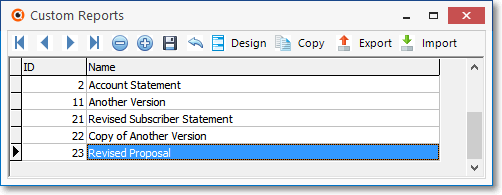
▪An ID number will be assigned to the Name that was just saved.
▪Click the Design button to open the Report Builder dialog.
2.Modify an existing Custom Report Format.
▪Select an existing Custom Report Format ID number.
▪Click the Design button to open the Report Builder dialog.
3.Copy an existing Custom Report Format to a record and Redesign that Copy.
▪Select an existing Custom Report Format ID number.
▪Click the Copy button to create a new record.
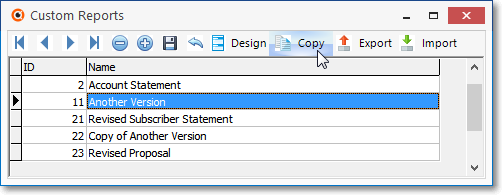
▪Select this new copy of the Custom Report Format.
▪Click the Design button to open the Report Builder dialog.
❑Exporting a Custom Report Format - Being able to Export a Custom Report Format file will allow you to Share that new design with another Person or Company.
•Once you have Designed a new Custom Report Format (see "Designing a Custom Report using Report Builder" below), you may Export that Custom Report Format file to a folder of your choosing.
✓Select the appropriate Report (Invoices, Service Request Forms, Subscriber Statements or Proposals from their corresponding Reports menu) to be Exported.
✓Click the small down arrow ‚ on the Print button in the Options dialog of that Report to open the Custom Report Print Options Menu
✓Choose the Custom Reports option.
•To Export a Custom Report Format file:
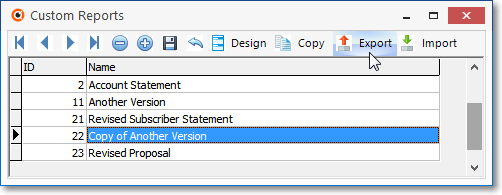
✓Select an existing Custom Report Format Name.
✓Click the Export button to start the Export procedure.
Windows Save As dialog - Browse Folders button
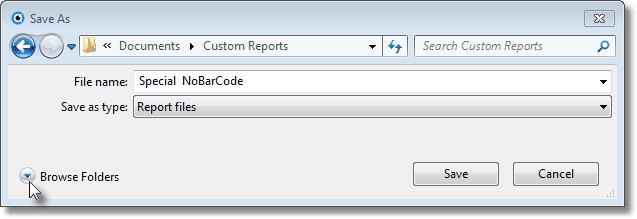
✓Click the Browse Folders button to fully open the Save As dialog so you can Locate the appropriate Folder into which this Custom Report Format file is to be saved.

Windows Save As dialog fully opened
✓File name - The Windows® Save As dialog will be displayed.
▪The Custom Report Format Name which was selected above will be inserted into this File name field.
▪You may rename this Custom Report Format file, if appropriate.
✓Save as type - By default this will be Report files.
▪Do not change this setting.
✓Locate (or Create) the Folder in which this Custom Report Format is to be stored.
✓Click the Save button.
❑Importing a Custom Report Format: Being able to Import a Custom Report Format file will allow you to "Borrow" a design from another Person or Company.
•Once they have Designed a Custom Report Format (see "Designing a Custom Report using Report Builder" below), you may Import that Custom Report Format file into a folder of your choosing.
✓Select the appropriate Report (Invoices, Service Request Forms, Subscriber Statements or Proposals from their corresponding Reports menu) to be Exported.
✓Click the small down arrow ‚ on the Print button in the Options dialog of that Report to open the Custom Report Print Options Menu
✓Choose the Custom Reports option.
•To Import a Custom Report Format file:
✓Depending on how this Custom Report Format file was provided to you:
▪Copy the file from the USB Memory Stick, CD, or Email source into the Folder where your Custom Report Format files are stored.
▪Click the Import button to start the Import process.
✓The Windows® Save As dialog will be displayed.
▪Locate the Folder in which your Custom Report Format are stored.
▪Click on the File Name to be Imported.
▪Click the Open button.
✓The selected File Name will be added to the list of Custom Report Format files in the Custom Reports dialog.
❑Designing a Custom Report using Report Builder - Once you Click the Design button the Report Builder dialog will be displayed.
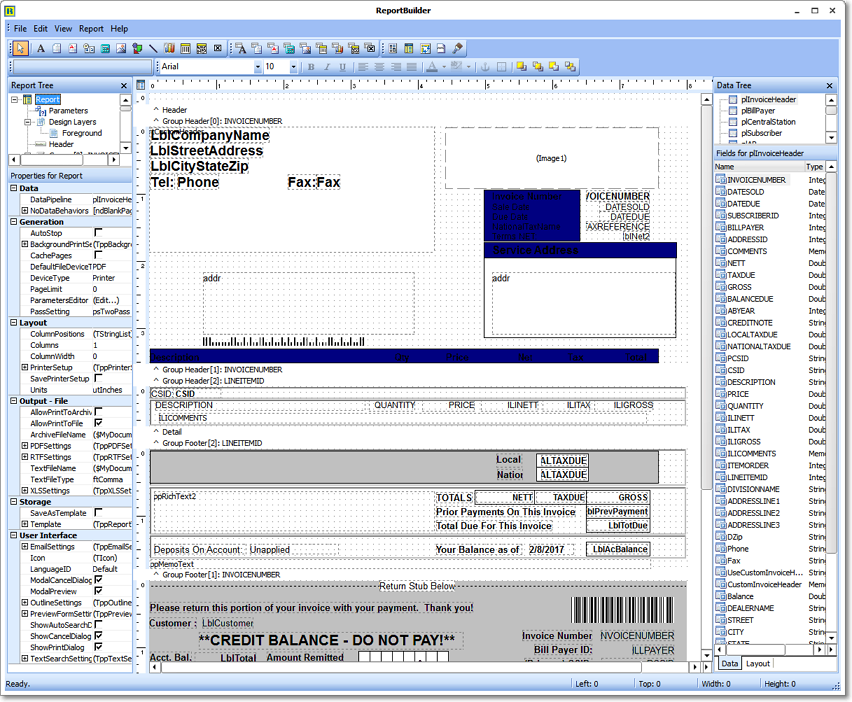
Report Builder dialog for creating Custom Report Formats
•Make the modifications, as needed.
✓Click Ctrl+S to Save these changes.
✓Click the Close box T to close the Report Builder Form.
✓Click the Close box T to close the Custom Reports dialog.
✓Close and Re-open the Report dialog (so it can now recognize your new report format).
•On the Report dialog, Select the small down arrow ‚ on the Print button.
✓Choose the new Custom Report Format's Name from the list presented.
✓Preview the report to Confirm your changes.
➢Note: See the Report Builder chapter for a detailed explanation of this Report Builder Form and its functionality.
❑Modifying or Deleting an existing Custom Report Format
•On the Reports dialog, Select the small down arrow ‚ on the Print button.
•Choose Custom Reports.
•Select the Custom Report Format's Name to be modified or deleted.
✓To Delete, Click the Delete Icon (" _ ") and, once you Confirm the Deletion Request, that record will be removed from the list.
✓To Modify, Click the Design Button and proceed as outlined above as if you are creating a new Custom Report Format.
❑Working through the change process:
•This Report Builder dialog can be quite intimidating, at first.
✓Keep in mind that whatever changes you make, can be changed again, or completely reversed.
✓In addition, take comfort in knowing that the original format is always preserved.
✓So, you can experiment with your changes without permanently affecting the system's original design.
•Using the Change, Save, Close, Re-Print cycle outlined above, try making the changes you need and then looking at the results by Previewing the format's revisions to see if you have gotten what you wanted from your changes.