❑The Subscriber Information page has three (3) tabs one of which is the Panels tab
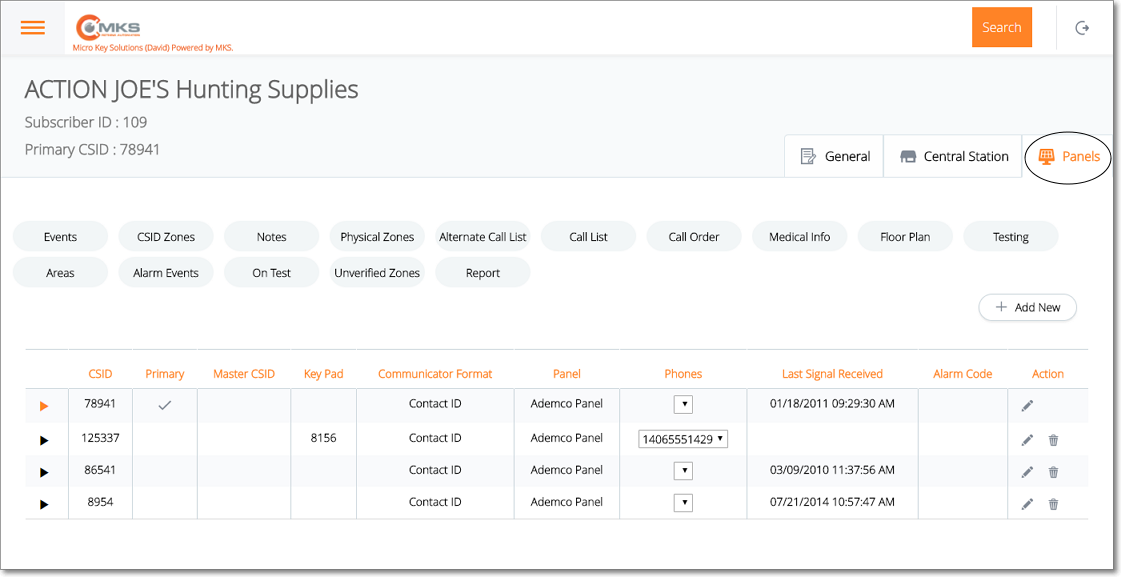
Web Dealer Access - Subscriber Information - Panels tab
•The Panels tab contains the list of the CSIDs which are being monitored for this Subscriber; and (among other options) has a Areas option.
✓Select the CSID from the list on the Panels tab that has the Areas records which are to be viewed, added to, modified and/or deleted.
✓Tap or Click on the Areas option to display the Areas page for that CSID.
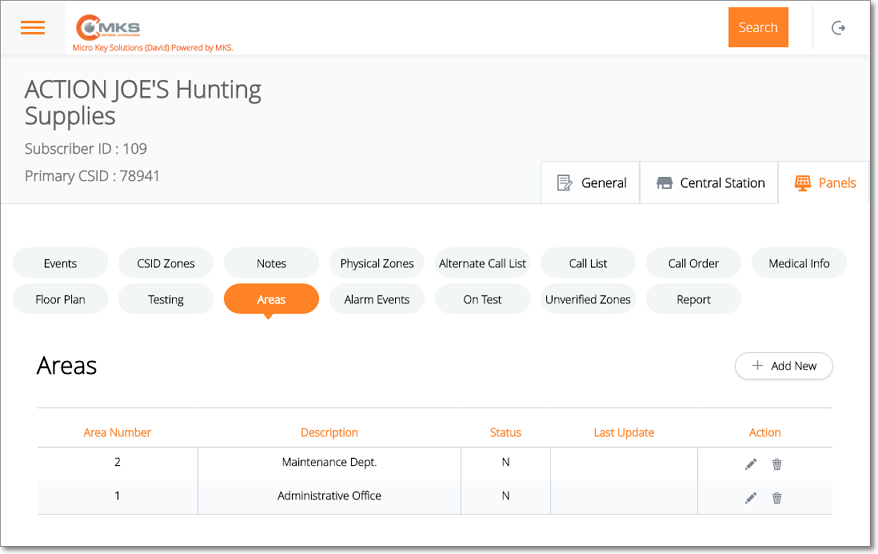
Web Dealer Access - Subscriber Information - Panels tab - Areas option
❑Understanding the Areas feature:
•When a Subscriber's premises has an Alarm System installed in such a way as to be able to sub-divide sections of that premises into separate Areas (often referred to as Partitions).
✓These sub-divided sections allow each such division to be identified as a separate, unique, supervised Area.
✓The result is that each of these individual sections (Areas) may then be monitored as separate "systems" within the Alarm System as a whole.
•Areas are used to accommodate this need and are implemented as follows:
a)Area(s) are defined for a specific CSID
b)Areas are often referred to as Partitions
c)Areas do not represent the Subscriber's premises as a whole, but instead represent a specifically sub-divided section (i.e. Partition) of that Subscriber's premises.
d)Each Area may therefore be monitored individually, Armed and Disarmed individually, and have Opening, Closing, and Other types Events Supervised individually, as well as Test Events.
❑Understanding and Using the Areas page:
•This Areas page provides three features:
A.List - A List of all previously defined Areas
B.Actions - Ability to Edit and/or Delete previously defined Areas.
C.Add New - Ability to Add a new Area
A.List - List of Area records has several columns
a.Area Number - The Number assigned to this Area
b.Description - A brief, concise description of the Area.
c.Status - Will initially be None,then either Open or Closed
d.Last Update - Date of the last Opening or Closing in this Area
e.Actions - Special purpose Icons (see B. below).
B.Action - Offers an Edit (select to update existing Area records), and a Delete (select to remove this Area record) option
1.Edit - Tap or Click ![]() to open the Area page
to open the Area page
2.Trash - Tap or Click ![]() to remove this Area entry.
to remove this Area entry.
C.+ Add New - Tap or Click this button to open the Areas entry page.
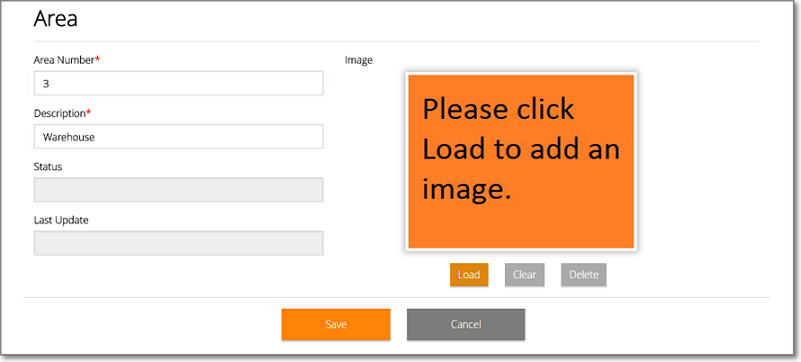
Web Dealer Access - Subscriber Information - Panels tab - Add Areas page
❑Defining an Area:
•Tap or Click on the + Add New button to open the Areas entry page.
•Area Number - Enter the area number (i.e., Partition code) that will be transmitted with the Opening/Closing supervised Event Signal.
•Description - Enter a concise description of this system's Area (i.e., Partition).
•Status - Initially set at None until the first valid Opening/Closing signal is received, then automatically updated each time a supervised Event is reported.
•Last Update - The most recent date and time is automatically updated to either Open or Closed each time a supervised Event is reported from this Area.
•Loading an Image of this Area:
a.Load - Use this option to locate and select the appropriate image file using the standard Windows® Open dialog
b.Clear - Use this option to remove the selected image file from the Image box
c.Delete - Use this option to delete the selected image file from the database
•Save - Tap or Click the Save option to record this information.
✓A confirmation message will be displayed when the changes have successfully been posted to the database.
✓Tap or Click the OK button to continue.