❑The Subscriber Information page has three (3) tabs one of which is the Panels tab
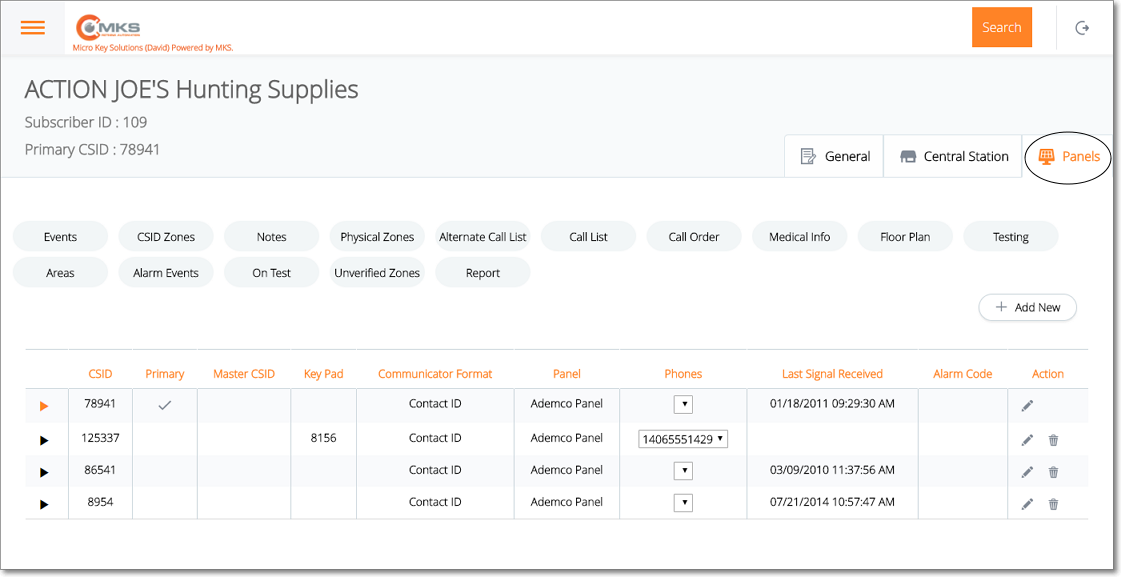
Web Dealer Access - Subscriber Information - Panels tab
•The Panels tab contains the list of CSIDs which are being monitored for this Subscriber; and (among other options) has an Events option.
✓Select the CSID from the list on the Panels tab which has the Open Close Events that are to be viewed, added to, modified and/or deleted.
✓Tap or Click on the Events option to display the Open Close Events page for that CSID.
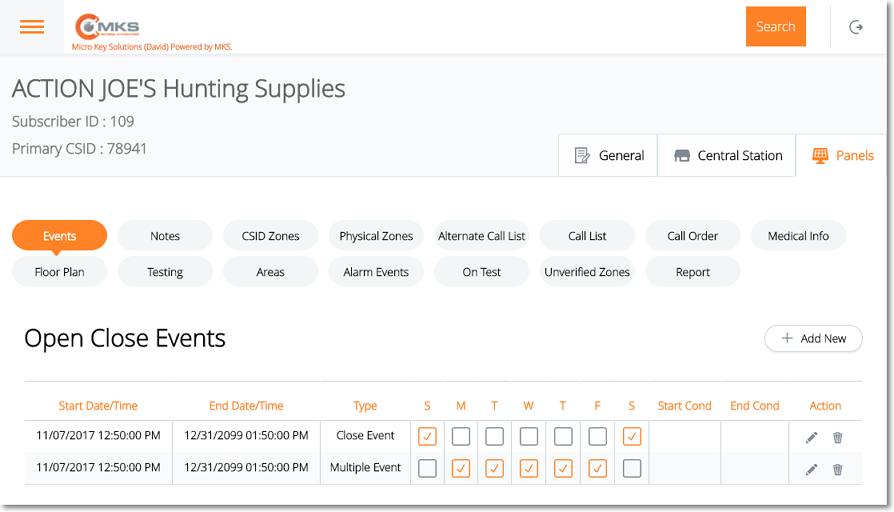
Web Dealer Access - Subscriber Information - Panels tab - Events page
✓Once you have finished using the Open Close Events page, Tap or Click on the Panels tab to return to it.
❑Understanding and Using the Open Close Events page:
•This Open Close Events page provides three features:
A.List - A List of all previously defined Open Close Events
B.Actions - Ability to Edit or Delete a previously defined Open Close Event
C.Add New - Ability to Add a new Open Close Event
A.List of Open Close Events has several columns
1.Start Date/Time - The initial starting date and time defined for the Event
2.End Date/Time - The final ending date and time defined for the Event
3.Type - The Type of Event (i.e., Open, Close, Multiple, Holiday)
4.Days of the Week - The Day(s) of the week when this Event is to be supervised
5.Start Cond(ition) - Optional Starting Condition Code
6.End Cond(ition) - Optional Ending Condition Code
7.Action - Special purpose Icons (see B. below).
B.Action - Offers an Edit (select to update existing Event information), and Delete (select to remove this Event) option
1.Edit - Tap or Click ![]() to edit the Event page
to edit the Event page
2.Trash - Tap or Click ![]() to remove this Event entry.
to remove this Event entry.
C.+ Add New - Tap or Click this button to open the Event entry page.
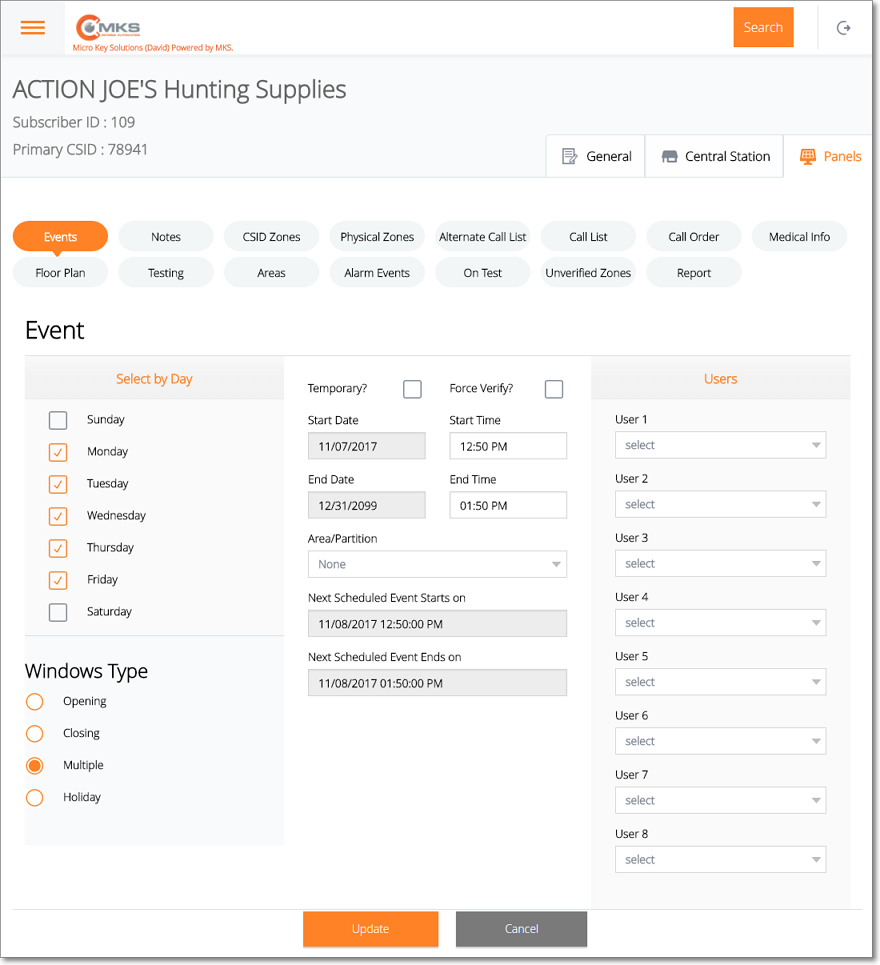
Web Dealer Access - Subscriber Information - Panels tab - new Event entry page
✓Select by Day - By default all Weekdays will be Checked.
▪Add or remove Check Marks as appropriate to identify the Days on which this Event should be Supervised..
✓Windows Type - Select the Type of Event being defined.
▪Opening - The default selection - This is an Event record that will supervise an Opening at the Premises.
oOne (1) minute after the End Time, if this Opening Event Signal has not been received, the system will generate a FO* Signal with a Failed To Open Condition Code.
▪Closing - This is an Event record that will supervise a Closing at the Premises.
oOne (1) minute after the End Time , if this Closing Event Signal has not been received, the system will generate a FC* Signal with a Failed To Close Condition Code.
▪Multiple - This is an Event record that will supervise a Premises that may have multiple Openings and Closings occur within the specified time frame.
oAn Opening Signal and/or a Closing Signal is not required, but is permitted at any time within the Start and End Times for this type of Event.
oAny number of Opening and Closing Signals may be received within the Start and End Times, and all will be considered Valid Openings and/or Closings Signals.
oTo have the Closing time specifically Supervised, define that Closing Event separately (see the Closing instructions above).
▪Holiday - This is an Event record that will supervise a Holiday during which the Premises should remain Closed.
✓Temporary? - If this is a Temporary Event (i.e., one that will only be Supervised for a specific Date/Time period), Check this box and enter those Starting and Ending Dates and Times below.
✓Force Verify? - If a Verification call is required whenever an Opening Signal is received, Check this box.
✓Start Date - No entry is required unless the Temporary? box has been Checked.
✓Start Time - Enter the starting time for this Event (i.e., the earliest time this Open, Close, Multiple or Holiday Event may occur)
✓End Date - No entry is required unless the Temporary? box has been Checked.
✓End Time - Enter the ending time for this Event (i.e., the latest time this Open, Close, Multiple or Holiday Event may occur)
✓Area/Partition - If the Subscriber's Premises is divided into areas (i.e., partitions) and as such, an Area is being supervised individually, use the Drop-Down Selection Lists provided to identify that Area/Partition.
✓Next Scheduled Event Starts On - System maintained field.
✓Next Scheduled Event Ends On - System maintained field.
✓Users - Sometimes, to be considered valid, an Event signal must be received from a specifically identified User.
▪Use the Drop-Down Selection Lists provided to identify up to eight (8) Users who are permitted to transmit this Event Type.
oThe User Number transmitted by the control panel (which identifies the Employee who disarmed or armed the Alarm System) is entered in the Call List page on the Panels tab
oEntering a User Number actually limits which individuals may activate this Event (create a valid Open or Close Signal) to only those User Numbers identified here.
oIf all Users are permitted to initiate this Event, do not enter any User Numbers.
✓Save - Tap or Click the Save option to record any changes or updates to this information.
▪A confirmation message will be displayed when the changes have successfully been posted to the database.
▪Tap or Click the OK button to continue.