❑Action Icons - These Actions Icons provide special features for the Vendors Form
➢Note: The Add or Remove Buttons option - accessed by selecting the Down-Arrow at the top of the Subscribers, Prospect, and Vendor Forms - will allow the User to Customize the content of the Quick Access Tool Bar on those Forms.

Vendors Form - Actions Icons
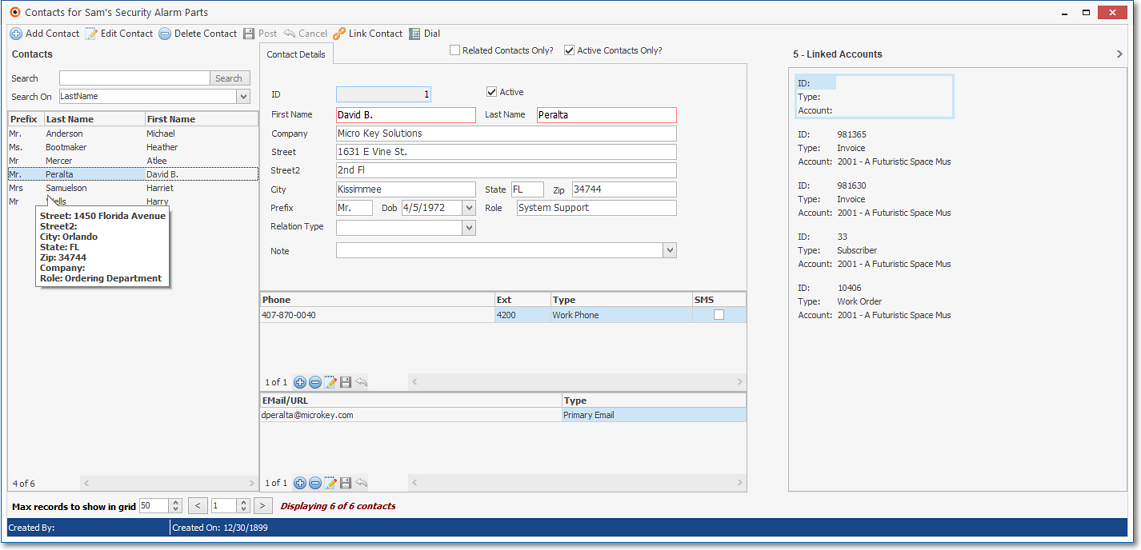
•Contacts - This option opens the Contacts Form.
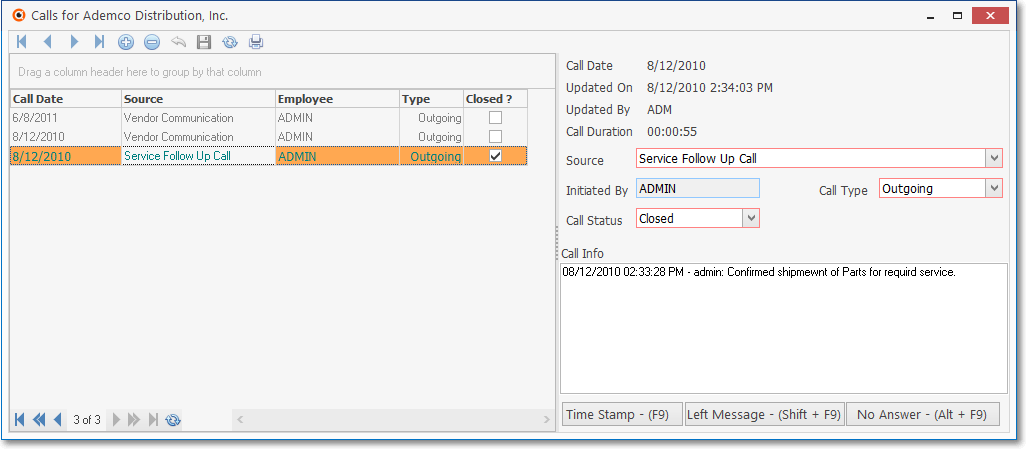
•Calls Icon - Click the Calls Icon to open the Calls dialog containing the Calls information for the selected Vendor.
![]()
❖See this Calls chapter for more information about how to use the features on this Calls Form.
•Dial Icon - Click Dial to dial the Primary telephone number for this Vendor via your modem.
✓The Dial Icon is available on the Subscribers, Prospects, Vendors and within the Monitoring module.
![]()
✓You must have a modem attached to your computer and a telephone line connected to the modem.
✓Your modem must be defined in your Personal User Options.
✓Be sure to Click Hang Up (which Replaces Dial during the Call) to release the modem from the line when the Call is completed.
•Label Icon - For users with the DYMO Label interface.
![]()
✓The Print Address Label dialog will be displayed.
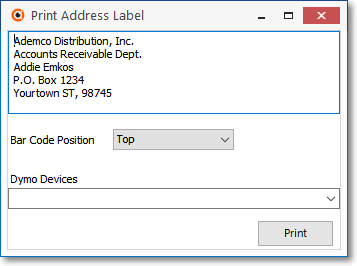
Print Address Label dialog
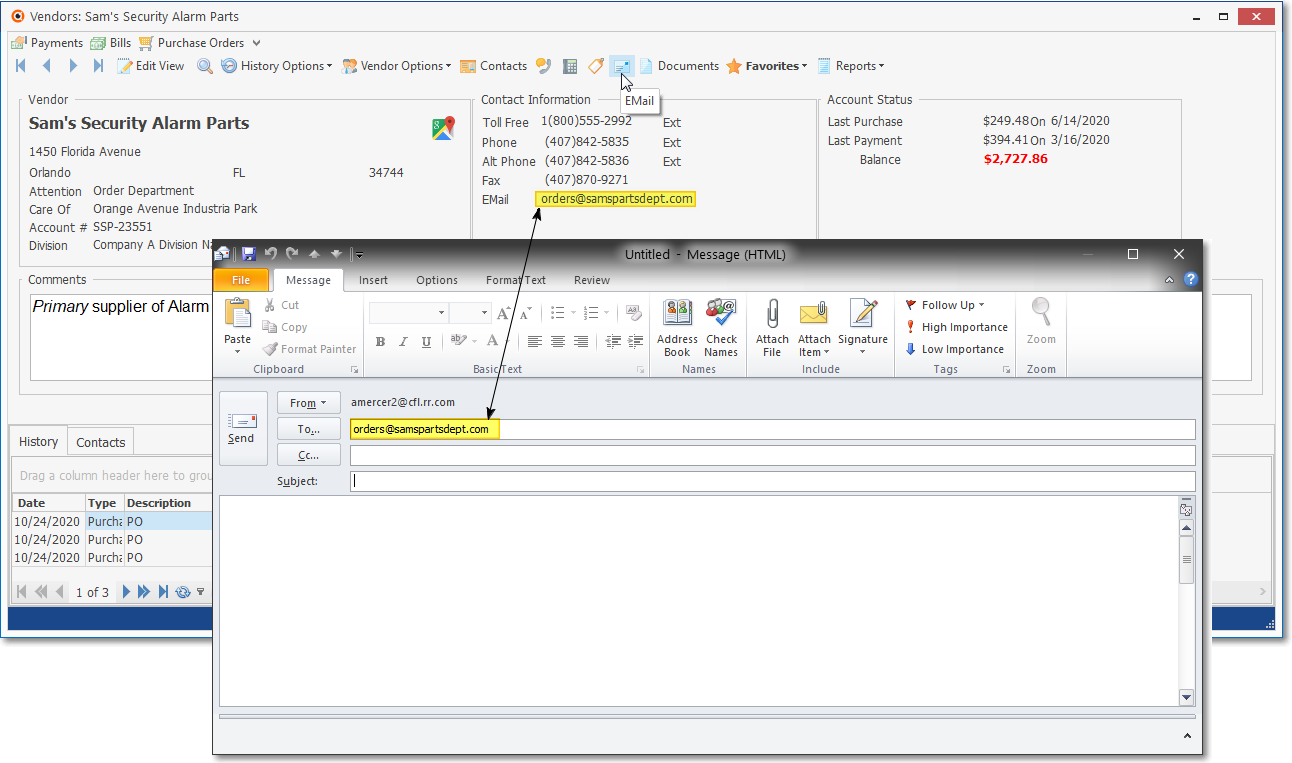
•EMail - Click the Email Icon to open the Email Dialog (e.g., using Outlook©, or whatever Email protocol is being used) to send an Email to this Vendor.
![]()
Actions - EMail Icon
✓The Email option will activate your Email utility (e.g., Outlook®, etc.) and - as illustrated below - inserts the Email Address(es) identified for this Vendor.
•Documents - The Documents Icon provides access to the Documents that were associated with the selected Vendor.
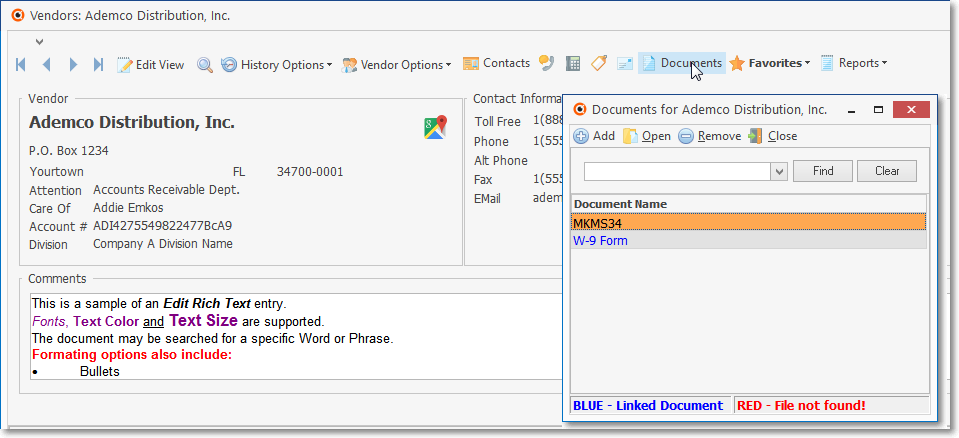
✓Click the Documents Icon to open the Documents dialog.
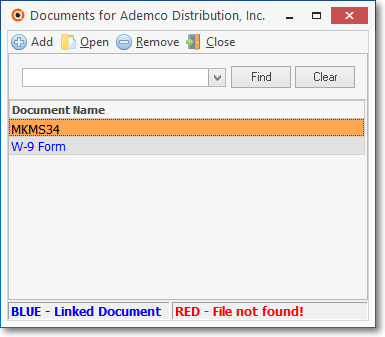
Documents Management dialog
✓Click the Documents Down-Arrow ‚ to display a list of those Documents that have been associated with the selected Vendor.
▪Click on any Document Title on the list to Open that Document.
✓For detailed information about using the Documents Form Click here.
•Favorites Icon - This Icon is used to create Favorites which may then be selected using the Favorites Icon's Drop-Down Selection List.
✓Click the Favorites Icon to assign favorites status (and insert this Vendor into the Favorites Drop-Down Selection List)
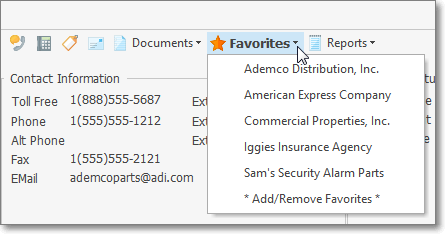
Actions Menu - Favorites Icon and List
▪Choose the *Add/Remove Favorites* option.
▪It will be added to your Favorites Drop-Down Selection List.
✓Once a Vendor (Prospect, Subscriber) has been added as a Favorite, you may immediately access that favorite Vendor record by Clicking the Down-Arrow ‚ and Selecting the desired Vendor.
•Reports Icon - The Reports Icon on the Vendors Form's Action Menu provides easy access to a variety of Vendor specific printed information.
✓All Reports are specifically populated for the current Vendor.
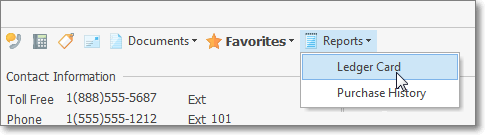
Actions Menu - Reports Icon - Menu options
✓See Vendors Form Reports Icon chapter for more information.