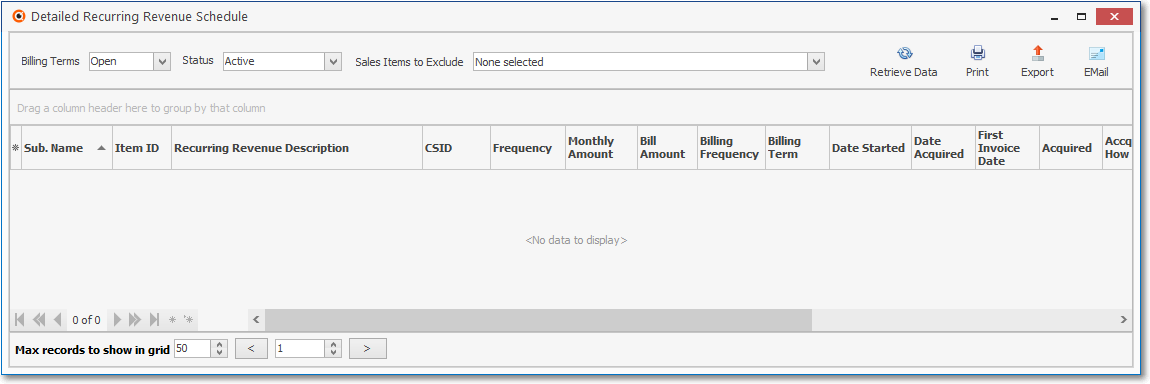
❑The Detailed Recurring Revenue Schedule report is presented as a fully functional data grid.
•It provides a List in the form of a Grid of the previously defined Recurring Revenue rules which:
✓Includes Open Term (the default), or Fixed Term, or Both Recurring Revenue types
✓Supports a Selection based on whether their Status is Active, Ended or Both
✓May Exclude specifically identified Recurring Revenue Sales Category Codes.
✓Because it is a fully functional data grid, the selected Detailed Recurring Revenue Schedule data may be:
▪Printed as a report,
▪Exported as an Excel® style Spreadsheet and/or
▪Emailed as a attached PDF document.
•There are two ways to access the Detailed Recurring Revenue Schedule dialog:
a)From the Backstage Menu System Select Reports and Choose Receivable Reports, or
b)From the Quick Access Menu, Select Reports and Choose Receivable Reports.
✓Then, Select the Detailed Recurring Revenue Schedule option.

Detailed Recurring Revenue Schedule report Grid
❑Setting Up the Detailed Recurring Revenue Schedule dialog's data grid Options:
•The Ribbon Menu provides these Options and Icons:
•Ribbon Menu Options to determine what Detailed Recurring Revenue Schedule records will be listed:
✓Billing Terms - By default this will be Open.
▪Use the Drop-Down Selection List provided to select Open, Fixed, or Both.
✓Status - By default this will be Active.
▪Use the Drop-Down Selection List provided to select Active, Ended, or Both.
✓Sale Items to Exclude - By default this will be None selected
▪Use the Drop-Down Selection Check List provided to exclude the from the list those Detailed Recurring Revenue Schedule records which have been Checked.
•Ribbon Menu Icons to load the selected data, and filter, sort, print, and/or export the Detailed Recurring Revenue Schedule records
✓Retrieve Data - Once you have determined the Detailed Recurring Revenue Schedule that are to be listed, Click the Retrieve Icon
✓Print - Once you have filtered, sorted, and selected the required Columns (see below) in the data grid, if needed Click the Print Icon
✓Export - Once you have filtered, sorted, and selected the required Columns (see below) in the data grid, if needed Click the Export Icon
✓EMail - Once you have filtered, sorted, and selected the required Columns (see below) in the data grid, if needed Click the EMail Icon

Detailed Recurring Revenue Schedule report Grid - with data
•Columns - Select which columns of data are to be displayed:

Available Columns
✓Click the asterisk (¬) at the left of the data grid's Header row (see the mouse pointer in the illustration above) to display a list of all of the column names - and associated data - which may be displayed.
✓By default, all Column Names will be Checked.
✓Remove the Check mark (Click on the Check to remove it) to hide that column of data from the data grid.
•Max records to show in grid - This option - which is located at the bottom of the ePay Review Grid is set to 50 by default.

✓Provided for those Companies with a large number of Subscribers
✓This setting allows a User to restrict the number of ePay records - that will be retrieved from the database at one time - to the Maximum number set here.
✓A pair of left and right arrow buttons provides movement from Grid page to Grid page.
✓The number of records (transactions) being displayed, and the total number of applicable records (transactions), is also shown.
•Sorting the List - Setting the Order in which the Detailed Recurring Revenue Schedule dialog's data grid is Listed within the Detailed Recurring Revenue Schedule Grid:
✓The default sorted order of the Detailed Recurring Revenue Schedule dialog's is based on the Subscriber Id (Subscriber's ID Number) - which is ordered from lowest to highest (1 - 9).
✓Thereafter, the column that determines the sorted order of the List may be easily changed, whenever needed.
•Filtering the List - This Detailed Recurring Revenue Schedule dialog's data grid may also be filtered, as needed to define/identify the data that is actually needed.
✓See the Grids & Lists and the Filter Builder Dialog chapters for more information about formatting and printing (and exporting) the ePay Review dialog's data grid
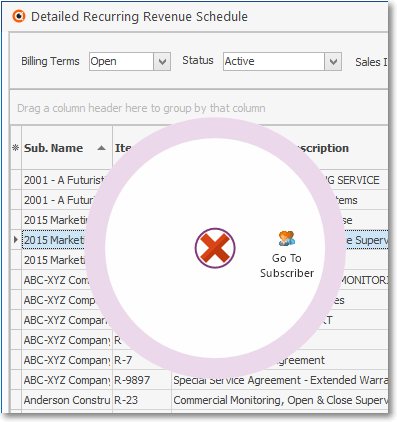
•Radial Menu Lookup options - Accessing the Subscriber Form for any listed Recurring Revenue line item.

Detailed Recurring Revenue Schedule - Radial Menu
✓Right-Click on any Recurring Revenue record to display its Radial Right-Click Menu
▪Select the Go To Subscriber option to open and view the associated Subscriber Form
•Print - Once you have:
a)Chosen which columns of data are to be included,
b)Set the order in which they are to be listed, related any columns (if appropriate),
c)Adjusted any column's width,
d)Then, you are ready to Print the resulting Detailed Recurring Revenue Schedule Report.
•Click the Print Icon at the top of the Form to display the Print Preview dialog.
✓The Print Preview dialog will be displayed exactly as the data grid was formatted.
✓It is easy to Close the Print Preview, make formatting adjustments (if needed), then Click the Print Icon again until you have the Detailed Recurring Revenue Schedule Report displayed in the Print Preview dialog exactly as needed.
•Export - Once the data has been formatted, filtered, sorted and configured as needed, Click the Export Icon to display the standard Windows® Save As dialog.
✓See the data grid chapter for more information.
•EMail - Once the data has been formatted, filtered, sorted and configured as needed, Click the EMail Icon to send this data as a PDF attachment to an Email address of your choosing.
❖See the Grids & Lists - Print Preview - Exporting Data chapter for much more information about sorting, filtering, formatting and printing (and exporting) the Detailed Recurring Revenue Schedule data grid.