❑The Contract Tracking System is designed to track each Contract's Length.
•If the Contract Tracking System has been activated (when the AssignInvoiceToContract option is set to True ["T"] in the Company Settings Form), when Converting a Proposal to an Invoice and/or a Generating an Invoice for a Service Request (Work Order), the Assign Contract Form will be displayed.
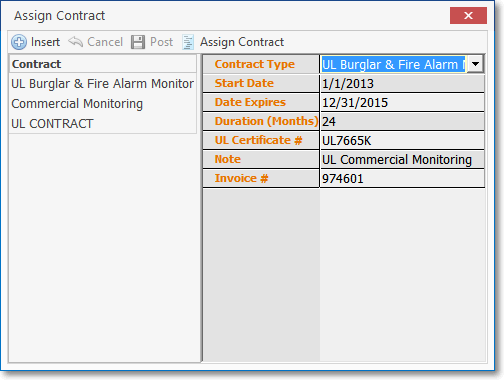
Assign Contract Form
•Understanding the Assign Contract Form
✓The left side of the Available Contracts section on the Assign Contract Form lists any existing Contract records (if any) that were previously defined for the current Subscriber.
✓Click on any existing Contract record and the right side of the Available Contracts section displays the information for that specific Contract.
✓The Navigation Bar at the top of the Assign Contract Form has four Icons:
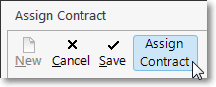
1.New - If there are no Contract records listed, or no existing Contract record provides the appropriate "match" for the Invoice being created, Click the New Icon to define the required Contract for this Subscriber (see the "Adding a Contract" section below).
2.Cancel - Click the Cancel Icon to Abort the Assign Contract process.
3.Save - Click the Save Icon to save a new entry (modifications to an existing Contract record must be made using the Contract Form).
4.Assign Contract - Select the appropriate Contract record, then Click the Assign Icon to assign the Invoice # being created to the Selected Contract.
❑Adding a Contract - When no (appropriate) Monitoring Contract record exists:
•Click the New Icon on the Assign Contract Form to define the required Monitoring Contract information.
New Entry added to the Assign Contract Form
✓Contract Type - Using the Drop-Down Selection List provided, Choose the Type of this Contract.
✓Start Date - Using the Drop-Down Calendar/Date Entry field provided, Choose the Starting Date of this Contract.
a)Click on the Date field and type the desired Date using a MM/DD/YYYY format; or
b)Use the Drop-Down Calendar/Date Entry field provided to Choose the desired Date
✓Date Expires - Using the Drop-Down Calendar/Date Entry field provided, Choose the Expiration Date of this Contract.
✓Duration (Months) - This number is calculated automatically and inserted in this field but may be modified, if required.
✓UL Certificate # - Enter the Certificate Number, if available.
✓Note - Add additional comment, if appropriate.
✓Invoice # - The Invoice Number will be inserted automatically.
•Click the Save Icon to save a new entry
➢Note: This new Contract information will automatically be inserted into the Contract Form.

Contract Form - with New Contract record added