|
|
Invoices - Understanding the Sales Entry FormThis Help File Page was last Modified on 10/07/2024 |


|
|
Invoices - Understanding the Sales Entry FormThis Help File Page was last Modified on 10/07/2024 |
 Scroll to Top of Page
 Print Topic
 Email Feedback
 Show/Hide Expanders
❑Sales to Subscribers must be entered as Invoices (to record and itemize those sales) within the Accounts Receivable System and then these Invoices must be Printed and mailed (or E-mailed) to those Subscribers.
•Invoices for recurring services (e.g., Monitoring, Extended Warranty, Leasing contracts) are created automatically when Recurring Revenue is Invoiced.
•But Invoices to Subscribers for initial installations, and other sales for routine service calls, parts sales, or any non-recurring charges must be individually created using the Invoice Form shown below.
✓The only exception to this is when a Prospect has a Proposal which, when accepted, may be converted automatically to an Invoice.
•Sometimes an Invoice must later be canceled, or a portion credited back to the Subscriber.
✓This process is called "Issuing a Credit Memo" and that process is almost identical to entering a Sale.
•Some Invoices - specifically Recurring Revenue Invoices - may be generated automatically by MKMS.
✓See the Fully Automated Recurring Billing and Auto Billing - Billing Recurring Revenue in Cycles chapters for that information.
❑Understanding the Invoice Form:
•Locate the Invoices option on the Receivables sub-menu of the Options Menu on the Subscribers Forms.
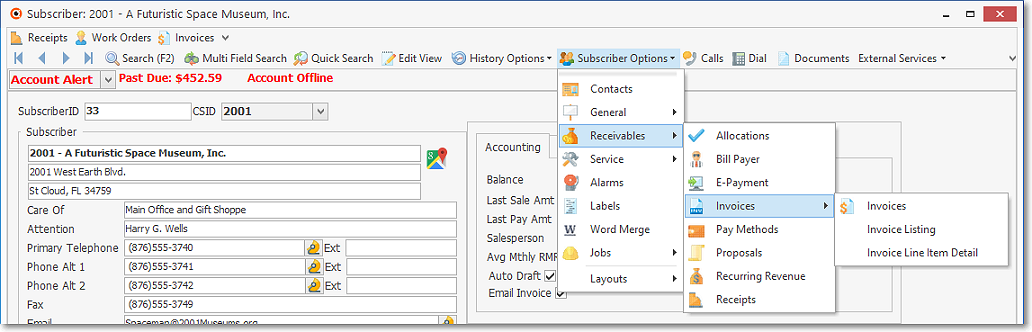
•Then, Select the Invoices option on that Invoices option's sub-menu.
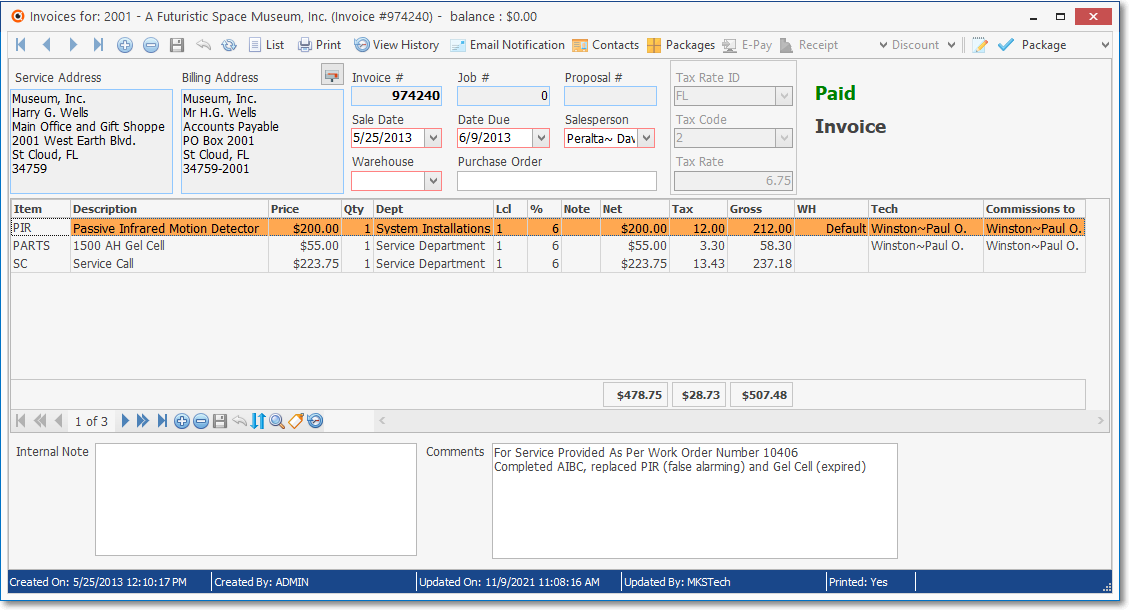
Invoice Form's Invoices Tab with three Detail Line Items - Note the List (Invoices) option on the Navigation Menu
•The Invoice Form (an example is shown above) uses a "many Sections within One" Format.
✓Ribbon Menu - The Invoice Form's Navigation, Actions, Commissions and/or Discount Ribbon Menu Sections - at the very top of the Invoice Form - display various Icons, but exactly which Icons will be displayed is based on the content and/or status of the currently displayed Invoice record.
![]()
Invoice Form - Navigation, Actions, Contacts, E-Pay, Receipt, Credit Invoice, Discount, Commissions & Package Sections - All Icons shown - but some of them may not be displayed, or may be deactivated, when not needed
✓Header Section - Below the Invoice Ribbon Menu Sections is the Invoice Header Section which includes:
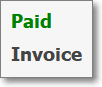
▪Invoice Title Bar (i.e., Invoice, Credit Note) and Payment Status information (e.g., Paid Invoice, Open, Past Due)
▪Subscriber Service and Billing Address, and other general Invoice information:

oThe Service Address and Billing Address information
oThe system maintained Invoice Number, the Job #, and Proposal Number fields (the last two are only populated when appropriate)
oThe Sale Date, Due Date, and Salesman fields
oThe Warehouse (see ØNote #1 below) and Purchase Order (if defined)
oThe Sales Tax Information box (see ØNote #2 below)
oThe Recurring Revenue Information box (see ØNote #3 below)
➢Note #1: The Divisions Form allows a Company to identify a Default Warehouse for that Division
Thereafter, when Invoices, and/or Work Orders are created for a Subscriber who was assigned to a Division (a Division assignment to a Subscriber is optional), by default, any Inventory related Transaction posted to one of those Invoice, and/or Work Order documents will automatically be assigned to that Warehouse but that Default Warehouse assignment may be changed as needed.
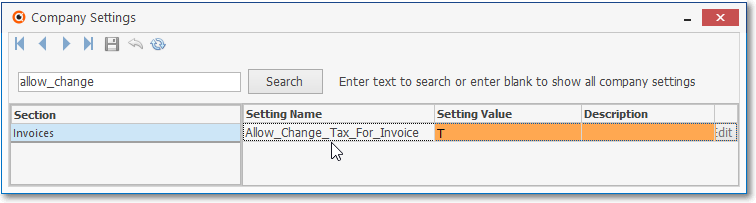
➢Note #2: The Tax Rate ID field in the Sales Tax Information box may be editable if:
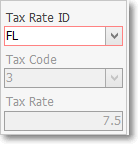
Sales Tax Information
i.A Receipt has not been Allocated to the Invoice and
ii.The Allow_Change_Tax_For_Invoice option in Company Settings to True ("T")
iii.If the Sales Tax ID is changed, a Confirm message is displayed:

iv.Answer Yes to implement the Sales tax ID change
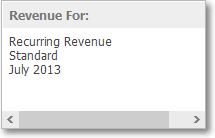
➢Note #3: If this is an automatically billed Recurring Revenue Invoice, a special message will be displayed on the right side of the Header Section identifying the Invoice as a Recurring Revenue Invoice, and will show the Recurring Billing Cycle in which this Invoice was created, as well as the starting Month and Year for which this Recurring Service was billed.
✓Body - The center of the Invoice Form beneath the Header Section may have any number of Sale Items as needed (a sample of which is shown below) to itemize exactly what was sold (such as Parts, Labor, a Trip Charge, etc.) and these are referred to as the Invoice's Detail Line Items and various Column Totals (which are technically part of the Footer Selection explained later)
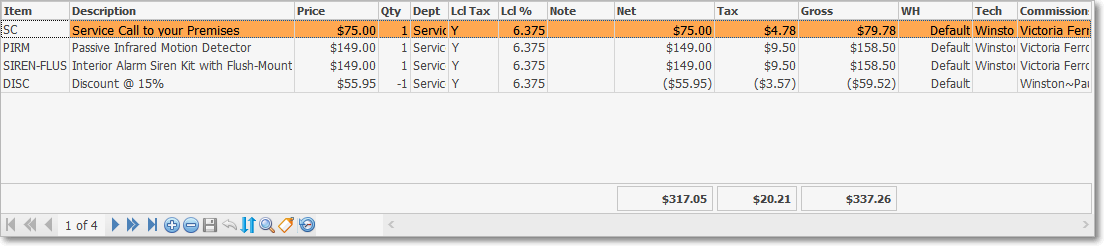
Invoice Form - Detail Line Items with Totals
✓Footer - The bottom of the Invoice Form - referred to as the Invoice Footer - shows various Column Totals and provides a Comments and Internal Note field, and the Status line (each are explained within the Invoice Footer section of the Creating an Invoice chapter).
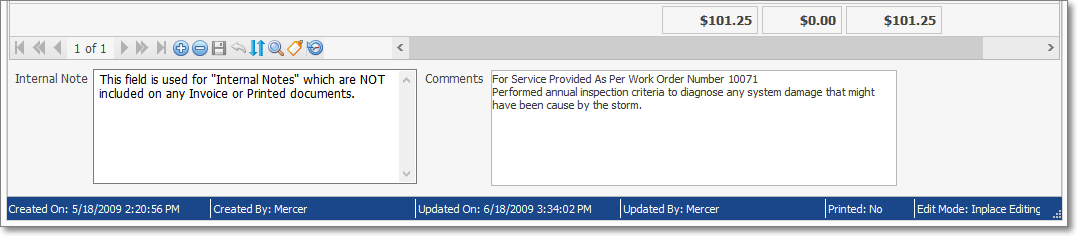
Invoice Form - Invoice Footer with Totals
➢Note: Regardless of what Section of the Invoice Form is being viewed:
Items boxed in Teal are inserted and/or calculated automatically by the system and cannot be changed by the user.
Items boxed in Red must be entered before the Invoice and/or Detail Line Items will be accepted.
![]()
•List Icon - Click the List Icon to display a Grid of the previously created Invoices for this Subscriber and any Receipts (Payments) that were Allocated to this Invoice
![]()
Navigation Menu shown with the List Icon
✓Click the List Icon again to Close the List View and return to the Record Editing View.
❖See the Grids - Print Preview - Export Data chapter for complete information on using the List View, including its Export & Print options.
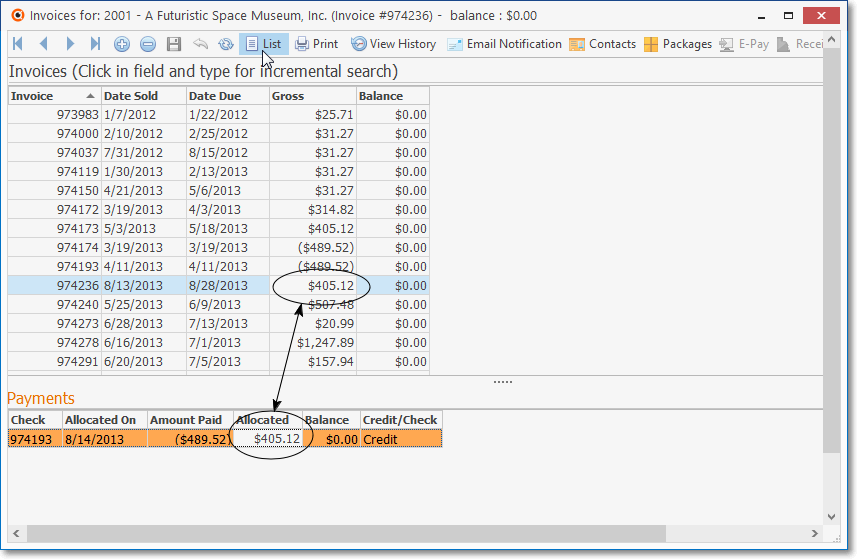
✓The Invoices are initially listed in Invoice Number order (from the oldest to the newest) and the Payments associated with any Selected Invoice are shown below (see the two-ended arrow in the illustration above).
✓Sorting the Prior Invoices List - Click a column's Header Name to change the sorted order to that column, with the sorted order automatically set from lowest to highest (a-z or 1 - 9).
▪To change this newly selected column's sorted order from highest to lowest, Click that column's Header Name again.
▪An Arrow next to the Header Name indicates the column that is determining the sorted order of the Grid Data.
o~ indicates lowest to highest (a-z or 1 - 9)
o€ indicates highest to lowest (z-a or 9-1).
✓Payments - The List Icon also shows a tabular (spreadsheet style) list of all Receipts and Credits (see above) which have been Applied (see the Allocating Receipts chapter) to the currently selected Invoice.
•Locating a specific Invoice record when:
![]()
✓At the top of the List is a simple message representing a powerful functionality:
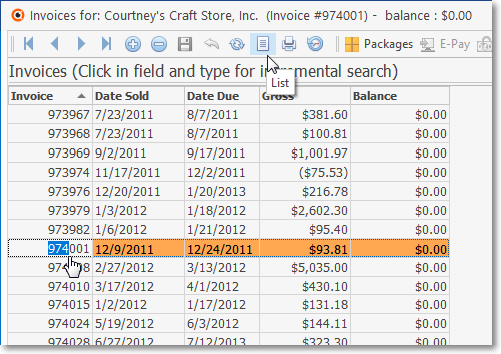
✓Click within any field by which you want to perform this search to perform an incremental search.
✓Type the characters that best identified that field's data as it exists for the desired Invoice. If search for:
▪This is a left to right incremental search process meaning that the entry is compared to the data in the selected column from left to right
a)a Dollar Value: enter the Dollar sign ("$"), then the fist number of the Value you are looking for.
b)an Invoice Number, just starting entering that number
c)a Date, enter the month number than a slash, then the day, then a slash, then the year, as needed.
✓Select the highlighted record by Clicking the List Icon to return to the Record Editing View.
❑Creating an Invoice: See the Creating an Invoice chapter for complete information.
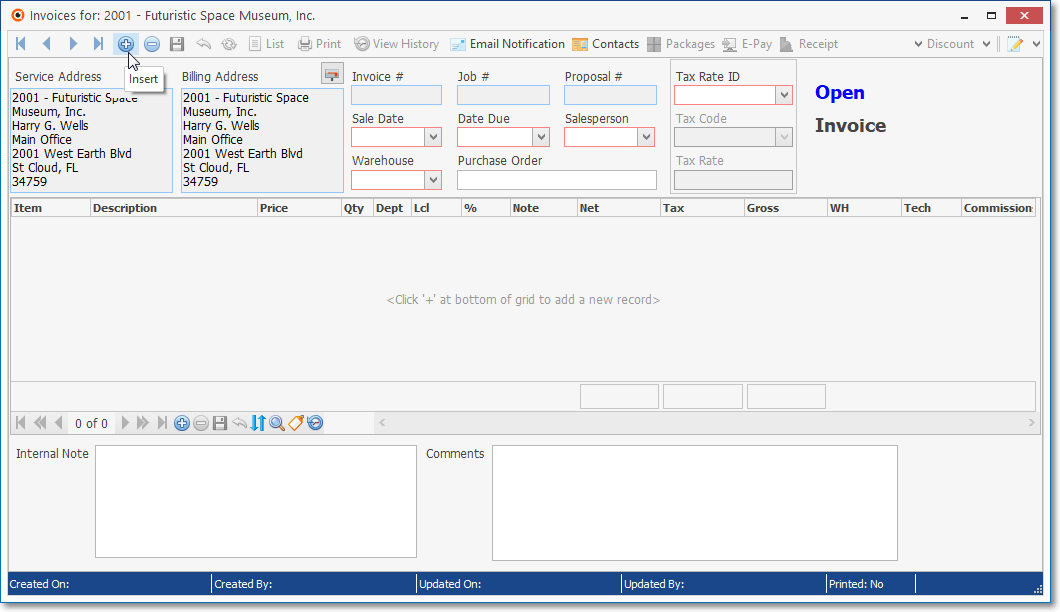
Invoice Form - New Entry defaults
❑Navigation Icons on the Invoices Form's top Ribbon Menu:
![]()
Invoice Form - Navigation Section
•See the Navigation Menu chapter for complete information about these Icons.
❑Action Icons on the Invoices Form's Ribbon Menu:
❖Not all Icons appear on all Invoice Forms.
✓Certain Icons will only appear when appropriate based on the content and/or status of the currently Selected Invoice.
![]()
Invoice Form - Actions Section
•View History - Click the View History Icon to display the Accounting History dialog.

Invoice Form - Assign Task Icon
✓Authorized changes that were made to the currently selected Invoice are listed (newest to oldest) in the Accounting History dialog.
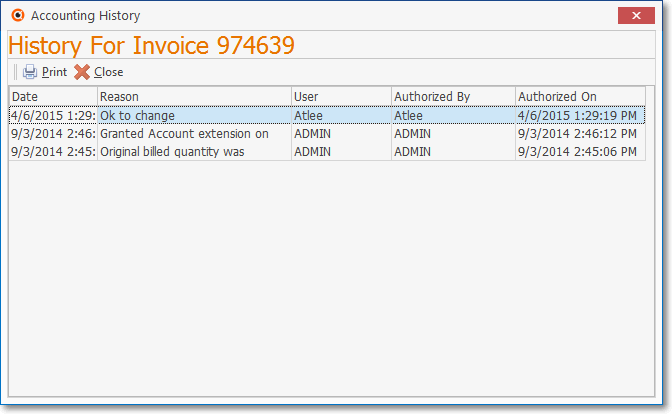
Invoice Form - View History option - Accounting History dialog
✓Contacts - Click this Contacts option to open the Contacts Form to identify anyone who should be associated with this Invoice.
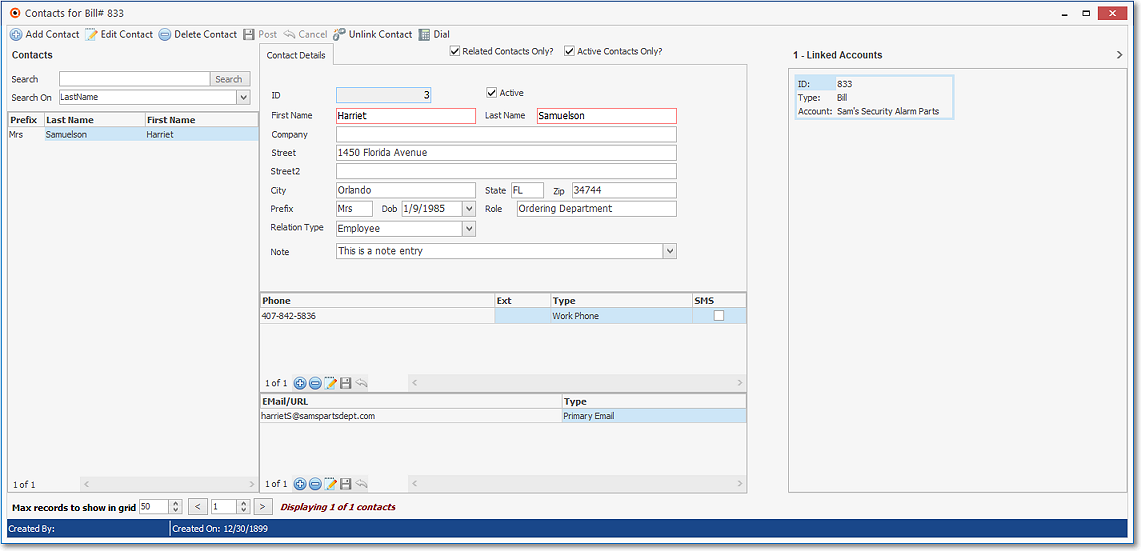
Contacts Form associated with a specific Document (e.g., Invoice, Bill, Work Order, etc.)
✓Print - Click the Print Icon to immediately send a list of these changes directly to the User's default workstation Printer.
✓Close - Click the Close box ![]() to return to the Invoice Form.
to return to the Invoice Form.
•Packages - Click the Packages Icon to add the components of a predefined Proposal Package to this Invoice.
![]()
Invoice Form - Ribbon Menu - Add Proposal Package Icon
✓If other Sale Items have already been added to this Invoice, a confirmation message box will be displayed.

▪Click the Yes button to Confirm this request.
✓In either case (a new or an existing Invoice), the Search Proposal Packages dialog will be displayed.
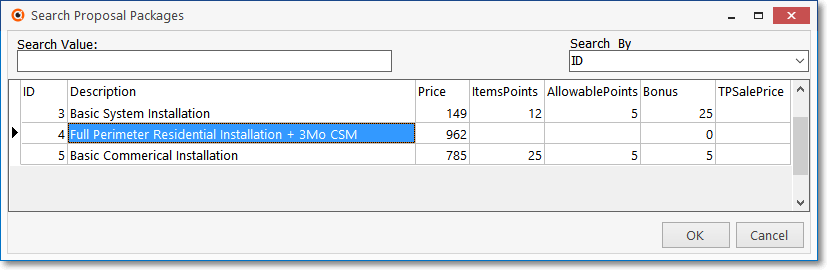
▪Select the required Proposal Package from the list presented in the Search Proposal Packages dialog and Click the OK button.
✓Add Proposal Package dialog - Once the Proposal Package has been Chosen, identify the Warehouse from which these Inventory Items will be taken, the Technician who will Install it, and whether Inventory Items in the Proposal Package should be inserted in the Subscriber's Installed Equipment table:
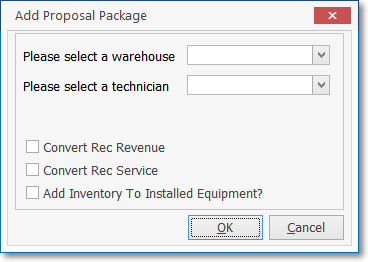
Add Proposal Package dialog
▪Please select a warehouse - Using the Drop-Down Selection List provided, Choose the Warehouse from which this Inventory was withdrawn.
▪Please select a technician - Using the Drop-Down Selection List provided, Choose the Technician who Installed these Inventory Items.
▪Convert Rec Revenue - Not used.
▪Convert Rec Service - Not used.
▪Add Inventory To Installed Equipment? - Check this box to have any Sale-Purchase Items identified as an Inventory Item added to this Subscriber's Installed Equipment table.
▪Click the OK button and all of the Sale-Purchase Items identified in this Proposal Package will be inserted in the Invoice as Detail Line Items.
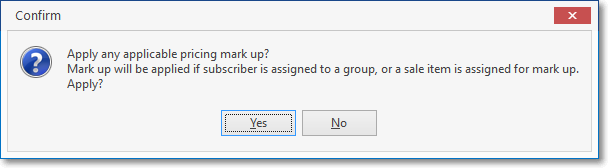
✓If Pricing Mark Up Groups have been defined, and one has been assigned to this Subscriber or to an item in the Selected Proposal Package, indicate whether or not this Pricing Structure should be applicable here.
•E-Pay - This Icon is used to open the E-Payments Form

Invoice Form - Request Electronic Payment Icon
✓On the E-Payments Form the User may Validate a Credit Card Payment (or Authorize an E Check) for the currently selected Invoice.
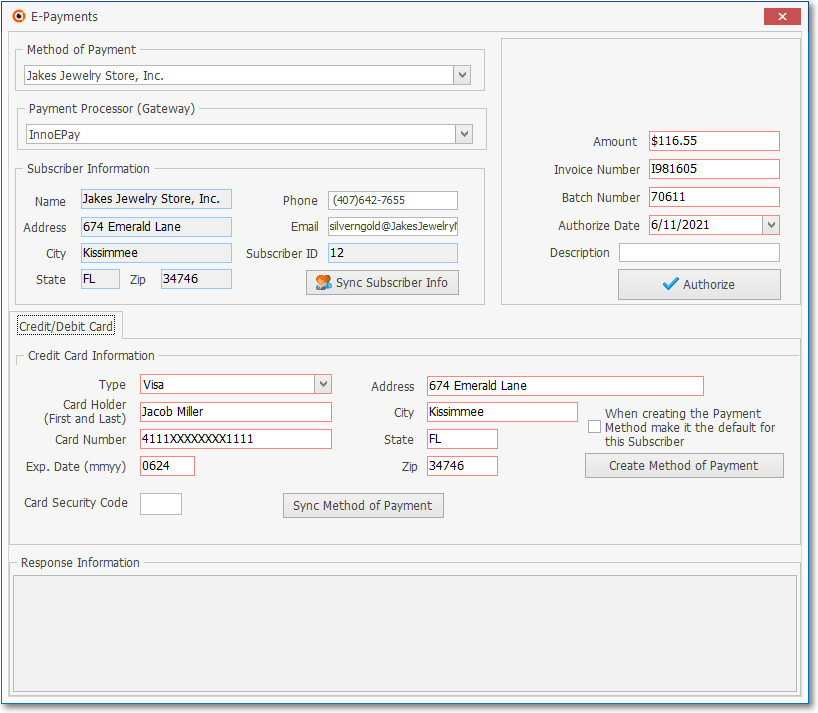
E-Payments Form - Default settings for Credit Card payment (plus Amount & Description) when opened from the Invoice Form
•Receipt - Click the Receipt Icon on the Invoice's Ribbon Menu to open the Create Receipt and Allocate dialog in which a payment from the Subscriber may easily be posted and allocated from one Form
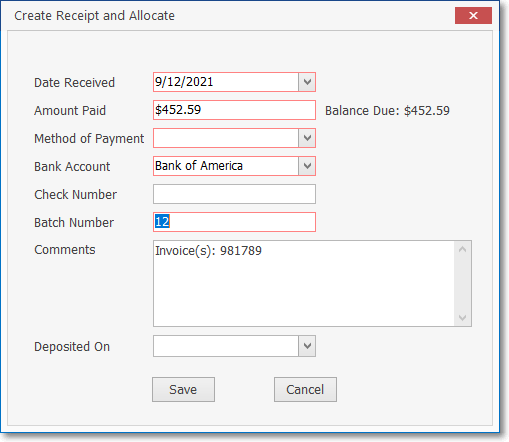
Create Receipt and Allocate dialog accessed using the Invoice's Receipt option
•Credit Invoice - Click the Credit Invoice Icon to create a Credit Memo for the currently selected Invoice:

Invoice Form - Generate Credit Memo Icon
✓Use the List option to Locate the correct Invoice to be credited.
✓Click the List Icon to display the Invoice in the Invoices Form.
✓Click the Credit Invoice Icon in the Actions Section at the top of the Invoice Form.

✓Choose whether you want to have the Invoice Form Auto Generate the Credit Memo, or to Select the specific Items to be credited.
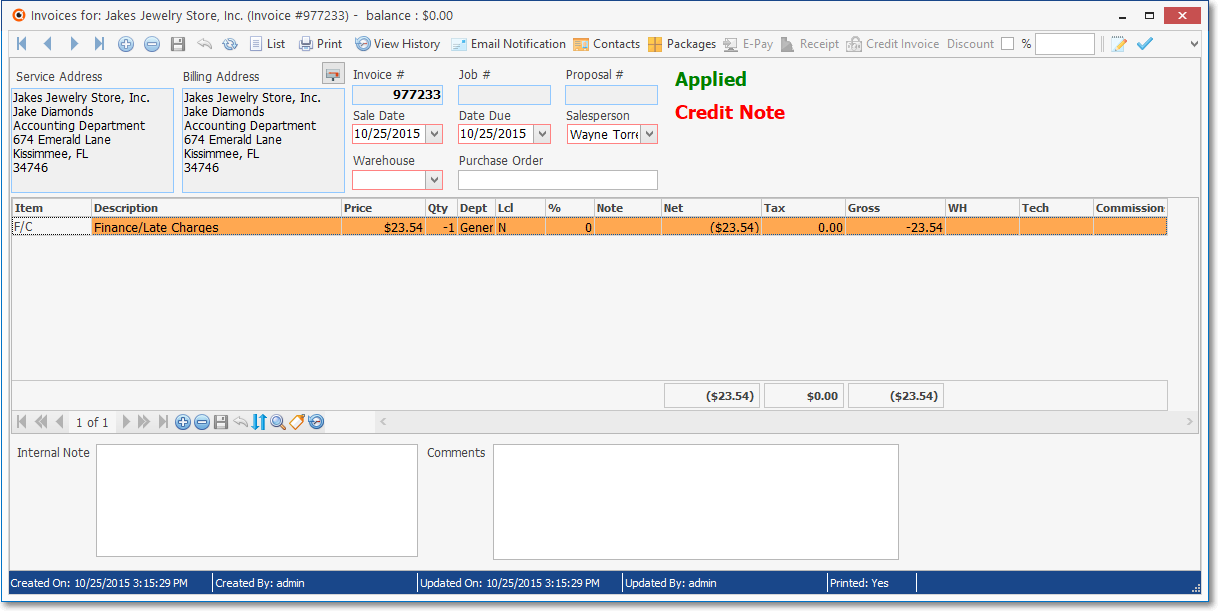
Automatically Generated Credit Note
✓See Credit Memos for additional information.
•Job Costing related Icons on the Invoice Form
✓Invoices created through Job Costing for a completed Job Task will include that Job Number in the Job # field.
✓When a Job Number is shown, two additional Icons are added to the Invoice Form's Actions Section (i.e., Go To Job, Assign Tasks).

Invoice Form - Invoice created from Job Costing module - Go To Job Icon
1.Go To Job - Click the Go To Job button to open the Job Costing Form for the designated Job #.

Job Costing record displayed by using the Go To Job button
2.Assign Task - Click the Assign Tasks Icon to (re-)assign this Invoice to a (different) Service Type from among the Job Task(s) assigned in the Job Costing Form's Job Task tab.

Invoice Form - Invoice created from Job Costing module - Assign Task Icon
▪Use the Drop-Down Selection List provided to Choose the appropriate Service Type.
▪If another Invoice Detail Line Item is added to an Invoice with a Job # identified (because it was created Generated from within the Job Costing Form), the User will be prompted to enter a Job Task for that new item.

Invoice Form - Assign Job Task dialog
•Print - Click the Print Icon to print a copy of the current Invoice.
✓The Invoice Print Options dialog will be displayed.

Invoice Print Options
✓See Printing the Invoice for detailed information on these Invoice Print Options.
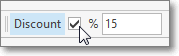
•Discounts - Discounting the Gross Amount of this Invoice from its total original price (whether for a Sales Promotion or some other customer compensation situation):
✓The Discount function - which may require the appropriate Authorization - allows you to apply either a specific "percentage off" Value, or a specific "dollar off" Amount, both of which will be calculated by the Invoice Form and inserted as a separate Detail Line item.

Invoice Form - Discount Section - Check Box
✓To provide a Discount based on a specific Dollar Value, after the Invoice has already been completed and saved:
▪Enter that Dollar Value in the Discount field
▪Do Not Check the % box.
▪Press the Tab F key
![]()
Dollar Value Discount entry
▪Click the Discount option.
▪Click the ![]() Icon to record this Discount entry.
Icon to record this Discount entry.

Invoice Form - Detail Line Item showing Dollar Value Discount
▪This action will automatically adjust all of the Invoice Net, Tax, and Gross Totals.
✓To provide a Discount based on a specific Dollar Value, after the Invoice has already been completed and saved:
▪Check the Discount Box:
▪Enter the desired Discount Percentage of Discount.
▪Press the Tab F key
▪Click the Discount option.
▪Click the ![]() Icon to record this Discount entry.
Icon to record this Discount entry.
▪This action will automatically adjust all of the Invoice Net and Gross Totals.
❖About Sales Tax and Department entries - Updates to the Discount Detail Line Item may be required:
▪Sales Tax - In some States and/or Countries, Sales Tax may not be credited as part of the Discount, but in others it is allowed.
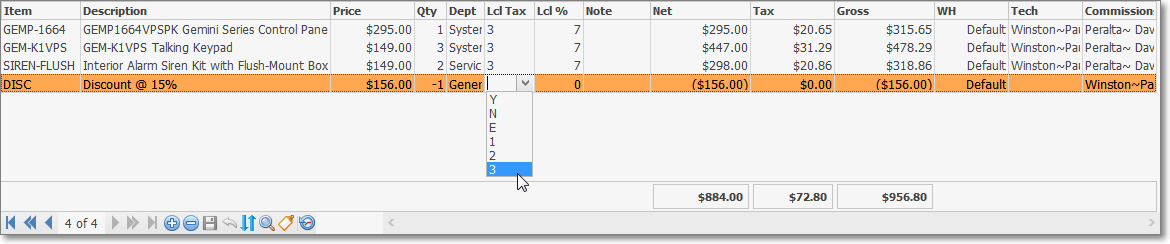
Invoice Form - Discount Detail Line Item - Lcl Tax field
a)If the Sales Tax cannot be credited as part of the Discount, and Sales Tax has been charged on other items, Click the Local Tax - Code column and, using the Drop-Down Selection List provided, Select "N" (No).
b)If the Sales Tax may be credited as part of the Discount, and Sales Tax has been charged on other items, Click the Local Tax - Code column and, using the Drop-Down Selection List provided, Select the appropriate Sales Tax code and rate.
▪Department - If a Department was assigned to the original Detail Line Items (prior to providing a Discount), be sure to assign the appropriate Department to the Discounted Detail Line Item.
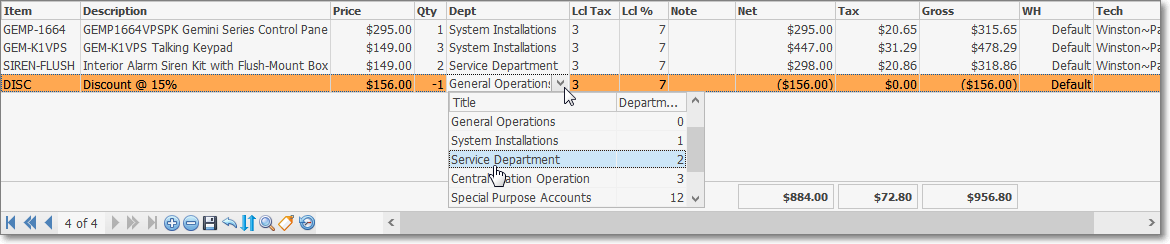
Invoice Form - Discount Detail Line Item - Department field
•Adjust Commission - When using the Commission Tracking System, sometimes a Commission Adjustment may be required.

Invoice Form - Adjust Commissions Icon
✓Click the Adjust Commissions Icon to display the Commission Adjustments Form.
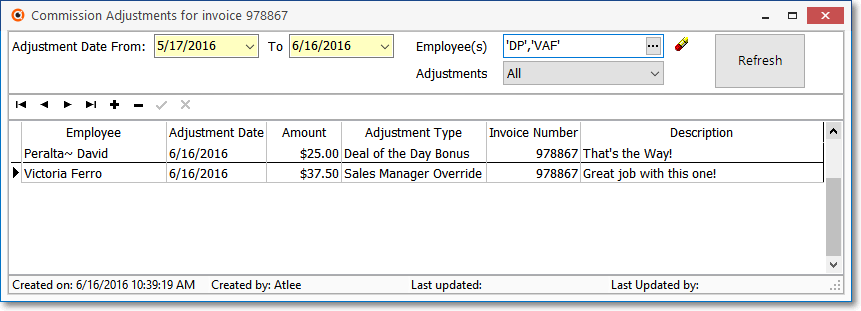
Commission Adjustment Form
•Approve Commissions - When using the Commission Tracking System, you may want to individually Approve Commissions for a specific Invoice.

Invoice Form - Approve Commissions Icon
✓Click the Approve Commissions Icon to display the Approve Commission Form.
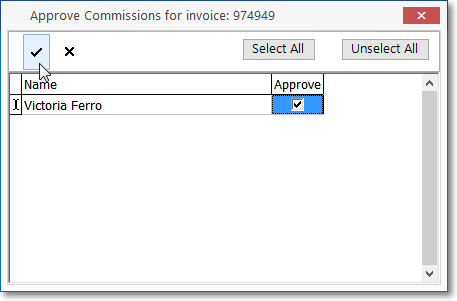
Approve Commission Form (Invoice)
▪Approve - Check the Approve Box(es) for those Sales Person's Commission's which are to be approved.
▪Save - Click the Save Icon to record this entry.
▪Close- Click the Close box ![]() to Close the Approve Commission Form.
to Close the Approve Commission Form.
▪See the Commission Approves chapter for more information
•View Package Info - When using the Commission Tracking System and a predefined Proposal Package has been inserted, the Commission Points associated with that Proposal Package may be displayed.
✓Click the Package Icon to view this Commissions related information.
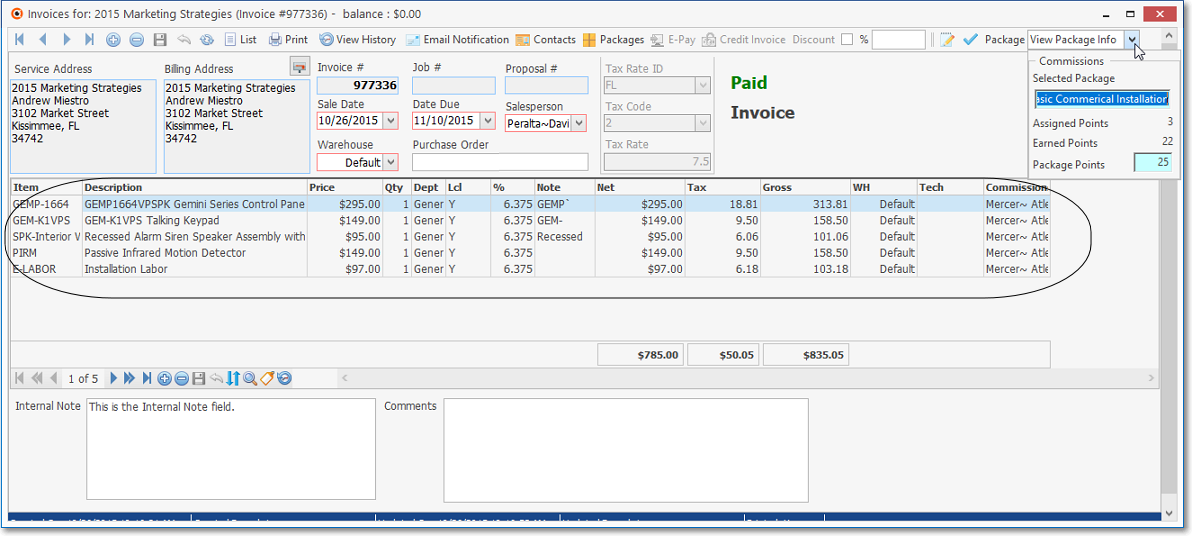
Invoice Form - View Proposal Package Icon - Commissions information box - Proposal Package Detail Line Items
•Deleting an Invoice.
✓Click the Delete Icon
✓If a Receipt has been Allocated to this Invoice you may not delete it (you must first Unallocate the Receipt).

Invoice has existing allocation(s)
✓If the Invoice has a Balance Due, you (or an Authorized person) must explain why this deletion is being requested.
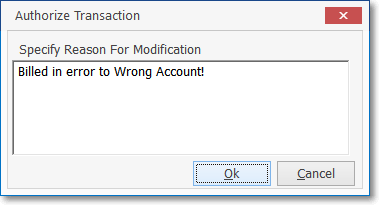
Authorize Transaction - a Deletion
✓Confirm that you do want to execute this Invoice Deletion.
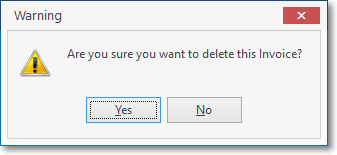
✓The Invoice will be removed.
✓For General Ledger Users, the Financial Transactions reversing the original Invoice will be posted to the same Date as the Original transaction was posted.