|
|
Recurring Revenue: Defining Automatic BillingThis Help File Page was last Modified on 03/02/2024 |


|
|
Recurring Revenue: Defining Automatic BillingThis Help File Page was last Modified on 03/02/2024 |
 Scroll to Top of Page
 Print Topic
 Email Feedback
 Show/Hide Expanders
❑Recurring Revenue can be the lifeblood of any Company, but particularly a Burglary Alarm Business.
•The ability to accurately and easily create Invoices for Recurring Revenue is a critical step toward the successful implementation of the Accounts Receivable module.
✓The flexibility of this Automatic Billing system will allow the automation of virtually any recurring billing requirement your Company may have.
✓This Recurring Revenue Form is where these recurring billing requirements are defined for each Subscriber.
❑Setting Up a new Recurring Revenue rule:
•Recurring Revenue rules may be added, updated or deleted at any time. To do so:
✓Click the ![]() Icon to start a Recurring Revenue entry in the Recurring Revenue Form
Icon to start a Recurring Revenue entry in the Recurring Revenue Form
✓The first step is to indicate whether this is:
a)an Open Term billing entry for ongoing services like a charge for Monitoring or Opening & Closing Services, or
b)an internally financed Fixed Term equipment sale, installation sale, or lease-purchase which, once it is paid off, will automatically cease to be billed.
✓Choose which type of Recurring Revenue entry this will be using the Drop-Down Selection List provided.
▪Open Term - See the Defining Open Term Recurring Billing chapter for complete information on Open Term billing.
▪Fixed Term - See the Defining Fixed Term Billing chapter for complete information on Fixed Term billing.
❑Using the Recurring Revenue Form:
•Press F3 to open a Subscribers Form.
•Press F2 Search on the Navigation section of the Subscribers Form to locate the appropriate Subscriber record,
•Open the Subscriber Options Menu on the Navigation section of the Subscribers Form, Select the Receivables sub-menu, then Choose the Recurring Revenue option.
✓The Recurring Revenue Form will be displayed.
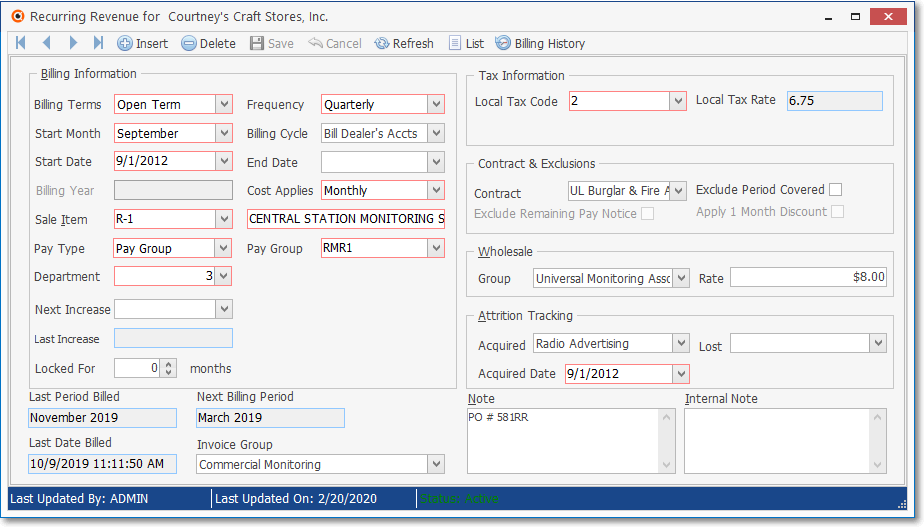
Recurring Revenue Form - Recurring Information Tab - Open Term entry
✓This Recurring Revenue Form may be Re-sized by Dragging the Top and/or Bottom up or down, and/or the Right side in or out.
✓Certain special fields are not visible unless the Slide-Bar on the left is Dragged Down to show them (See mouse pointer - specific instructions for those special fields are included later in this chapter).
•Ribbon Menu - The Ribbon Menu is located at the top of the Recurring Revenue Form.

Recurring Revenue Form - Navigation & Ribbon Menu Icons
✓This Menu provides Record Movement, New, Delete, Save, Cancel and Refresh options, plus the List and Billing History options.

Recurring Revenue Form - Navigation & Ribbon Menu - List Icon
•List Icon (see mouse pointer in illustration above) displays a Grid List of all Recurring Revenue records defined for this Subscriber.
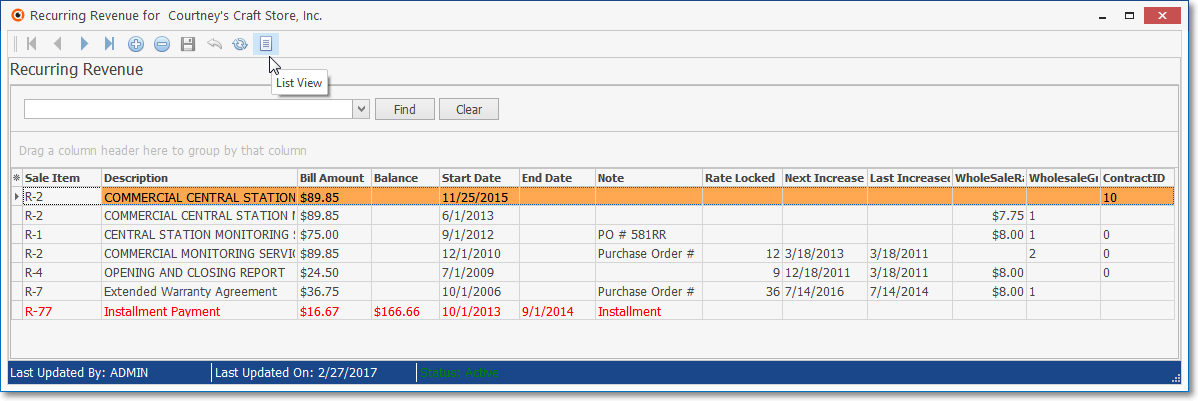
Recurring Revenue Form - List View
✓Click the List Icon to display the associated Grid Data.
Ø In the List View, Click the Asterisk at the left of the row of Header Names to display a Drop-Down Check List of each column's Headed Name.
▪Check any Header Name to be included in the List View (by default, initially all Header Names may be Checked)
▪Remove the Check for any Header Name (see illustration below) that is to be removed from the List View.

✓The columns of Grid Data may be rearranged, filtered, sorted, and exported as a PDF file and/or an Excel formatted file.

✓Find - Enter text to search for a specific record, then Click the Find option.
✓Clear - To remove the text to search for entry, Click the Clear option
▪Click the List Icon again to Close the List View and return to the Record Editing View.
Recurring Revenue Form - Navigation & Ribbon Menu - List Icon
✓To locate a specific Recurring Revenue record, open the List View and Select that Recurring Revenue line item.
✓Click the List Icon again to return to the Recurring Information Tab.
✓That Selected Recurring Revenue record will be displayed within the Recurring Information Tab.
❖See the Grids & Lists - Print Preview - Export Data chapter for complete information on using the List View, including its Export & Print options.

Recurring Revenue Form - Navigation & Ribbon Menu - Billing History Icon
•Recurring Revenue Billing History Icon - (see mouse pointer in illustration immediately above) displays a Grid List of all Recurring Revenue Billing records for this specific Recurring Billing item that were Invoiced to (and/or subsequently Deleted form) this Subscriber .
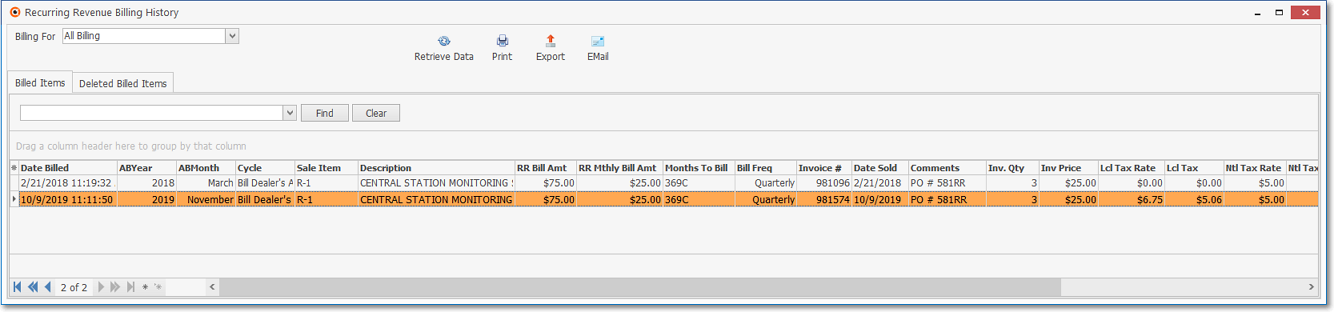
Recurring Revenue Billing History - Billed Items Grid - displaying all available columns
1.Billed Items tab - The Billed Items data is presented in a Grid format and therefore has all of the normal Grid features and functions such as Sorting, Relocating, and Filtering the data presented before it is Printed as a report, and/or Exported to a file.
a.Billing For - Using the Drop-Down Selection List provided, Choose the set of Recurring Revenue Billing History records to be included in the Grid.
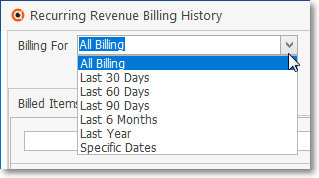
Recurring Revenue Billing History - Billing For options
b.Columns - Choose which columns of data are to be included,
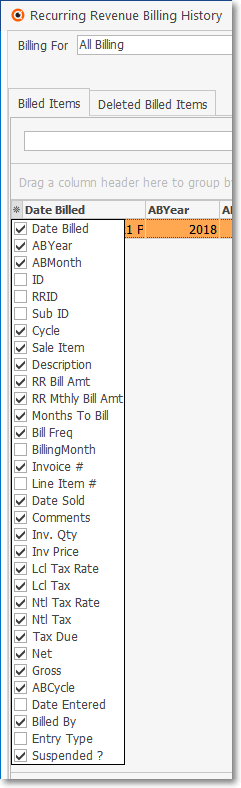
Recurring Revenue Billing History
Billed Items tab - available columns
c.Order - Set the order in which they are to be listed, related any columns (if appropriate), which by default is the Date Billed.
d.Format - Adjust any column's width, and create Groupings if needed for Print Preview formatting,
e.Output - Then, when ready, if required:
i.Print - Click the Print Icon at the top of the Form to display the Print Preview dialog.
ii.Export - Click the Export Icon to display Save as... Windows® dialog.
iii.Email - Click the Email Icon to send this data as a PDF attachment to an Email address of your choosing.
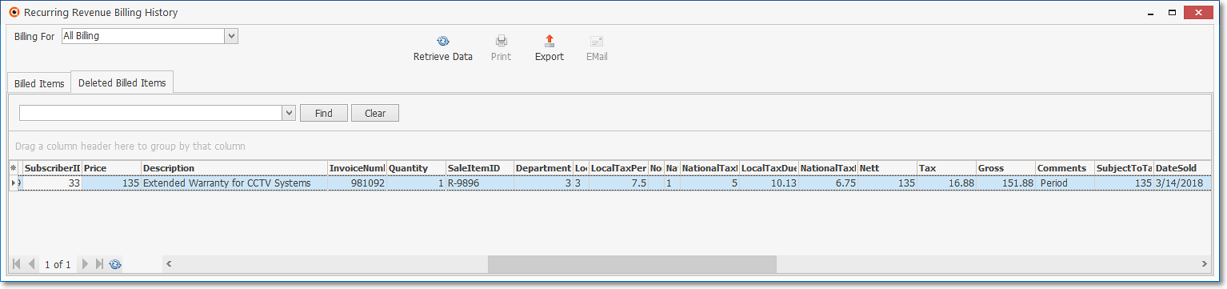
2.Deleted Billed Items tab - The Deleted Billed Items data is presented in a Grid format and lists those Recurring Revenue related records which have been deleted after creation.
a.Billing For - Using the Drop-Down Selection List provided, Choose the set of Deleted Billing Items records to be included in the Grid.
b.Columns - Choose which columns of data are to be included,
c.Order - Set the order in which they are to be listed, related any columns (if appropriate), which by default is the Date Deleted.
d.Format - Adjust any column's width, and create Groupings if needed for Export formatting,
e.Output - Then, if required:
i.Export - Click the Export Icon to display Save as... Windows® dialog.