❑Panel Connection Types may easily be assigned to groups or sets of Subscribers based on selectable common characteristics (i.e., all having the same type of Control Panel, same Town Code, same Receiver, same Account Type, are being monitored for the same Alarm Dealer, or reside within the same Zip Code) using this Panel Connection Maintenance Form.
•To Access the Panel Connection Maintenance Form within MKMS:
a)From the Backstage Menu System Select Maintenance and Choose the Monitoring option, then select the Panel Connection Maintenance option, or
b)From the Quick Access Menu, Select Maintenance and Choose the Monitoring option, then select the Panel Connection Maintenance option
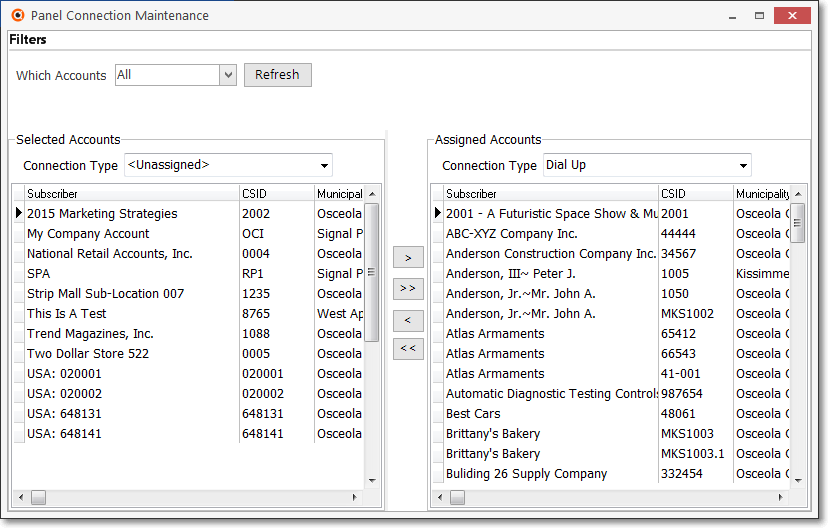
Panel Connections Maintenance Form
❑Understanding the Panel Connection Maintenance Form:
➢Note #1: For definition purposes, think of each Account as an individual CSID which has been assigned to a Subscriber within the Subscriber Panels section on the Monitoring Tab in the Edit View of the Subscribers Form.
A Subscriber may have any number of Accounts assigned.
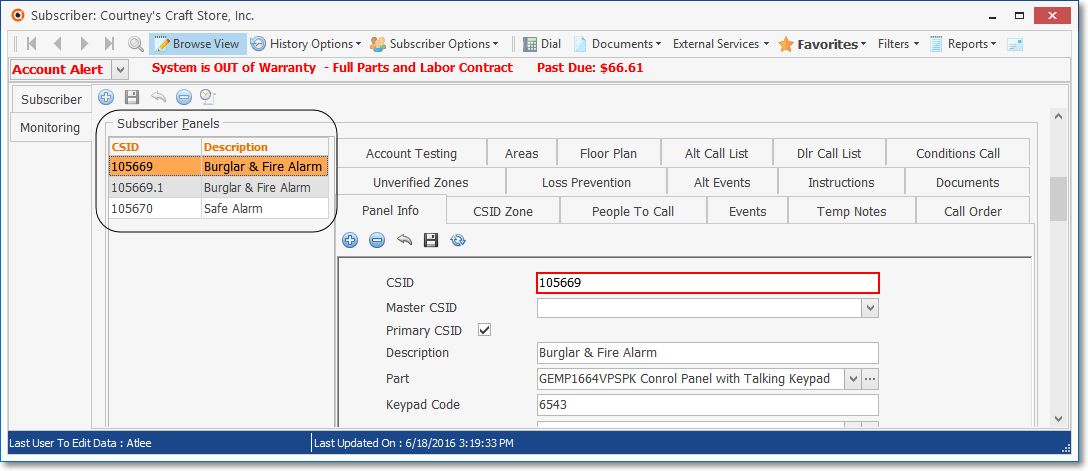
Subscribers Form - Edit View - Monitoring Tab - Multiple Accounts
➢Note #2: The width of this Panel Connection Maintenance Form may be expanded by Dragging the central vertical bar - see the hand pointer below - to the right, and/or by Dragging the right border to the right - see the mouse pointer below.
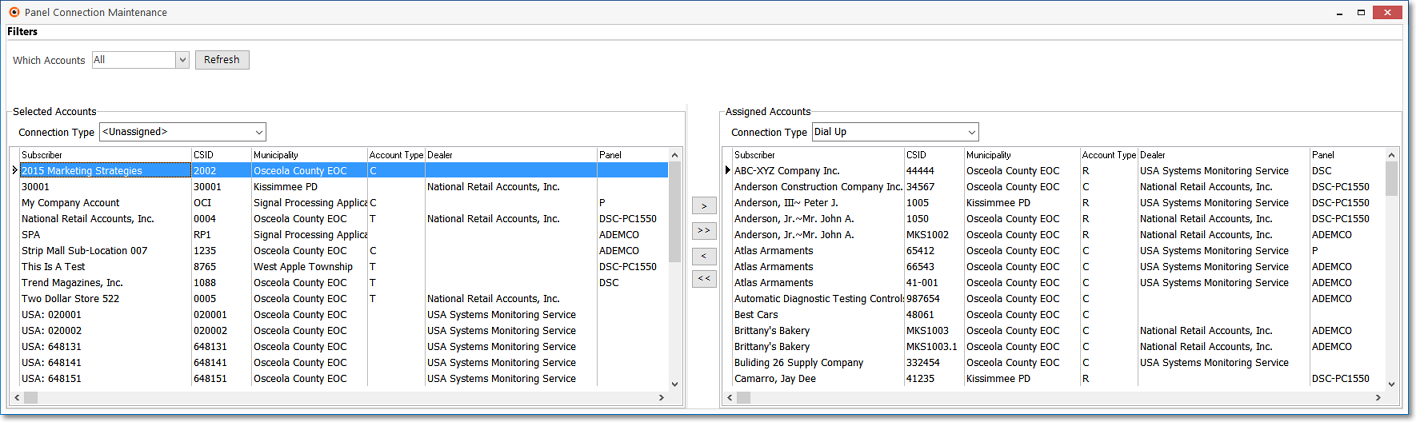
Panel Connections Maintenance Form - Expanded
•Using this Panel Connection Maintenance Form, there are two ways to Choose Which Accounts will be listed in the Selected Accounts section and therefore be the set of Accounts that can then be assigned a Panel Connection Type (by moving one, or more, or all of those Accounts to the Assigned Accounts section):
a.Make all Accounts available for assignment to a Panel Connection Type.
b.Limit (filter) the Accounts that will be listed in the Selected Accounts section - and therefore be available for assignment to a Panel Connection Type by being one of that selected Group of Accounts (e.g., by being an Account that matches a specific qualification such as all having the same Town Code, residing in the same Zip Code, or being monitored for the same Alarm Dealer).
1.Once you have identified Which Accounts will be available for assignment, Choose which of those Accounts that will actually be listed as the Selected Accounts for (re-)assignment.
a.Assign <Unassigned> Accounts a Panel Connection Type for the first time (i.e., no Connection Type is defined in the Subscriber Panels section on the Monitoring Tab in the Edit View of the Subscribers Form, or
b.Reassign Accounts which already have a Panel Connection Type assignment (i.e., they have a Connection Type already defined in the Subscriber Panels section, but that assignment needs to be changed).
2.Connection Type - Then, Choose the Connection Type of the Accounts that are to be displayed in the Assigned Accounts section by selecting that Panel Connection Type.
3.Finally, Select and Move one or more of the Accounts displayed in the Selected Accounts section to the Assigned Accounts section.
a.This will automatically insert the Selected Panel Connection Type into the Panel connection ID field in the Subscriber Panels section on the Monitoring Tab in the Edit View of the Subscribers Form.
❑Choosing the set of Accounts that are to be (re-)assigned a Panel Connection Type:
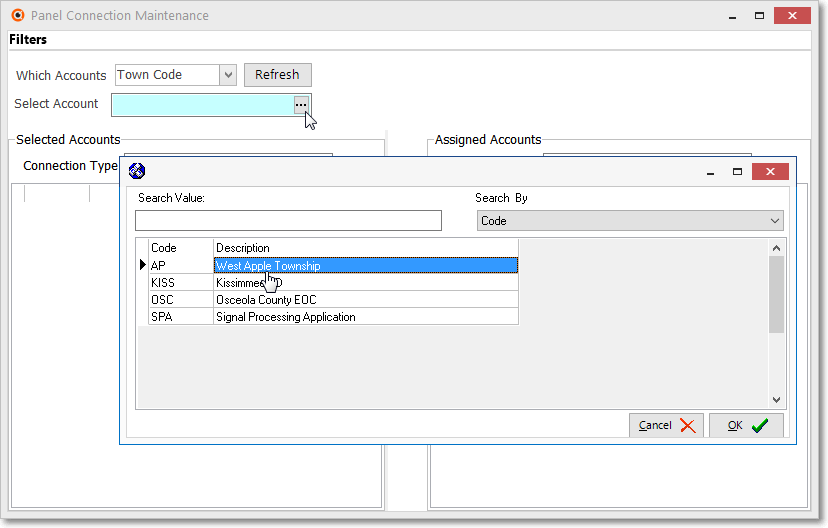
•Which Accounts? - Choose which Accounts ("CSIDs") are to be listed in the Selected Accounts section, based on the following criteria:
✓All - By default, all Accounts will be listed.
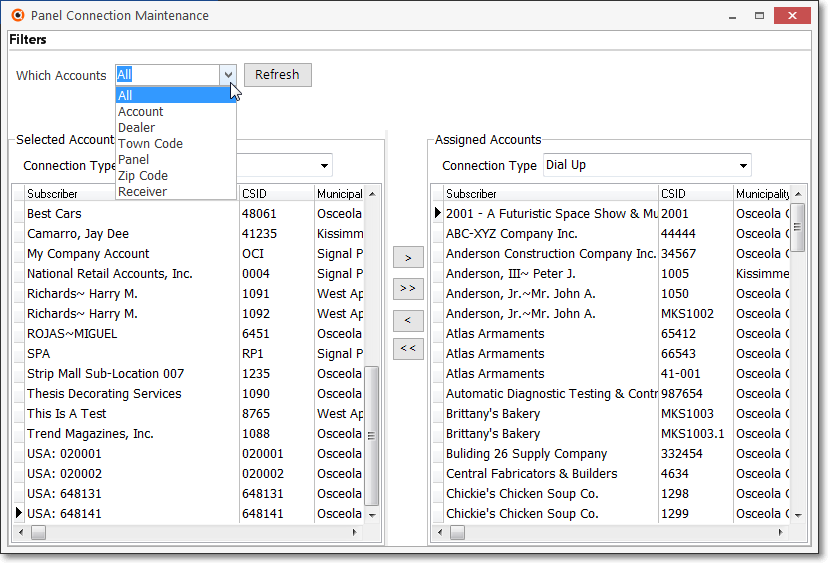
Panel Connection Maintenance Form - Which Accounts? options
✓Any other choice will display the "Select Account" field (the teal box in the illustration below).
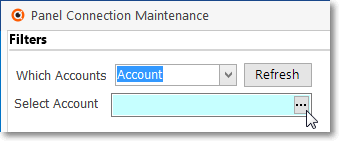
a.When available, Click the Ellipse button to view the appropriate Advanced Search dialog
b.Otherwise, enter the appropriate characters.
•Choosing the right the Select Account option:
✓Account Type - Limit Which Accounts will be listed in the Selected Accounts area to those that have been previously assigned the specified Account Type within the Central Station Data Form.
✓Dealer - Limit Which Accounts will be listed in the Selected Accounts area to those that have been previously assigned the specified Dealer Code in the Subscriber's Central Station Data Form.
✓Town Code - Limit Which Accounts will be listed in the Selected Accounts area to those that have been previously assigned the specified Town Code in the Subscriber's Central Station Data Form.
✓Panel - Limit Which Accounts will be listed in the Selected Accounts area to those that have been previously assigned the specified Control Panel (the Inventory item representing the Control Panel - listed in the "Part" column - that was installed with this system) in the Subscriber Panels section of the Central Station Data Form.
✓Zip Code - Limit the Accounts available for selection within the Selected Accounts area to those Subscribers with the Zip Code entered in the Select Which Accounts field.
✓Receiver - Limit the Accounts available for selection within the Selected Accounts section to those Subscribers with the Receiver ID entered here matching one defined in the associated Receiver field in the Subscriber Panels section on the Monitoring Tab in the Edit View of the Subscribers Form.
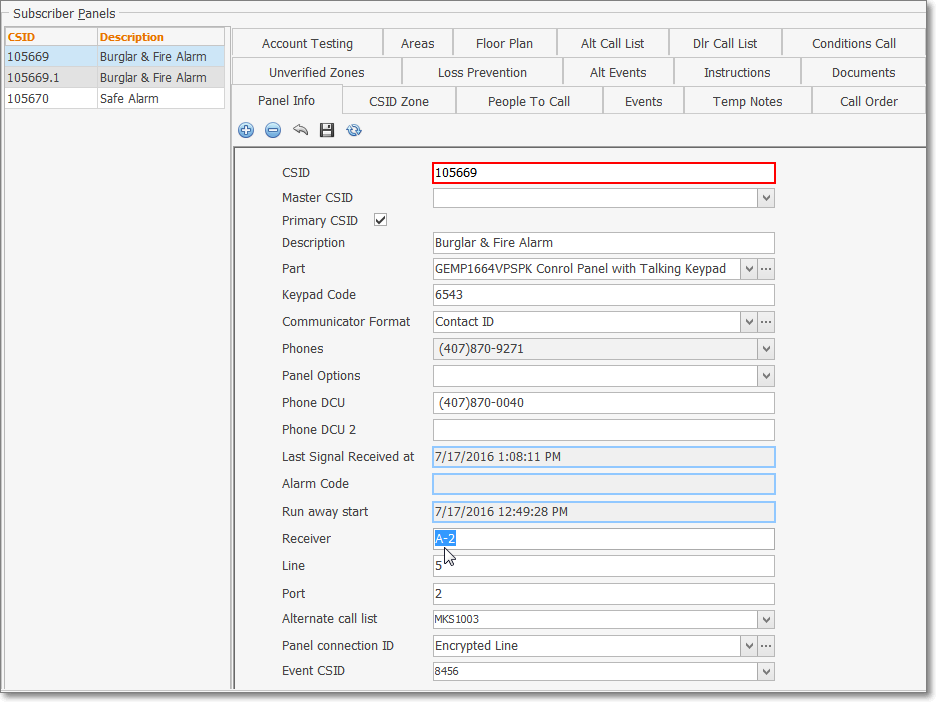
Subscriber Form - Edit View - Monitoring tab - Subscriber Panels section - Panel Info sub-tab - Receiver field
✓Refresh - Click the Refresh button after choosing the desired Select Account option.
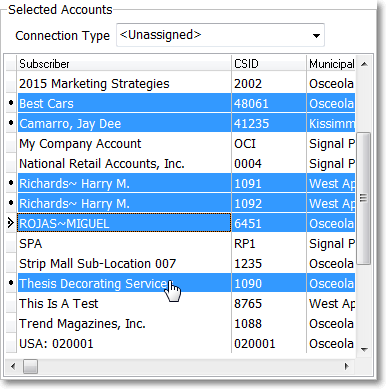
•Selected Accounts section - Once you have Chosen Which Accounts will be available for listing in the Selected Accounts section, you must limit the Accounts to those with a specified Panel Connection Type (or to those having no Panel Connection assigned - listed as <Unassigned>):
✓The assumption is that you want these Accounts displayed for the purpose of (re-)assignment to a (or another) Panel Connection Type.
✓Use the Drop-Down Selection List provided to Choose the current Panel Connection that is assigned to these Selected Accounts, or Choose <Unassigned>.
✓The result will be a filtered list with only those designated Accounts that match both the "Which Accounts" selection and the Panel Connection Type selection (i.e., The Selected Accounts list will now be restricted to those Accounts previously assigned the selected Panel Connection Type , or only those Accounts which are <Unassigned> Accounts).

Selected Accounts - Connection Type field
✓Press Control+Click on each of the the Account(s) that are to be moved into the Assigned Accounts list (then see Assigned Accounts section below).
✓This process selects the Accounts that are to be assigned a new (another) Panel Connection Type.
•Assigned Accounts section - After selecting the Accounts in the Selected Accounts section that are to be assigned a new (another) Panel Connection Type, the next steps are to
1.Choose that Panel Connection Type

Assigned Accounts - Connection Type field
▪Using the Drop-Down Selection List provided in the Assigned Accounts section, Select the Panel Connection Type to which the Selected Accounts should be reassigned.
2.Move those Accounts (see Move below) to the Assigned Accounts section.
•Move - Move the selected Account(s) from the Selected Accounts section to the Assigned Accounts section.
✓Click either the single right arrow (>) for moving only the selected Account(s), or the double right arrow (>>) to move all Accounts listed in the Selected Accounts section into the Assigned Accounts section.
✓This will immediately update the Panel Connection ID field entries in the Subscriber Panels section on the Monitoring Tab in the Edit View of the Subscribers Form.
➢Important Note: This process may also be performed in reverse to move Assigned Accounts back to the Selected Accounts section by selecting the appropriate Account(s) and then Clicking the left pointing arrow(s) to return them to the left side of this Panel Connections Maintenance Form.