❑The Advanced Search Dialog provides the User a method to locate and Select a specific record that is contained within a table in the database.
•This is accomplished by presenting a Form displayed as a Data Grid from which the User may Select a Search By method, and then Enter a Search Value to identify the record to be located based on the chosen Search By method.
•Once the record is located within the Data Grid, the User Clicks on that record to set the record pointer.
•Clicking OK Selects the record and closes the Form.
❑This Search dialog is generally accessed, depending on the Form from which it is requested, in one of three ways:
1.By Clicking on the Search Icon on that Form's Navigation Menu.
![]()
2.By Clicking an Ellipse within a field (as shown below)
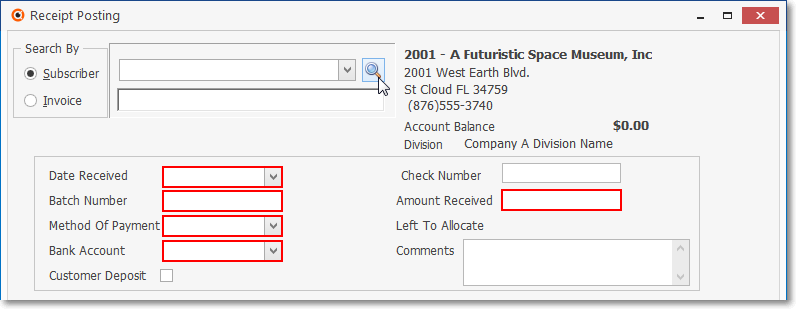
Search Ellipse located within a Field
3.By using a specialized Search Icon next to a field (as shown below)
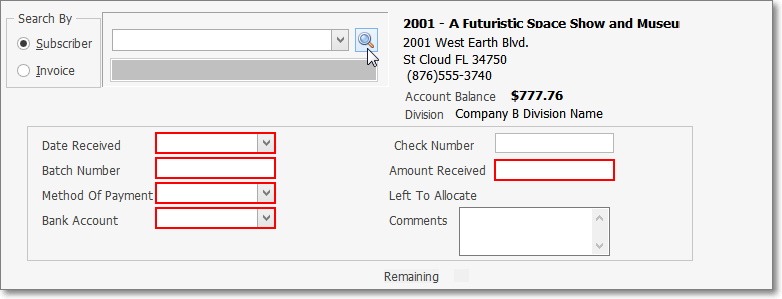
Search Icon next to a field
❖Also see the Subscriber Search and Vendor Search chapters for additional information about those specialized search options.
❑Using the Generic Search dialog:
•As required, Click the Search Icon or the Ellipse button to open the Search dialog.
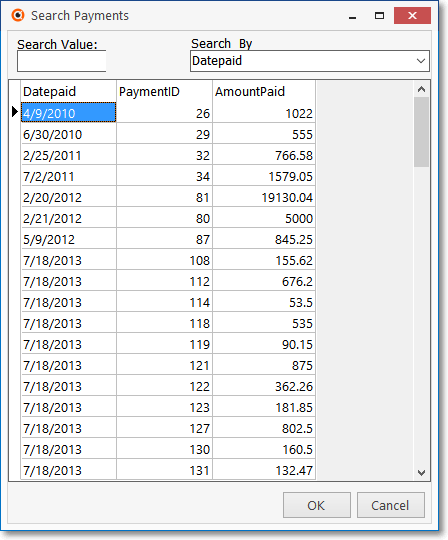
Search dialog showing Search By and Search Value fields and Data Grid
•Search By - Use the Drop-Down Selection List to Choose a field that exists within the Search Subject's Table which will be compared to the Search Value that will be entered (see Search Value below).
✓This Search By selection will become the current User's default choice the next time this specific Search Form is opened.
•Search Value - Enter the characters that will be compared to the contents of the field name that was selected as the Search By field (see above).
•Select - Click on the record in the list representing the Subject of the Search which will move the record pointer 4 to that line.
•OK - Click the OK button to make the selection.
✓The appropriate record information will be entered in the field on the Form where this information was required.
•Close - This will automatically close the Search Form and return you to the originating Form where your selection will be inserted in the appropriate field.
❑Using the Special Search dialog:
•Certain Search dialogs may have additional settings - typically when the number of records to be searched could be quite large.
✓An example of this enhanced capability Search Form is the Sale-Purchase Item Search dialog.
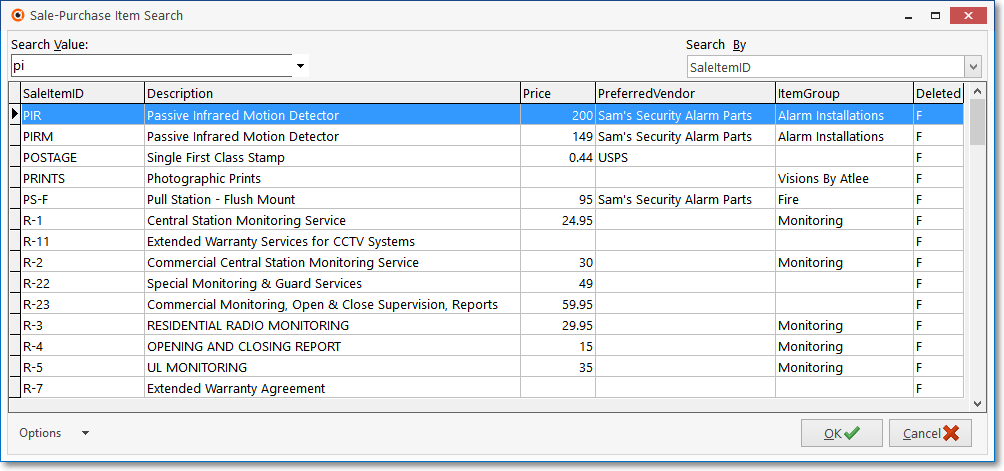
Sale-Purchase Item Search dialog
✓Auto Search - This option activates and deactivates the incremental search capability.
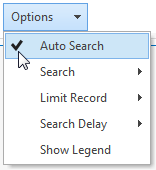
▪When there are a very large number of records, there is less stress on the database engine if Auto Search is turned off. The System Administrator may decide which method should be used.
oIf Auto Search is inactive (Un-Checked), the Search Value entry is made; and then the Search button to the right of that field is Clicked.
oIf Auto Search is active (Checked), the Search button will not be displayed and as each character is entered into the Search Value field, the dialog locates the first record that matches what has been entered (so far).
✓Search - Use this Drop-Down Selection List field to choose from three options:
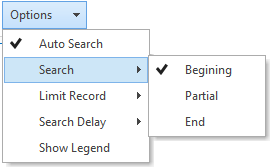
1.Beginning - The Search Value entry is compared to the data in the field identified in the Search By field, starting at the beginning of that data.
2.Partial - The Search Value entry is compared to the data in the field identified in the Search By field at any position within that data,
3.End - The Search Value entry is compared to the data in the field identified in the Search By field, starting at the end of that data.
✓Show Legend - Display additional information, as needed.
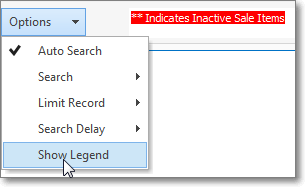
▪Certain records within the Search Results Grid may be highlighted based on their status (in the case above, if any Sale-Purchase Item has been designated as Inactive, those records - if any are listed - will be highlighted as indicated).