❑To view the Prospect Details of an existing Prospect record, Tap that Prospect line on the Prospects List page.
•The Add Prospect page will be displayed when you Tap the ![]() button on the Prospects List page.
button on the Prospects List page.
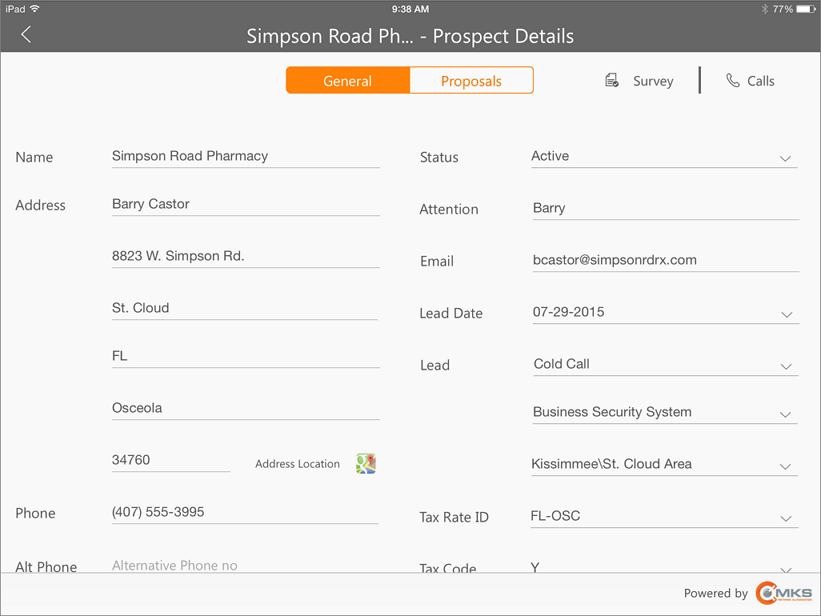
MKSales Application - Prospect Details page selected from the Prospect List page
•Understanding and Accessing all of the Prospect Details page:
a)Modify this information, if necessary.
b)Slide the page up to display the fields and options on the bottom of the page.
c)If any changes are made, Tap the Save option at the bottom of the page.
•There are four options at the top of the Prospect Details page
1. General - This option (the default when this page is initially displayed) displays the actual Prospect information which may be modified, if required.
2.Survey - This option opens the Survey List page - which uses the same format for both Prospects and Subscribers - where the components of an existing Survey may be viewed or modified, new components added to an existing Survey, or a new Survey started.
3.Calls - This option opens the Calls page - which uses the same format for both Prospects and Subscribers - where previous contacts with the associated Prospect or Subscriber may be reviewed or updated, and/or new Calls documented.
4. Proposals - This option displays a list of all the Proposals created for this Prospect, the details of which (see the Proposal Details chapter for more information) may be viewed by Tapping a listed Proposal record.
▪A Proposal may be added for the selected Prospect by Tapping the Add New button
▪See the Add New Proposal chapter for those instructions.
❑ General - Be sure the General option is Selected at the top of the Prospect Details page and update, if necessary, any of the following information
Left Column:
•Name - Enter the Prospect's Name (up to 70 characters) as explained below:
✓Entering a Business Name
▪Enter the Name as it would normally be listed in the Telephone Directory
▪If a prefix is part of the Name but that Name is not normally alphabetized by that prefix (such as the word "the"), enter the name followed by a tilde ("~") and the prefix.
▪Example: "ABC Company~The"
✓Entering an individual Person's Name
▪The Last Name is entered first
▪Type a Tilde ("~") which tells the system that everything after it is the Prospect's first name and middle initial.
▪Enter the First Name and Middle Initial
▪For Prefixes (Mr., Mrs., Ms., etc.), enter them after the Tilde and before the first name
▪For Suffixes (MD., Jr., III, etc.), enter them after the Last Name and before the tilde.
▪Example: "Smith, MD~Dr. James T."
•Address - Enter the Street address number and name.
•City - Enter the City (up to 25 characters in length)
•State - Enter the State (or Province) Code
•County - Enter the County (up to 20 characters in length) which is entered for informational purposes only and does not print on a Proposal
•Zip Code - Enter the Zip Code for this Prospect's premises
•Phone - Enter the Primary Telephone Number following the rules below (Correct formatting will be applied automatically):
✓If no Area Code is required, enter the seven (7) digit telephone number (it cannot start with a 1)
✓If 10 digit dialing is in effect - no "1"prefix is needed, but you do need to dial an Area Code as part of the telephone number:
▪Enter the three digit Area Code.
▪Finally, enter the seven digit Telephone Number.
✓Long distance Telephone Numbers (with a "1" prefix) are entered as such, and the appropriate formatting parentheses and dash is applied automatically.
•Alternate Phone no - Enter an Alternate Telephone Number following the rules above.
•Comments - You may simply type in any appropriate Comments, as needed.
Right Column:
•Status - Initially the Prospect Status should be set to the Active (or its equivalent) as defined in the MKMS Prospect Status Form.
✓Tap the Down-Arrow to Choose this, or a different Prospect Status,
✓The Status may be changed at anytime based on subsequent contacts with this Prospect.
•Attention - The Attention line will be printed below the Prospect's Name as part of the Proposal's Mailing Address.
✓So this Attention line information may be used for a building name, a person, suite number, additional address information or skipped entirely - depending on what you need.
•Email - Enter the appropriate Email Address to be used for contacting this Prospect.
•Lead Date - Tap the Down-Arrow to display a Date Selection dialog within which you may select and tap the desired date.
•Lead - Identify and characterize this Lead, as appropriate:
✓Source - Tap the Down-Arrow to Choose the Lead Source for this Lead
✓Type - Tap the Down-Arrow to Choose the Lead Type
✓Market - Tap the Down-Arrow to Choose the Marketing Area for this Lead
•Tax Rate ID - Tap the Down-Arrow to Choose the Code representing the Tax Rate ID to be assigned to this Prospect.
•Tax Code - Tap the Down-Arrow to Choose the appropriate Sales Tax Code (from those defined for the assigned Tax Rate ID):
✓Y - Yes they are Taxable and the assigned Tax Rate ID was defined as not having Multiple Tax Rates
✓1 - Yes they are Taxable and the assigned Tax Rate ID was defined as a Multiple Tax Rates class and this Tax Code number represents the Tax Rate to be assessed.
✓2 - Same as 1 above.
✓3 - Same as 1 above.
✓N - No the Prospect is Not Taxable.
✓E - This Prospect is always Sales Tax Exempt.
•Tax Percentage - This field will be completed automatically based on the information for the Tax Code previously entered in the MKMS Tax Rates Form.
•Comments - Enter other information, as appropriate, to better understand this Prospect's needs or situation.
❑Slide the Prospect Details page up to view the fields and options on the bottom of the page
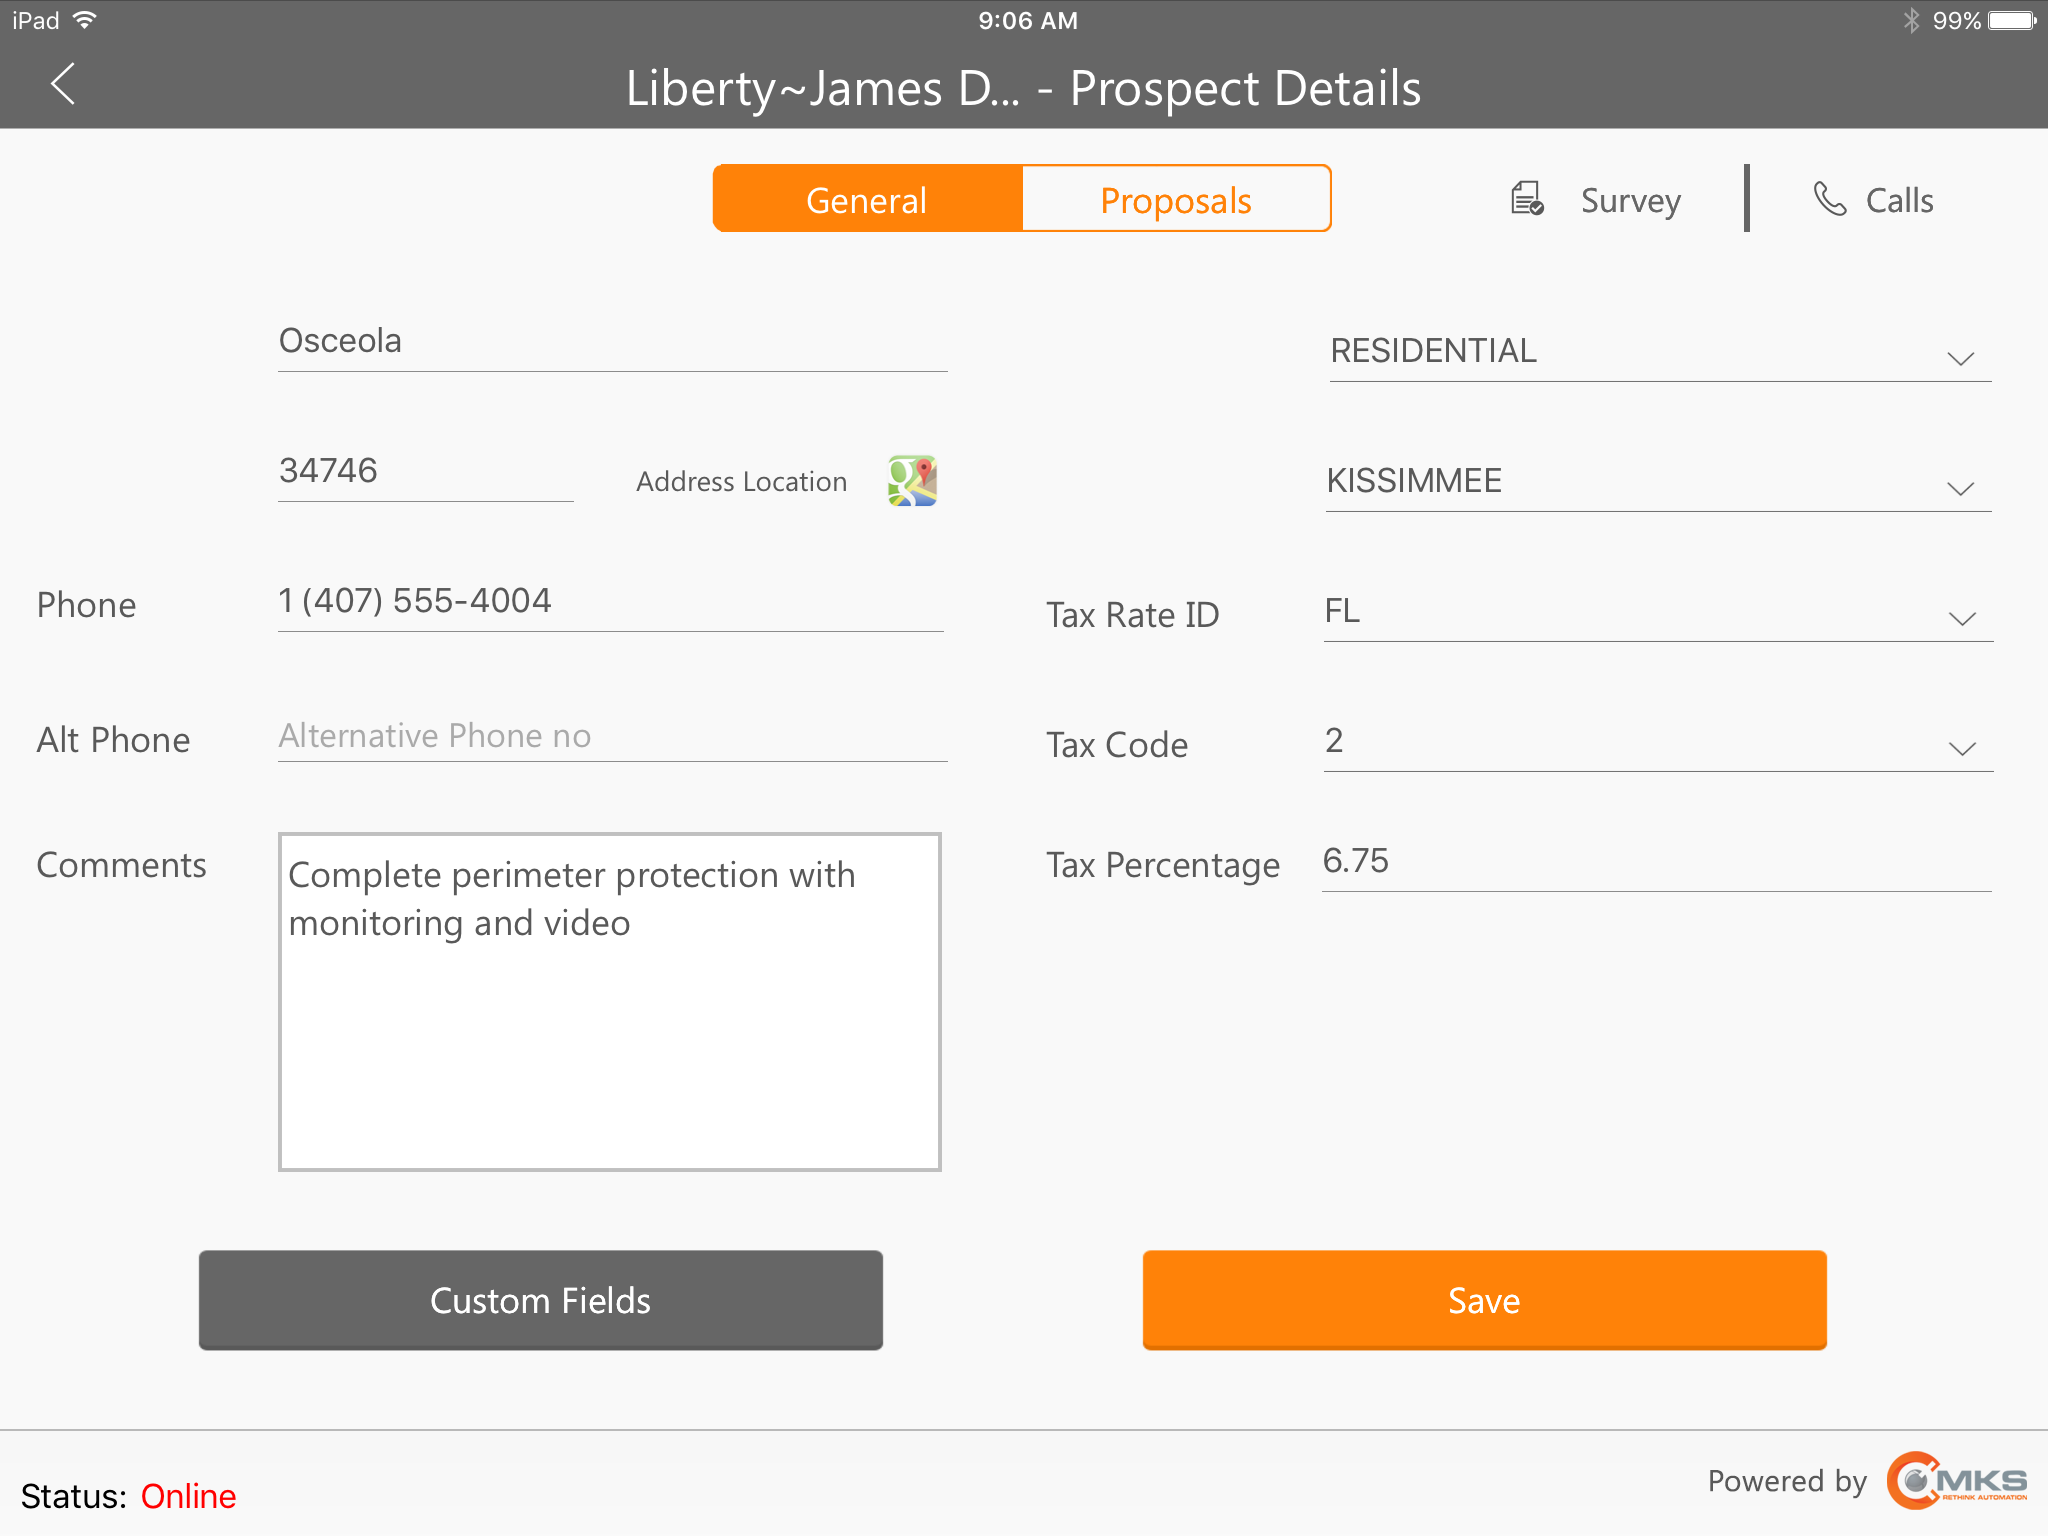
MKSales application - Prospect Details - other Fields & Save option
• Custom Fields - When Custom Fields have been defined, Tap the Custom Fields button to display those fields and options.
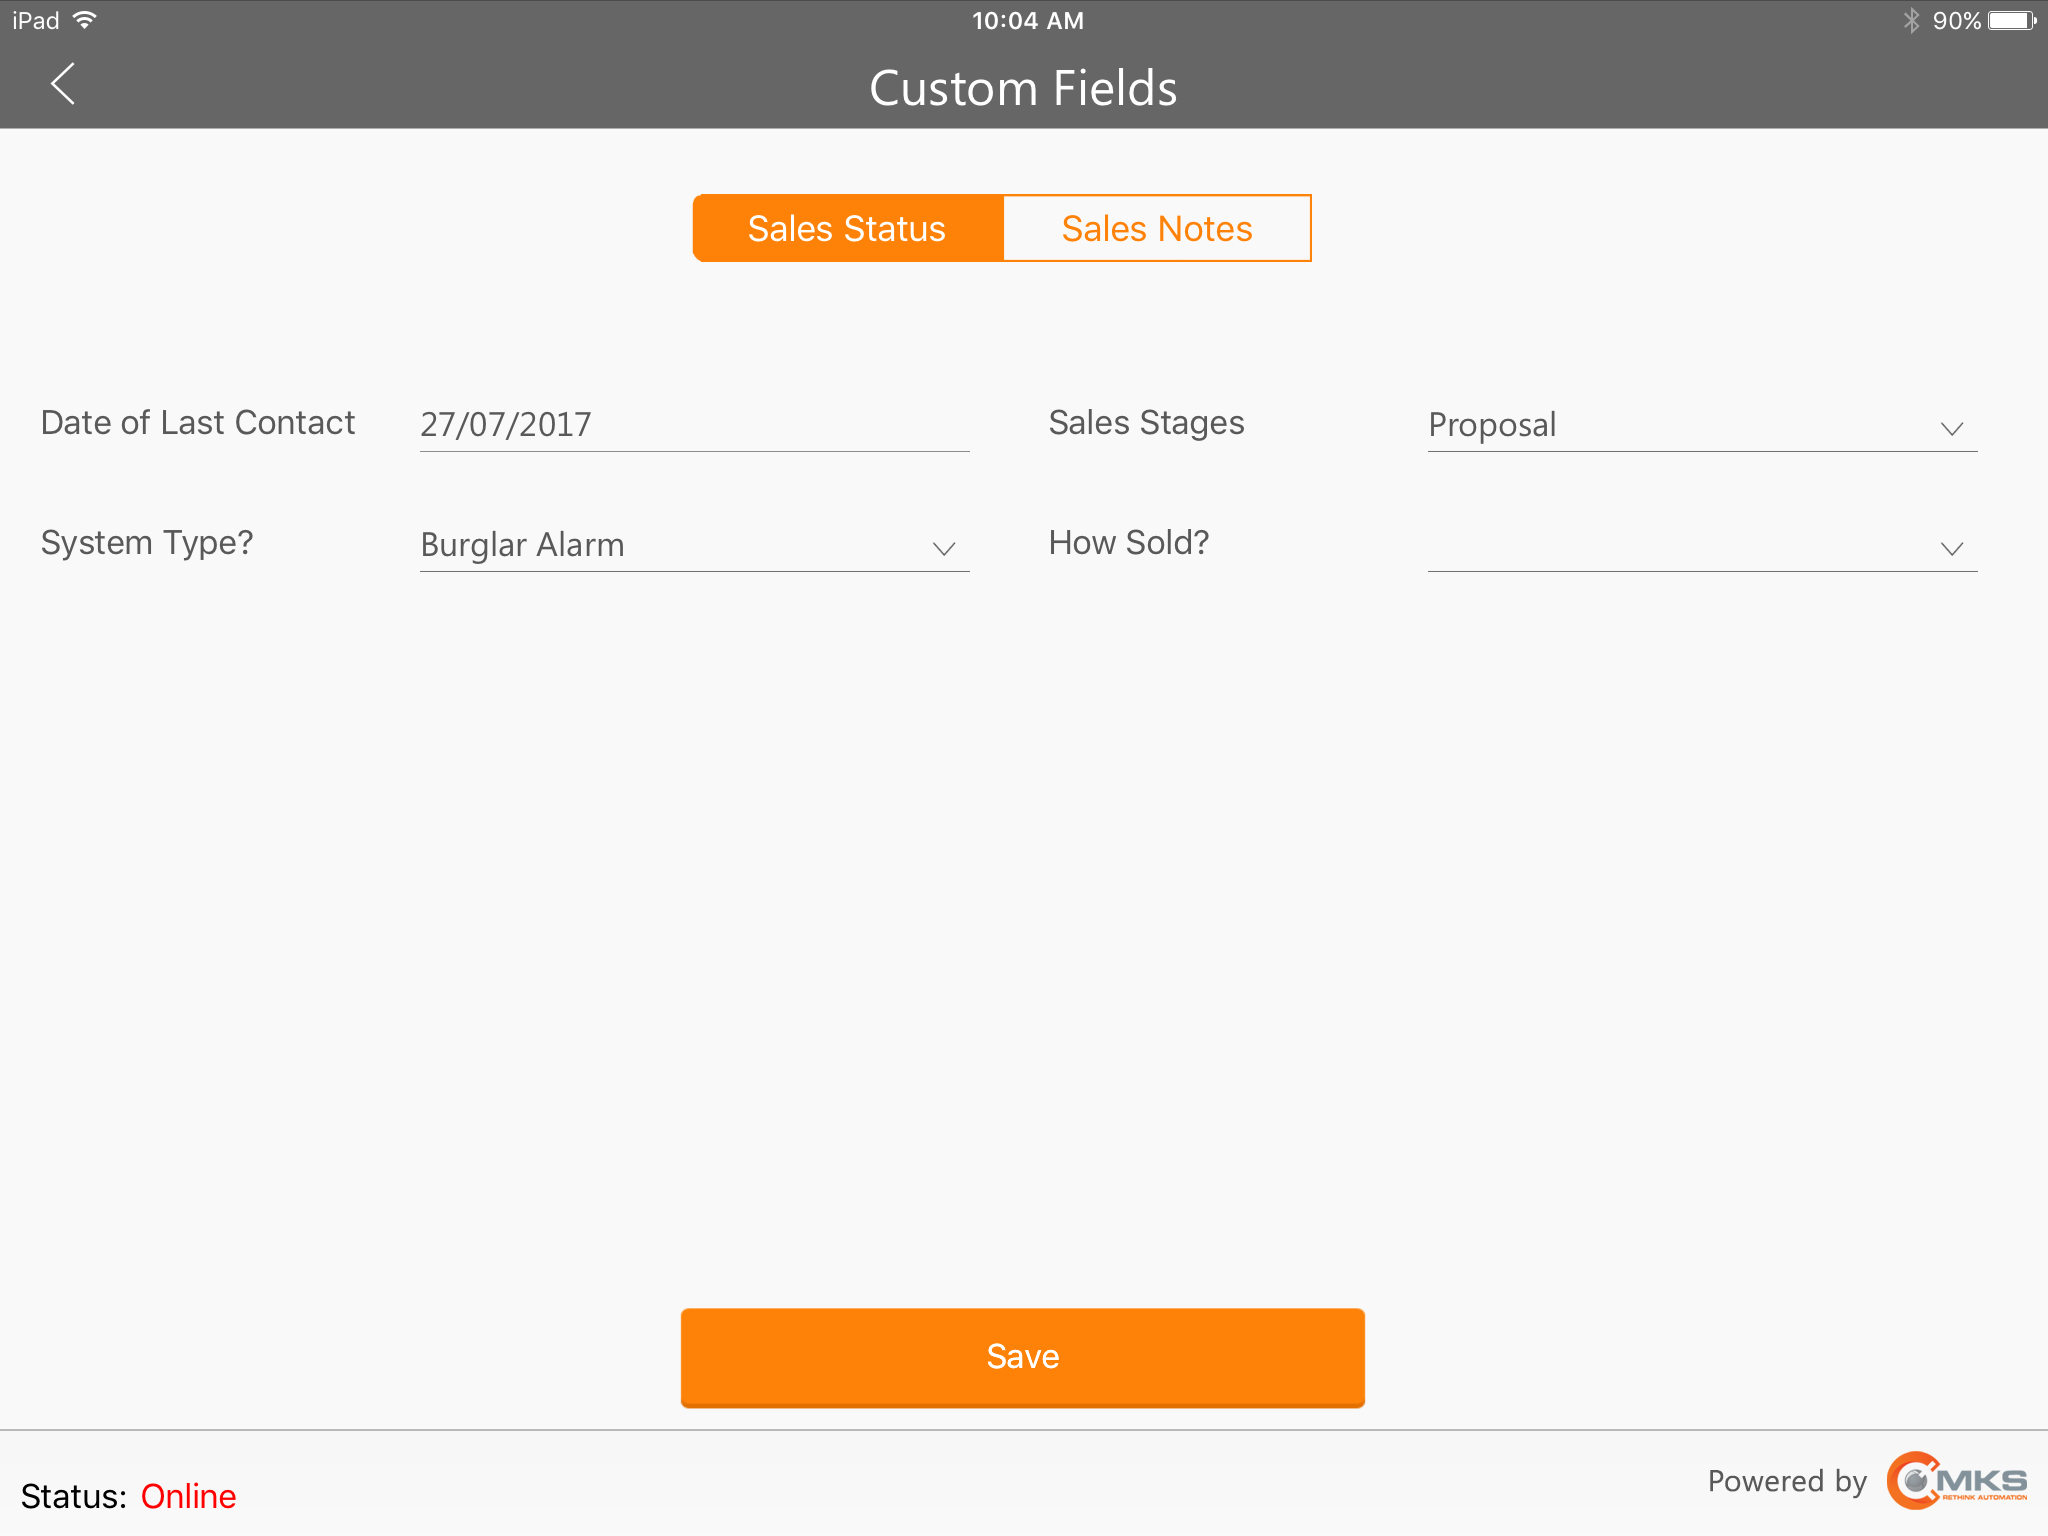
MKSales application - Prospect Details - Custom Tabs (options) Fields
✓Multiple option tabs may be presented (in the illustration above, the Sales Status and Sales Notes option tabs are present) and each option tab may have more than one field available for data entry.
▪These Custom Fields may be Mandatory or Optional - based on their purpose and how there were defined.
✓Enter the required and optional data as appropriate, then Tap the Save button at the bottom of the Custom Fields page to record this entry.
✓The Custom Fields page will close and the Prospect Detail page will be redisplayed.
• Save - Then, Tap the Save button at the bottom of the Prospect Detail page to record this entry.
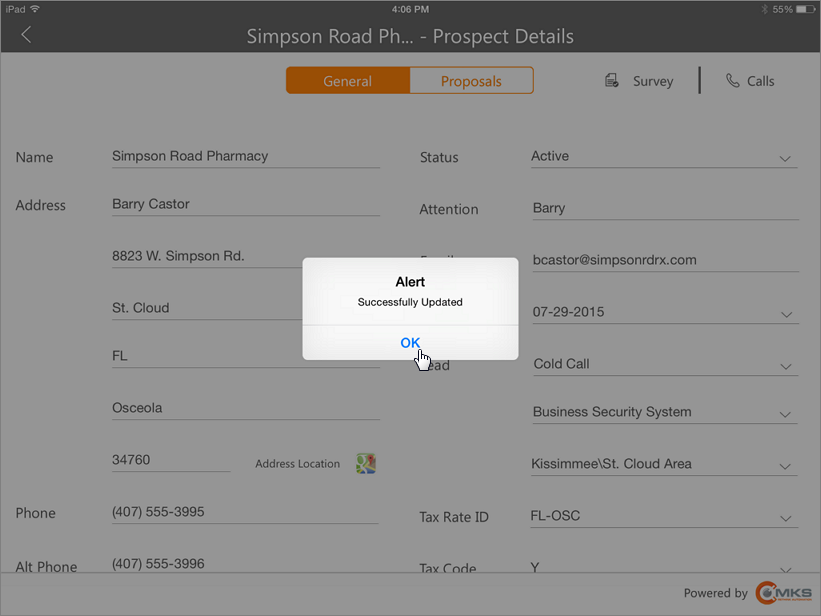
•This updated Prospect record will be added to the Prospect List and uploaded to the Prospect Form within MKMS.
✓Tap OK to acknowledge the Alert and complete the process.
•Tap the Left-Arrow < at the top left of the Prospect Detail page to return to the Prospect List.
❑ Proposals - Tap the Proposals option on the Prospect Detail page to display a list of the Proposals previously created for this Prospect
•Viewing the list of this Prospect's Proposals on the Proposals page:
a)Slide the page to the left to display additional information about each Proposal.
b)Slide the page up if the list of the Prospect's Proposals is longer than one page can display
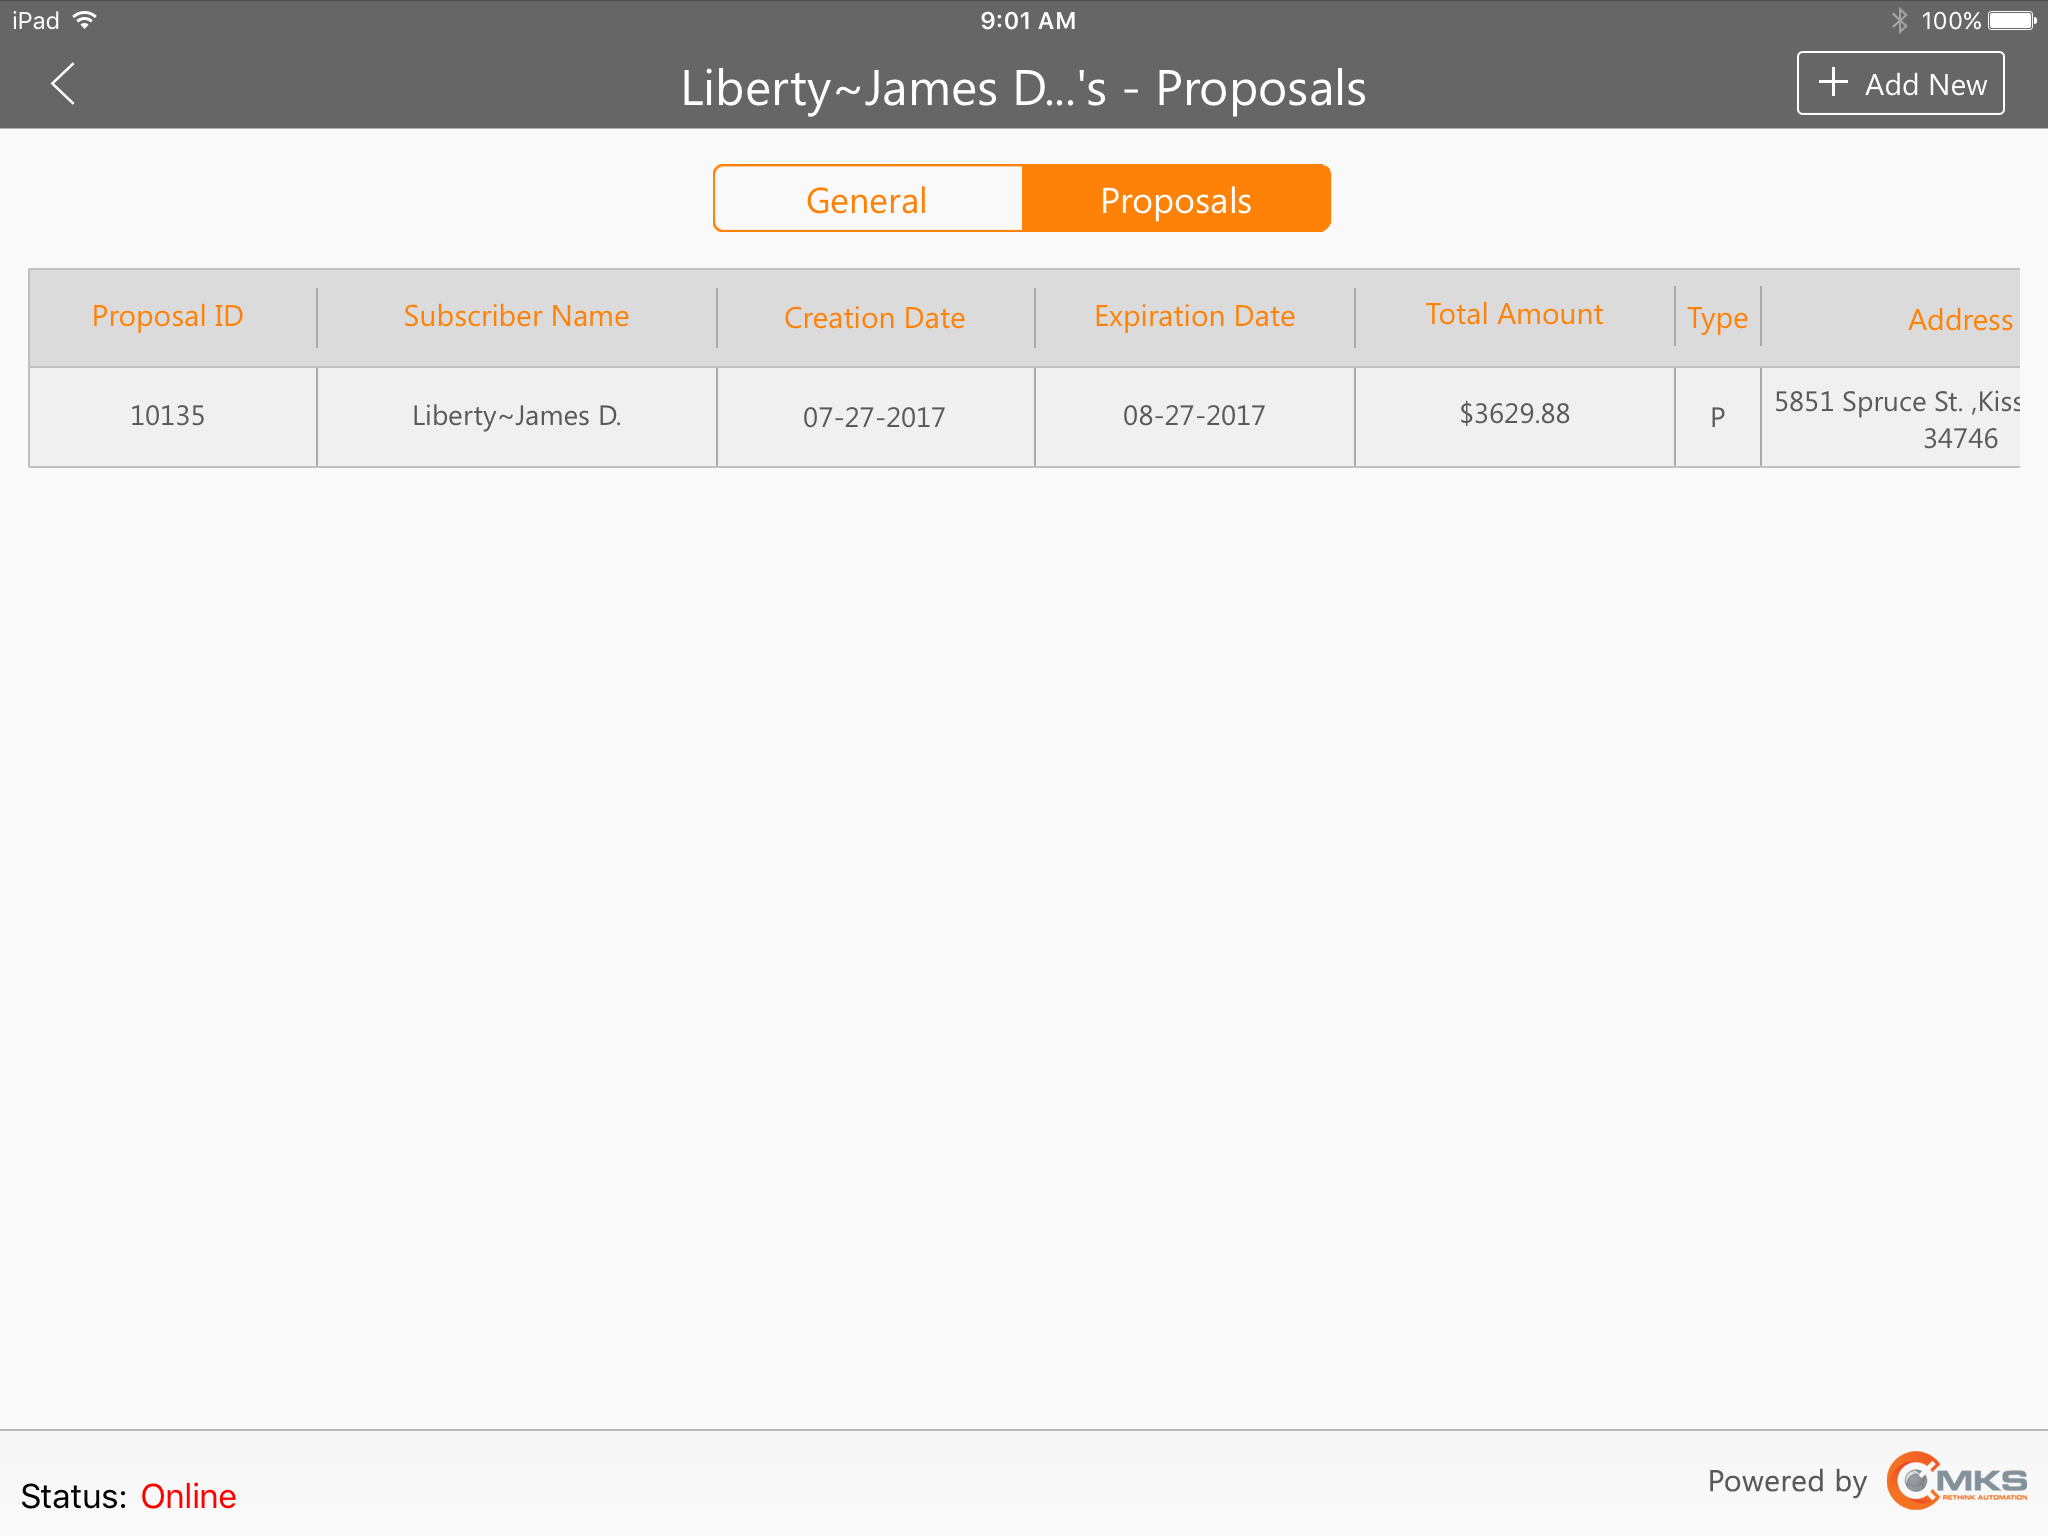
MKSales Application - Proposals button on Prospects List page
✓Tap any listed Proposal record to display the Proposal Details page where you can view the details of that Proposal.
✓Tap the Add New button to create a New Proposal.