❑Using the seven (7) Quick Dial Buttons and a Call Resolution Drop-Down Selection List on the Contacts tab:
![]()
•These buttons are provided so an Operator may easily re-execute any one of these calling or response procedures.
•The Call Resolution Drop-Down Selection List is used to identify the Verification Response.
❑There are 7 Quick Dial Buttons on the Contacts tab, located below the Available Call List (see Available Call List section in the Contacts chapter), that provide special functionality.
1.Verify - (Re-)Contact a person on the Subscriber's Premises.
✓Click the Verify button to perform the Verification process.
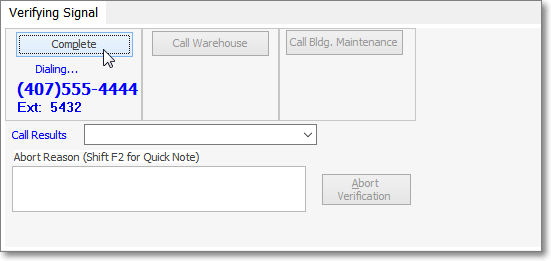
Verification dialog
2.Police - (Re-)Contact the Police Department assigned as the PD responder for this Subscriber.
✓Click the Police button to perform the Dispatch process requiring a Police Department response.
✓If a PD Permit Number has been defined for this Police Department, that Permit # information will be displayed.
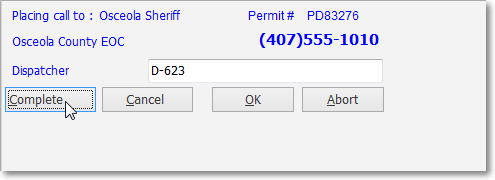
Complete button on the Dispatch Information dialog
3.Fire - (Re-)Contact the Fire Department assigned as the FD responder for this Subscriber.
✓Click the Fire button to perform the Dispatch process requiring a Fire Department response.
✓This functions exactly as the Police Dispatch dialog.
4.Medical - (Re-)Contact the Medical/Emergency Response Service assigned as the MD responder for this Subscriber.
✓Click the Medical button to perform the Dispatch process requiring a Medical or Ambulance related response.
✓This functions exactly as the Police Dispatch dialog.
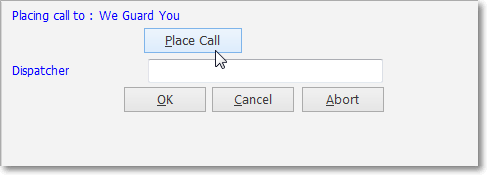
5.Other - (Re-)Contact a person/company by manually entering a telephone number which the system can then dial automatically.
✓Click the Other button and enter the desired Telephone Number to be dialed.
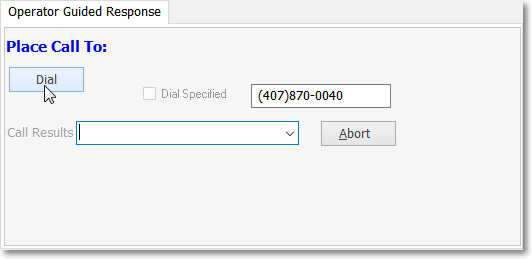
Quick Dial Button - Other dialog
✓The Telephone Number will be automatically formatted.
✓Click the Dial button to have the system dial the number.
✓Click Complete (the Dial button changes to a Complete button when the Call button is Clicked).
✓Enter the Name of the Other Contact in the dialog provided.
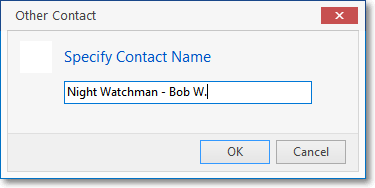
✓Enter a Note with additional information, if appropriate.
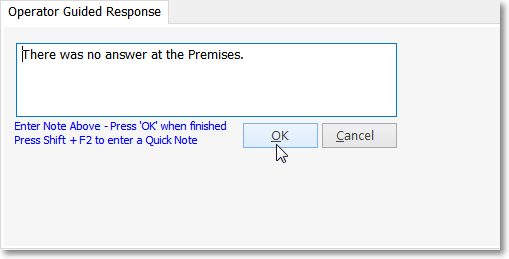
✓Use the Drop-Down Selection List to Choose the appropriate Verification Code, when finished.
6.Security - (Re-)Contact the Security Company assigned for this Subscriber.
✓Click the Security button to perform the Dispatch process requiring a Security Company response.
✓This is usually used to dispatch an Investigator to the Subscriber's Premises for an Alarm Signal with a Priority Level on 1, 2, 3, or 4 (see 8. Investigated below).
Quick Dial button - Security dialog
✓This functions exactly as the Police Dispatch dialog.
❖See the UL® Settings, Signal Processing & Reporting Procedures chapter for more information about Dispatching Security Company as an Investigator.
7.Dial - This option will (re-) Dial the currently selected Telephone Number in the Available Call List.

a.In the Available Call List, Select the individual to be dialed.
b.Click the Dial button.
c.When the contact is completed, Click the Done button.
d.Using the Drop-Down Selection List provided, Choose the appropriate Call Resolution code.
8.Investigator Required? - Inv 1 Sent - This is an option on the Actions button Menu and opens an Inv 1 Sent dialog (and the related Inv 2 Sent, Inv 1 Arrival, Inv 2 Arrival options) into which the Operator enters the required/appropriate information.
✓The following Operator actions will record the required Elapsed Time, and the method used to verify the alarm investigator's arrival

✓When using the MKMSCS UL® Version is Active (and in some cases when it is not), and the Operator who is processing an Alarm Signal with a Priority Level on 1, 2, 3, 4, 5, or 6 for a UL® Classified Account, and she/he had to Dispatch not only the Police (Fire Department, etc.), but also an Investigator (see 6. Security entry above)
a.An Internal Timer will be started automatically as soon as the first (second) Investigator is Dispatched.
b.The related Inv 2 Sent, Inv 1 Arrival, Inv 2 Arrival options will then used, as needed, on the Actions button Menu.
c.When the first (second) Investigator arrives at the premises of that UL® Classified Account, the Operator will Choose the appropriate Investigated option on the Actions button Menu and briefly record the results in that Arrival dialog.
d.When that Arrival dialog's OK button is Clicked, the Internal Timer will be stopped, the elapsed time calculated for that Investigator (1 and 2), and the results noted in the Signal History table.
❖See the Dispatch, UL® Settings, Signal Processing & Reporting Procedures chapter for more information about using the Investigated option.