❑Contact - Available in both MKMS and MKMSCS, this option opens the Contact dialog where the User may Choose the Type, Account and Method which is to be used to make the Contact (communicate with someone using electronic means).
•To display the Contact dialog within the MKMS application:
a)From the Backstage Menu System in MKMS, Select File and Choose Communications then Select the Contact option, or
b)From the Quick Access Menu in MKMS, Select File and Choose Communications then Select the Contact option

❑Using the Contact dialog

Contact dialog
A.The User must first Choose the:
1.Select Contact Type - Select theType of record (i.e., Dealer, Employee, Prospect, Contacts (People To Call), Subscriber) to which a Contact is to be made,
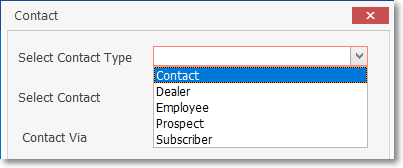
Contact dialog - Select Contact Type
2.Select Contact - Select the specific Account (Prospect, Subscriber), Entity (Dealer, Employee), or Panel (from the People To Call (Contact entered for a specific CSID) to be contacted using the Selection dialog presented (which lists the appropriate set of records based of the selection)
a.Dealer - Click the Ellipse on the right of the Select Contact field to open the Select Dealer dialog to Search for the Dealer who will receive the message
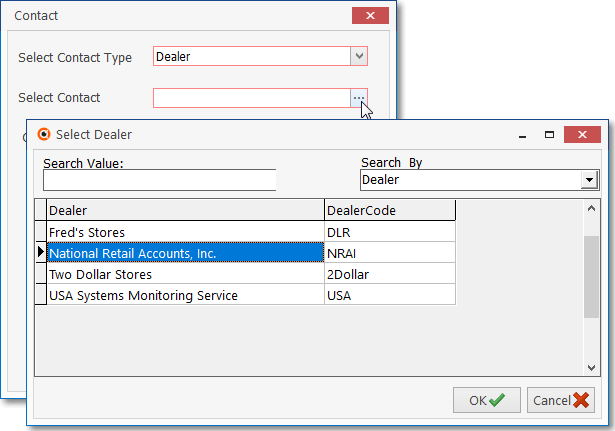
Contact Form - Select Contact Type - Select Contact field - Select Dealer dialog
b.Employee - Click the Ellipse on the right of the Select Contact field to open the Select Employee dialog to Search for the Employee who will receive the message

Contact Form - Select Contact Type - Select Contact field - Select Employee dialog
c.Prospect - Click the Ellipse on the right of the Select Contact field to open the Select Prospect dialog to Search for the Prospect who will receive the message
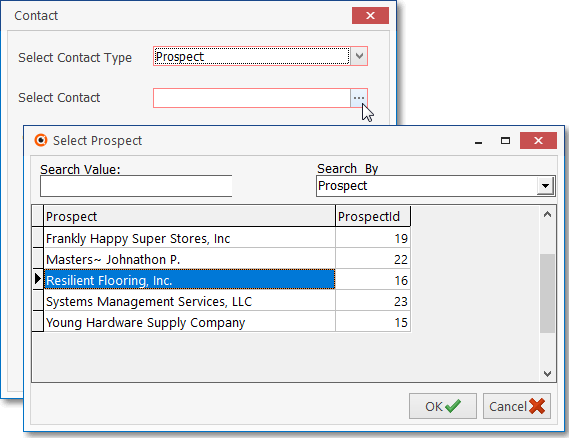
Contact Form - Select Contact Type - Select Contact field - Select Prospect dialog
d.Panel Contact - Click the Ellipse on the right of the Select Contact field to open the Select Panel dialog to Search for a specific CSID (or Subscriber name) to identify the list of individuals (i.e., the People To Call entered for a specific Subscriber's Panel) who will receive the message
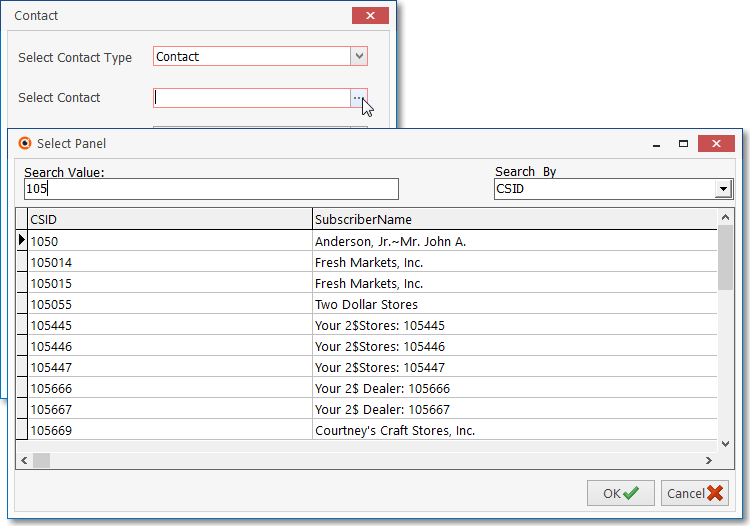
Panel Contact Form - Select Contact Type - Select Contact field - Select Panel dialog
e.Subscriber - Click the Ellipse on the right of the Select Contact field to open the Select Subscriber dialog to Search for the Subscriber who will receive the message
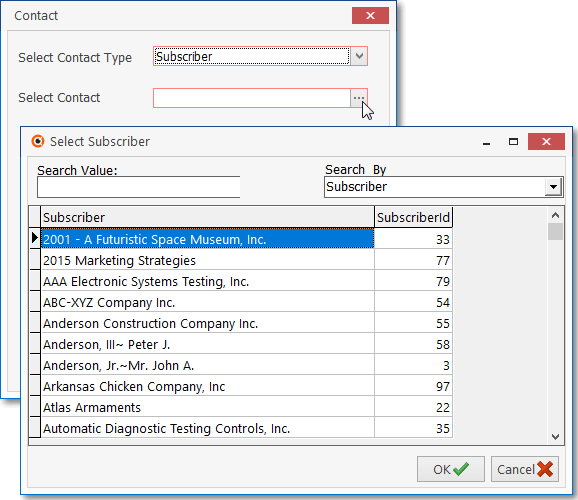
Contact Form - Select Contact Type - Select Contact field - Select Subscriber dialog
3.Contact Via - Use the Drop-Down Selection List provided to Choose the desired communication Method (i.e., Email, Voice Message, Pager, Phone Call, or SMS) to be used to make this Contact.
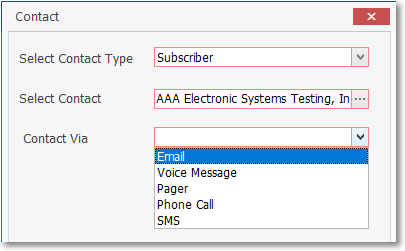
Contact Form - Contact Via - Select the desired communication method
B.Once the Contact Via method is selected (see A., 3. Contact Via immediately above), the Contact dialog will be expanded to allow the User to provide the required contact details based on the choices made above:
1.Email, Voice Message, Phone Call, or SMS - When any of these four options is chosen for a Subscriber, Prospect, Dealer, People To Call (Contact) or Employee a two column Grid will be presented
i.Contact column contains the Name of the selected Subscriber, Prospect, Dealer, People To Call (Contact), or Employee
ii.Phone Number or Email address - This column contains either all Phone Numbers, or Email addresses that are available (previously entered) for the selected Subscriber, Prospect, Dealer, or Employee
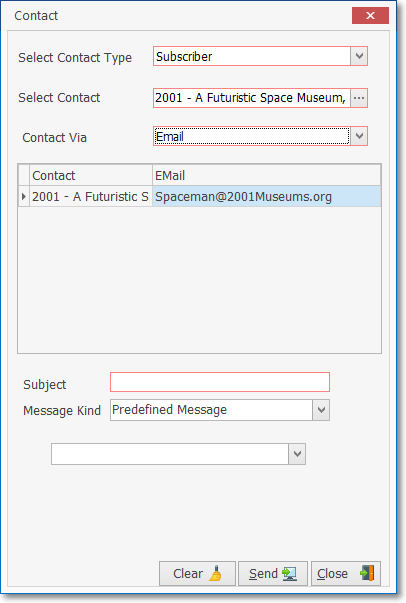
Contact dialog - Contact Via Email - contact detail section
a.Subject - Only presented when Email was selected as the Contact Via option.
i.Enter the purpose, description, heading for the Email message(will be its Subject line) to be sent to this Contact
b.Message Kind - Not presented if Phone Call selected as the Contact Via option.
i.Choose either a Manual Message or a Predefined Message
a)Manual Message - When Manual Message is selected, enter the desired message to be sent to this Contact
b)Predefined Message - When Predefined Message is selected, use the Drop-Down Selection List provided to Choose the appropriate message to be sent to this Contact
c.Message - In this field enter the Manual Message, or view the selected Predefined Message
2.Pager - Only when the selected Contact has Pager Information entered, and the Contact Via option selected is Pager:
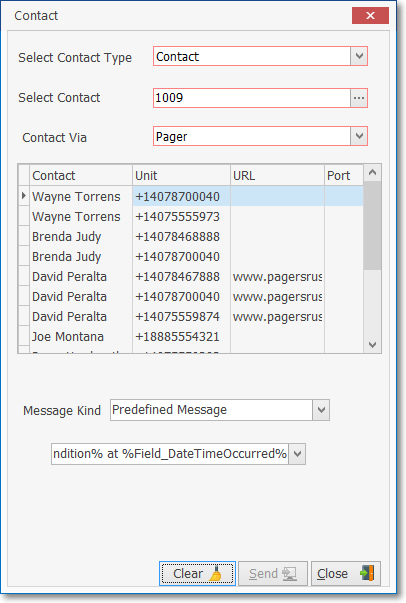
Contact dialog - Contact Via Pager - contact detail section
a.Message Kind - When Pager selected as the Contact Via option.
ii.Choose either a Manual Message or a Predefined Message
a)Manual Message - When Manual Message is selected, enter the desired message to be sent to this Contact
b)Predefined Message - When Predefined Message is selected, use the Drop-Down Selection List provided to Choose the appropriate message to be sent to this Contact
b.Message - In this field enter the Manual Message, or view the selected Predefined Message
❑Clearing, Sending, or Canceling the Contact
•The Contact dialog has three options at the bottom of the Form:
![]()
Contact dialog - Option Buttons
1.Clear - Removes all previously entered information from the Contact dialog
2.Send - Transmits the Contact message using the parameters established in the Contact dialog
3.Close - Closes the Contact dialog