❑This Active / Passive Accounts Report (designed and documented to comply with Section 5.2 - Active System of the Third Edition UL® 1981 Standard) lists the total number of Active System Accounts (those that are not Passive Accounts), which are being monitored - offering Detailed and Summary versions of this data.
•Because this is a true Grid (see the Grids & Lists - Print Preview - Exporting Data chapter for much more information), it offers the Filtering, Configuration, Sorting, Printing, Emailing and Export capabilities that are inherently part of an MKMS based data grid
5.2 - Active System - A system that sends one or both of the following signals to the central-station on a regular basis:
a)A signal that the system has been disarmed and the protection removed (commonly referred to as "opened"); or
b)A signal that the system has been armed and the protection activated (commonly referred to as "closed")
▪If an alarm system sends opening and closing (disarm and arm) signals, it is considered to be an active system.
▪Supervisory check-in signals transmitted from a system does not make it an active system.
•Active - Accounts are considered "Active" when the O&C Supervised? box is Checked on the Central Station Data Form, and/or at least two Events (for Opening and/or Closing) have been defined for that Subscriber.
•Passive - Accounts are considered "passive" when neither of the cases described (above) for Active Accounts are true.
➢Note: This Active Accounts Report is required for those companies who are providing UL® Listed Monitoring Services (see the UL® Settings, Signal Processing & Reporting Procedures chapter for more information).
•To print the Active / Passive Accounts Report
a.From the Backstage Menu System Select Reports and Choose Monitoring and Select the Active / Passive Accounts option, or
b.From the Quick Access Menu, Select Reports and Choose Monitoring and Select the Active / Passive Accounts option
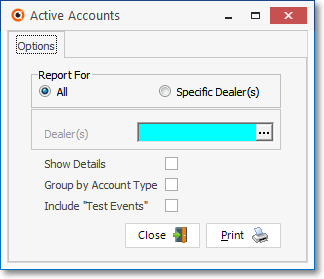
Active Accounts - Options tab
•Report For - Which Accounts should be included?
✓All - By default, All Subscribers that are - by definition - Active Accounts will be included.
✓Specific Dealer(s) - To list only those Subscribers that are Active Accounts and who are being monitored for a specified set of one or more Dealers, Click this button.
▪Dealer(s) - The Dealer(s) field will be displayed.
▪Click the Ellipse to open the Select Dealers dialog.
✓Select Dealers - To Choose the Dealer(s) required for this report, Check the Selected box for one or more Dealers on this Select Dealers dialog.
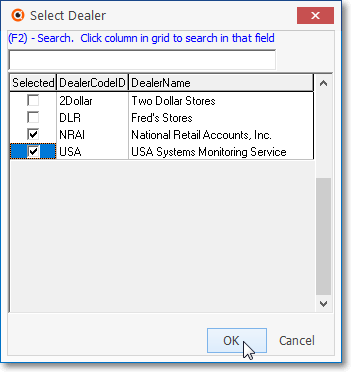
Select Dealers dialog
▪Click the OK button to Close the Select Dealers dialog.
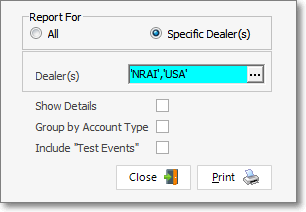
▪The Selected Dealer Code(s) will be inserted into the Dealer(s) field.
•Show Details - To see the list of each Subscriber - versus just the totals - Check this box.
•Group by Account Type - To include a sub-total of the number of Subscribers, which are Active Accounts, within each Account Type, Check this box.
•Include "Test Events" - For Non-UL Users Only, to consider Test Events toward fulfilling the qualification for an Active Account, Check this box.
•Print - Click the Print button ![]() to Preview and optionally Print (to a File or a Printer) this Active Accounts Report.
to Preview and optionally Print (to a File or a Printer) this Active Accounts Report.
•To Exit this Active Accounts Report dialog, Click the Close button ![]() at the bottom of the Options tab.
at the bottom of the Options tab.
❑The Preview tab presents the report which resulted from the Options you've selected.
•Up Arrow/Down Arrow - hi - Moves the report one line up, or one line down, respectively.
•Page Up/Page Down - Moves the report to the previous or next page, respectively.

Preview Tab's options
•Home - ![]() - Using either the screen Icon or your Keyboard's Home key, moves the report to the top of the first page.
- Using either the screen Icon or your Keyboard's Home key, moves the report to the top of the first page.
•End - ![]() - Using either the screen Icon or your Keyboard's End key, moves the report to the bottom of the last page.
- Using either the screen Icon or your Keyboard's End key, moves the report to the bottom of the last page.
•Arrows - The arrows allow you to move back and forth, from page to page.
•Number - Indicates the page number you are viewing.
✓You may also type in a specific page number, Press 8 Enter and that page will be displayed immediately.
✓If you enter an invalid page number, it will be ignored.
•Fit To Page - Click the first button after the arrows to size a full page of the report to fit the screen.
•Zoom To 100% - Click the second button after the arrows to display the page at 100% (of the printed view).
•Fit To Page Width - Click the third button after the arrows to size the page of the report to fit the full width of the screen.
•Zoom To Percentage - Click the fourth button after the arrows to re-size the page of the report by percentage.
![]()
✓When you Click the Zoom To Percentage button, the Percentage selector will be displayed.
✓You may then Click the Up or Down ‚ arrows to set the exact amount of Zoom you want.
•Print - Click the Print button to Print (to a File or a Printer) ![]() the displayed Active Accounts Report.
the displayed Active Accounts Report.
•Email - Click the Email ![]() button to send this report to an Email address of your choosing.
button to send this report to an Email address of your choosing.
•To Exit the Preview tab and Close this Report dialog Form, Click the Close ![]() box on the right at the top of the Preview tab.
box on the right at the top of the Preview tab.
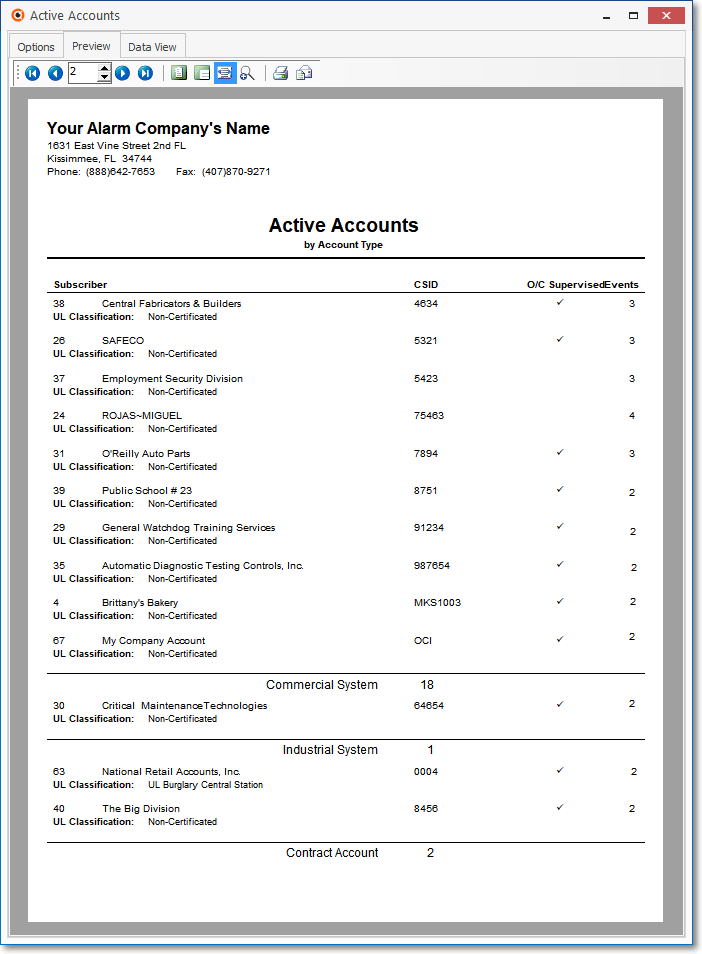
Active Accounts - Preview tab
❑Data View - This view provides a tabular (spreadsheet style) presentation of the selected data.

Active Accounts - Data View tab
•Arrows - Click the arrows to move through the record.
•Export - Exporting the data from this Data View tab (note the "fly-over" help available on these buttons):
✓Export to CSV - Click the first button after the arrows to export the data to a Comma Separated Values (CSV) file format.
✓Export To Excel - Click the second button after the arrows to export the data to an Excel (.xls) file format.
✓Export To Html - Click the third button after the arrows to export the data to an HTML formatted file.
•To Exit the Data View tab and Close this Report dialog Form, Click the Close ![]() box on the right at the top of the Data View tab.
box on the right at the top of the Data View tab.