|
|
Verification - Validating the AlarmThis Help File Page was issued on 09/30/2017 This Help File Page was last Modified on 09/30/2024 |


|
|
Verification - Validating the AlarmThis Help File Page was issued on 09/30/2017 This Help File Page was last Modified on 09/30/2024 |
 Scroll to Top of Page
 Print Topic
 Email Feedback
 Show/Hide Expanders
❖The Incoming Alarm Signal Alert is presented to all available and qualified Operators, the first one who Clicks OK (see Signal Pending alert illustration immediately below) will actually have that signal presented on their Processing Screen.
•This functionality prevents an incoming signal from "sitting" on the screen at a Workstation where the Operator has stepped away momentarily.
Verification - The CSID Zone (or Panel Zone) for each Signal contains instructions as to whether or not this Alarm Signal or Supervised Event should be Verified.
•Verify - The process of having an Operator Telephone the Subscriber's Premises immediately after receiving an Alarm Signal or Supervised Event to determine if it was accidental, unintended, had already been resolved, or for some other reason, there is no further action required by the Operator; or that they need help immediately.
✓To activate the Automatic Dialing feature, the Modem(s) installed in each Workstation that will be Processing Alarm Signals must be defined in the Personal Options tab on the User Options Form.
•Confirm this Configuration within MKMSCS.
✓Define the available Modem(s) within MKMSCS by Selecting the Actions Tool Bar menu and then Click the Configuration button's down arrow.
✓The MKMSCS Central Station Monitoring Module can automatically Dial telephone numbers for Subscribers, Emergency Response numbers, and Contacts (People to Call).
✓This feature is called Automatic Dialing.
✓The computer's Modem used by the Operator for Automatic Dialing must be connected to a telephone line.
•Ensure that Modem has also been defined on the User Option Form's Personal Options tab.
✓If a Verification is required, the Verification dialog is presented automatically (see below) with up to three (3) buttons (the number of buttons is based on the how many contact telephone numbers were defined for this Subscriber in their Subscriber Information section).
✓If Dialing is automatic, the Operator doesn't have to Click Call Primary (or Alternate 1 or 2 options, if available and as needed) to contact the Subscriber), they just Press the <Space Bar>.
❑The normal Processing of an Alarm Signal generally starts with the Verification procedure.
•When an Alarm Signal is received the Operator must acknowledge it by Clicking on the OK button, Pressing the <Space Bar>, or by Pressing the 8 Enter key.
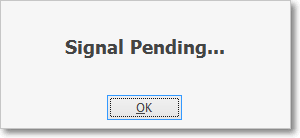
Signal Pending alert
•Then, the Alarm Signal will be displayed on a Signal Processing Form.
✓In certain cases, additional messages may be displayed such as alerting the Operator that there have been other, recent Signals received from this Premises.
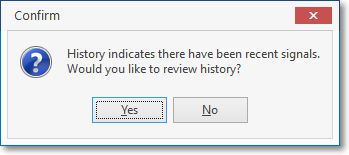
Answer Yes to have the Signal History Form displayed
•Alarm Verification - Most Alarm Signals are Verified prior to initiating a Dispatch.
➢Note - Generally you Do Not Verify Silent Alarms, Panic Alarms, and any other signal that needs to be handled discretely prior to Dispatching.
✓Operator Guided Response - If Verification is required, the Verification dialog will be displayed automatically.
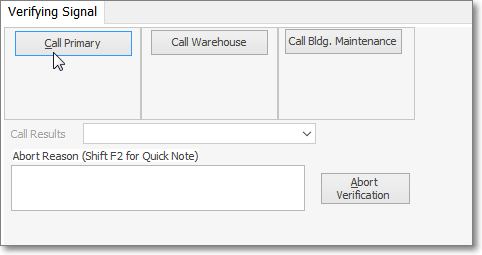
Operator Guided Response - Verification required - Call Primary option
▪Call Primary - Select the Call Primary option to Dial the appropriate telephone number.
oIf Dialing is automatic, the Operator doesn't have to Click Call Primary (or Alternate 1 or 2 options, if available and as needed, to contact the Subscriber), she/he may just Press the <Space Bar>.
oThe Password that allows the Account to validate themselves (and the Duress signal as well) is displayed on the Info box on the Signal Processing screen.
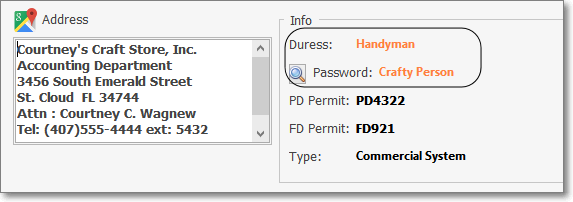
Signal Processing - Info box - Duress & Password fields
▪Complete - When this Verification Call is finished, Select the Complete option
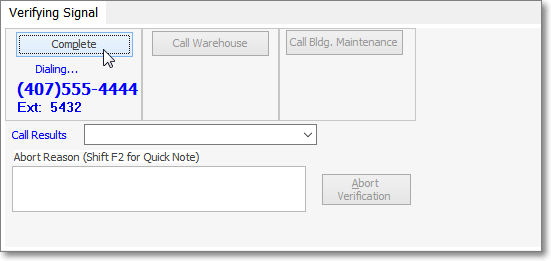
Operator Guided Response - Verification dialog - Complete option
▪Call Results - Use the Drop Down Selection List provided to Choose the appropriate Verification Response Code.
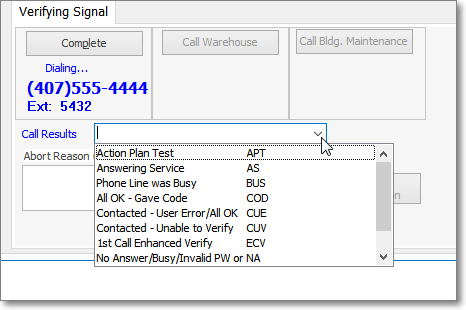
Call Result is chosen from predefined Verification Response Codes
▪Next - Based on the selected Verification Response Code, the Operator Guided Response will present to the Operator the appropriate next step.
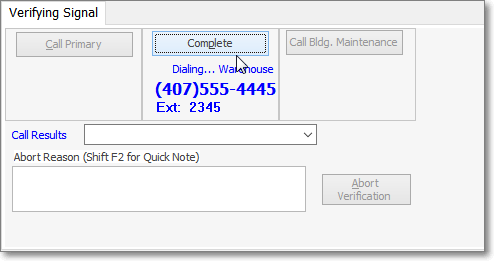
Operator Guided Response - Verification required - Call Alternate option
▪Call Alternate Number - If Alternate Telephone Number(s) have been entered for this Premises and an additional contact is required to reach this Premise,
oSelect the Call Alternate option to Dial the next available telephone number
▪Up to three contact numbers - each of which may be assigned a specific Name - may be entered for each Subscriber (see below) in the Contact Information section in the Edit View of the Subscribers Form.
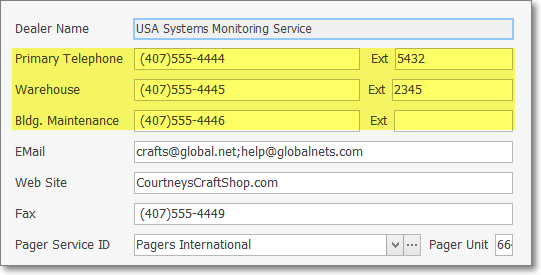
Subscribers Form - Edit View - Subscriber tab - Contact Information
▪Call Results - Use the Drop Down Selection List provided to Choose the appropriate Verification Response Code.
▪Next - Based on the selected Verification Response Code, the Operator Guided Response will present to the Operator the appropriate next step.
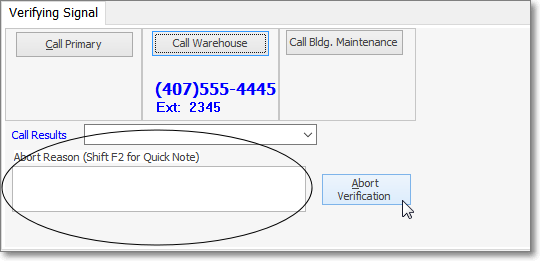
▪Abort Verification - If the Verification process needs to be stopped,
oComplete - Select the Complete option
oAbort Reason - Enter the reason for abandoning the Verification process.
oSelect the Abort Verification option.

Signal Processing Form - Contacts tab and Quick Dialing Icons
oThe Operator Guided Response will display the Contacts, Notes and Signal Options tabs for the Operator which also includes the Quick Dialing Icons.
▪Notes tab - A Note, if appropriate, the Operator may enter notes or comments in the box provided.
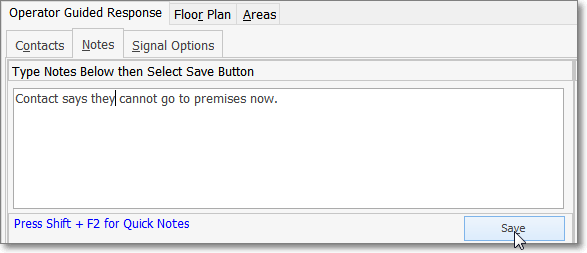
oPressing Shift+F2 when inside the Notes field in the MKMSCS Signal Processing mode, enables the Selection of an appropriate predefined Quick Note from the Drop-Down Selection List that is presented.
oMore than one Quick Note may be used in the same Notes field.
oManually entered Notes may also be added at that time, or used instead of any predefined Quick Notes.
oAfter the Note is entered, Click the Save button to indicate that the Note has been completed.
oThese Quick Notes, and any manual additions, are inserted into the Subscriber's Alarm History for the Alarm Signal or Event currently being processed.
▪If the Copy Operator Notes ("CopyOperatorNotes") option is set to True in Company Settings, the Copy Operator Notes From History button will be available at the bottom of the Notes tab

Guided Operator Response - Notes tab - Copy Operator Notes From History button
oWhen selected, a Signal History dialog for this Account will be presented
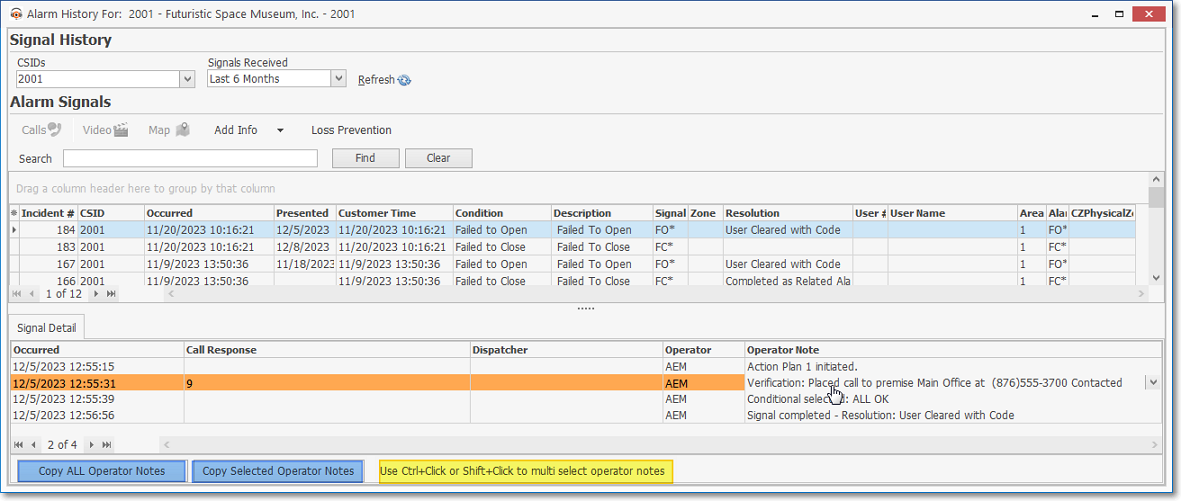
Signal History dialog with Copy Notes options
oThe Operator may locate the appropriate Signal, then Select the appropriate Signal Detail item, then:
i.Copy All Operator Notes and/or
ii.Copy Selected Operator Notes and/or
iii.Use Ctrl+Click or Shift+Click to multi-select operator notes
oOnce the desired Note(s) are selected, those note(s) will immediately be inserted into the Notes tab
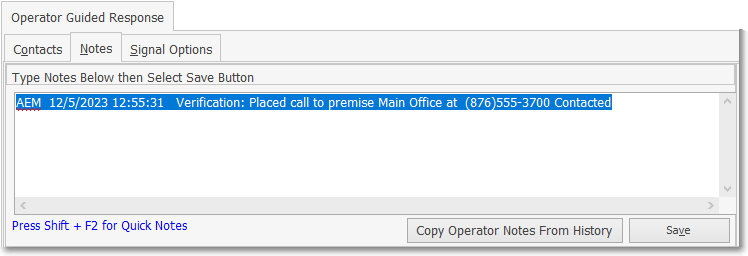
Guided Operator Response - Notes tab - Notes inserted from Signal History
•Alarm Verification - Action Plan
✓If the Action Plans Action Steps required that this Alarm Signal be Verified, the Verification dialog will be displayed automatically:
▪The instructions for this Action Step are presented just above the Comments box (see the red circled section in the illustration below).
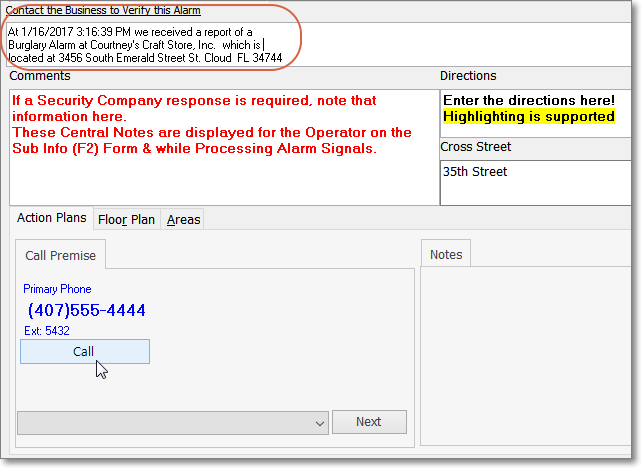
Action Plans tab - Verification dialog
▪The Action Plans tab is displayed
▪Call Primary - Select the Call Premises option to Dial the appropriate telephone number.
oIf Dialing is automatic, the Operator doesn't have to Click Call Primary (or Alternate 1 or 2 options, if available and as needed, to contact the Subscriber), she/he may just Press the <Space Bar>.
oThe Password that allows the Account to validate themselves (and the Duress signal as well) is displayed on the Info box on the Signal Processing screen.
✓
Signal Processing - Info box - Duress & Password fields
▪Call Results - Use the Drop Down Selection List provided to Choose the appropriate Verification Response Code.
Call Result is chosen from predefined Verification Response Codes
▪Note - A Note, if appropriate, may be entered in the box provided.
oPressing Shift+F2 when inside the Notes field in the MKMSCS Signal Processing mode, enables the Selection of an appropriate predefined Quick Note from the Drop-Down Selection List that is presented.
oMore than one Quick Note may be used in the same Notes field.
oManually entered Notes may also be added at that time, or used instead of any predefined Quick Notes.
oAfter the Note is entered, Click the Save button to indicate that the Note has been completed.
oThese Quick Notes, and any manual additions, are inserted into the Subscriber's Alarm History for the Alarm Signal or Event currently being processed.
❖Also see Copy Operator Notes above
▪Next - Click the Next button and the Action Plan will present to the Operator the appropriate next step.
❑What's Next?
•As a result of the attempted Verification, whether following an Operator Guided Response or an Action Plan, the appropriate next step will be presented automatically based on the rules entered for the Selected Verification Response that were established in the Verification Response Form and/or the assigned Action Plan for this Alarm Signal. These may include one or more of the steps (as well as other) that are listed below:
1.If the Verification Response, or Action Plan indicates that this event has been resolved, the Signal Options tab will be displayed for the Operator to Complete the Alarm Processing for this event.
2.If the Verification Response, or Action Plan requires the Operator to make a Note, the Note box will appear automatically (see the "Entering a Note about this Verification" instructions above).
3.If the Verification Response, or Action Plan requires the Operator to perform a Dispatch procedure, the Dispatch dialog will appear automatically.
4.Also see Before Dispatch and/or After Dispatch Contact List for that information
•In most cases, if this Verification was unsuccessful, or there was simply no response at the Premises, a Dispatch will be performed, when it is required based on any combination of one or more of these:
1.The Operator Guided Response requires it, or
2.It was the next step in the assigned Action Plan, or
3.The CSID Zone (or Panel Zone) represent the Signal requires it, and/or
4.The selected Verification Response for this Alarm Signal requires it.
•Typically, unless Verified OK, the next step is to Dispatch.
❑Converting to Manual Mode - Manual Mode allows the Operator to switch to the Operator Guided Response user interface.
•If the Operator needs to exit from an Action Plan, Press Ctrl+Shift+M.
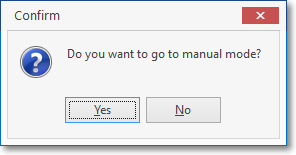
•Click the Yes button to Confirm the switch to Manual Mode.
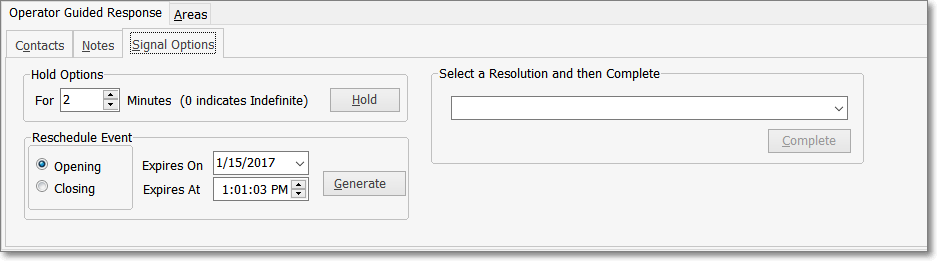
Operator Guided Response view with Signal Options tab activated
•The Action Plan user interface will be converted to the generic Operator Guided Response view with the Signal Options tab selected.
✓Normally, while an Operator is Processing an Alarm, and the processing of that Signal is being guided by an Action Plan, and she/he must put that Signal On Hold, when that Signal is retrieved from the Alarm Stack for further processing, it will revert to the Operator Guided Response processing methodology.
✓The Contacts, Notes, History, Temp Notes and/or Signal Options tabs may now be accessed, as needed.
•However, when (if) the Signal is Placed on Hold, if the RestartActionPlanFromOnHold option in the Company Setting tab on the Users Options Form is set to True ("T"), the processing guidance will revert to the beginning step defined in that Action Plan.