|
|
Sub Info (F2)This Help File Page was issued on 09/30/2017 This Help File Page was last Modified on 10/12/2024 |


|
|
Sub Info (F2)This Help File Page was issued on 09/30/2017 This Help File Page was last Modified on 10/12/2024 |
 Scroll to Top of Page
 Print Topic
 Email Feedback
 Show/Hide Expanders
❑Operators often need access to Subscriber Information and the Subscriber Information Form the the one-stop place to find it.
•Whether to look-up premises contact information, or CSID Zones, People To Call, Alarm History, etc. - she/he is constantly in need of looking up, or verifying some type of Subscriber Information.

•The Subscriber Information Form - Accessed by pressing F2, or by selecting the Sub Info Icon on the Shortcuts tab of the MKMSCS Desktop of the Central Station Monitoring Application - makes available every piece of Central Station Monitoring module related data entered for any Subscriber.

Subscriber Information Form in the Central Station Processing Application
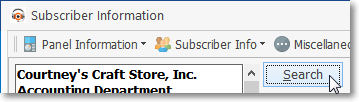
•Click the Search Icon to open the Search dialog (see the Using the Search dialog chapter for more information) to locate the required Subscriber.
➢Note: If the Operator Presses F2 while Processing an Alarm Signal, the Subscriber record will be provided for the premises currently displayed on the Signal Processing Form.
•The six (6) Icons at the top of the Subscriber Information (Sub Info) Form provide access to:
![]()
1.Panel Information - The Panel Information Icon offers five (5) Menu options (To view these options, Click its small Down-Arrow) which provide immediate access to one of the selected information types for the currently selected Subscriber.
2.Subscriber Information - The Subscriber Information Icon offers three (3) Menu options (To view these options, Click its small Down-Arrow) which provide immediate access to Medical information, Temp Notes, or the Work Order Forms.
3.Miscellaneous - The Miscellaneous Icon offers two (2) Menu options (To view these options, Click its small Down-Arrow) which provide immediate access to the Loss Prevention dialog, and/or the Unverified Zones dialog.
4.Signal History - This displays the Signal History dialog for the currently selected Subscriber's CSID.
5.Verify Passwords - Provides a quick and easy method for the Operator to confirm the Password (i.e. Pass code) - provided verbally by a contacted individual - is valid.
6.Notes - This opens the Customer Note dialog for the currently selected Subscriber
❑An Overview of the Subscriber Information Form:
•Subscriber's Premises & Warranty Information - This box shows the Subscriber Name, Address, the primary Contact's Name, and the premises Telephone Numbers and Extensions and the current Warranty Info (i.e., Contract Type, Warranty Status [Not In Warranty, In Warranty], and the Warranty Ends date) for this Account.
✓Drag the Right-Hand Slide Bar down to view additional information (see the "hand" Icon in the illustration below).

Subscriber's Premises Information
•CSID Information - Subscribers may have more than one CSID defined in the Subscriber Panels section of the Monitoring Tab within the Edit View of the Subscribers Form.
✓CSID - The Primary CSID is shown in the CSID field (see the the Subscriber Panels section chapter for more information).

Sub Info Form - CSID field - Subscriber Information Box
✓Click the Down Arrow on the right of the CSID field to view the CSID Information Box (shown below) which displays the the CSIDs that are active for the selected Subscriber.
•Sub ID - This is the internal record number for the currently displayed Subscriber.
•Alarm Group - This is the Alarm Processing Group to which this Subscriber has been assigned.
•Central Station Information - This section displays the following data:

Subscriber Information Form - Central Station Information section
➢Note: The fields in the list below marked with a red star («) have a Look Up Button ![]() (see Look Up Buttons below) available to display additional detail when Clicked.
(see Look Up Buttons below) available to display additional detail when Clicked.
✓Password - This is the Password entered in the Central Station Data section (of the Monitoring Tab within the Edit View of the Subscribers Form).
✓Duress - This is the Duress password entered in the Central Station Data section
✓PD Permit # - This is the governing municipality Police Department's Permits Number entered in the Central Station Data section
✓FD Permit # - This is the governing municipality Fire Department's Permits Number entered in the Central Station Data section
✓Acct. Type - This is the Account Type assigned in the Central Station Data section.
✓Floor Plan - If the Floor Plan Icon ![]() is displayed to the right of the field name
is displayed to the right of the field name
▪Click the Icon to view the Floor Plan Image entered in the Areas tab in the Subscriber Panels section of the Monitoring Tab within the Edit View of the Subscribers Form.
✓Panel « - This ![]() displays the Panel and related information as identified in the Subscriber Panels section of the Monitoring Tab within the Edit View of the Subscribers Form
displays the Panel and related information as identified in the Subscriber Panels section of the Monitoring Tab within the Edit View of the Subscribers Form
▪Click the Look Up Button to display the two available Look Up Options:

1.Panel Instructions - Displays the Instructions entered in the Installed Equipment Codes Form for this Subscriber's Control Panel.

Panel field - Panel Look Up Icon - Panel Information displayed
2.Panel Documents - Opens the Documents dialog from which the Operator may select the required document from those previously entered in the Installed Equipment Codes Form for this Subscriber's Control Panel.

Panel Instructions document list
✓Dealer « - If applicable, this ![]() displays their Dealer information if one was assigned in the Central Station Data section of the Monitoring Tab within the Edit View of the Subscribers Form.
displays their Dealer information if one was assigned in the Central Station Data section of the Monitoring Tab within the Edit View of the Subscribers Form.

Dealer field - Dealer Look Up Icon - Dealers Information displayed
✓Town Code « - This ![]() displays the Town Code information if one was assigned in the Central Station Data section of the Monitoring Tab within the Edit View of the Subscribers Form.
displays the Town Code information if one was assigned in the Central Station Data section of the Monitoring Tab within the Edit View of the Subscribers Form.

Town Code field - Town Code Look Up Icon - Town Code Information displayed
✓Date On Line - This is the Date On Line entered in the Subscriber Monitoring Data Form for this Subscriber.
✓Date Off Line - If the Subscriber has a Date Off Line entered in the Central Station Data Form that is earlier than Tomorrow, that Date will be will be flashing in this field.
✓Comm. Format « - This ![]() displays the default, predefined Panel Zones of the Communicator Format identified for this CSID in the Subscriber Panels section of the Monitoring Tab within the Edit View of the Subscribers Form (also see the CSID Zones chapter for how to access that information for this CSID).
displays the default, predefined Panel Zones of the Communicator Format identified for this CSID in the Subscriber Panels section of the Monitoring Tab within the Edit View of the Subscribers Form (also see the CSID Zones chapter for how to access that information for this CSID).

Comm Format field - Panel Zones Look Up Icon
Panels Zones for assigned Communicator Format displayed
✓UL Grade - If applicable, based on the UL® Grade level of this installation (identified in the Central Station Data section of the Monitoring Tab within the Edit View of the Subscribers Form.), the UL® Description (full classification name) will be displayed.
✓Keys Held? - If applicable, when Checked, it indicates that your Company Has the Keys for this premises.
✓Has Sounder ? - When Checked, it indicates that there is an Audible Alarm at the premises.
✓Security Co.« - If applicable, this ![]() displays the Security Company information identified in the Subscriber Monitoring Data Form for this Subscriber.
displays the Security Company information identified in the Subscriber Monitoring Data Form for this Subscriber.

Security Co field - Security Co. Look Up Icon - Security Co. Information displayed
✓Specialized Notes:

Specialized Notes: Directions Comments Test Notes
▪Directions - These are the Directions entered Service Info section of the Subscriber tab within the Edit View of the Subscribers Form.
▪Comments - These are the Comments entered in the Central Station Data section of the Monitoring Tab within the Edit View of the Subscribers Form.
▪Test Notes - These are the Test Notes entered in the Central Station Data section of the Monitoring Tab within the Edit View of the Subscribers Form.
•Call List - This Call List section on the Subscriber Info (F2) Form contains three tabs and an information area for the selected Contact.

Call List section has three tabs: General, Alternate and Dealer; and displays the Full Information on the selected Contact
❖See the following chapters for additional information:
1.Call List section - This section on the Sub Info (F2) Form provides access to all of the contact information defined for this Subscriber.
2.Panel Information Icon - The Panel Information Icon offers five (5) options that provide immediate access to that selected information for the currently selected Subscriber.
3.Subscriber Information Icon - The Subscriber InformationIcon offers three (3) options that provide immediate access to Medical information, Temp Notes and the Work Order form.
4.Miscellaneous Icon - The Miscellaneous Icon offers two (2) options that provide immediate access to the Unverified Zones dialog.