❑Assigning a Task to a specific Employee as a Task Appointment.
•The Tasks displayed in the Task List section of the Employee Calendar Form are restricted to those Tasks which:
✓Have not been Completed,
✓Were originally entered by the Current User,
✓Have not yet been assigned to an Employee as a Task Appointment.
•Therefore, any Task displayed in the Task List should, as soon as possible, be assigned to the Employee who will be responsible for accomplishing that Task.
✓By doing so, when viewing the Employee Calendar, because Task Appointment has been created, without having to Click the Task tab it is immediately apparent which Tasks are outstanding, unassigned, and/or need the attention of an Employee.
❑Assigning an Unassigned Task in the Task List:
•To assign a Task - displayed on the Task List - to an Employee, use the Task Appointment Editor as follows:
a.Select the Day View tab on the Employee Calendar Form.
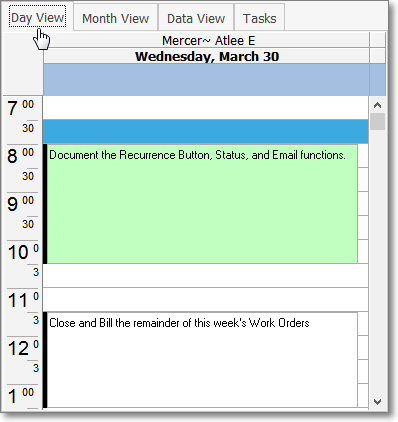
Employee Calendar - Day View
b.using the Visible Schedules Form, ensure that the Employee, to whom this Task is to be assigned, is displayed.
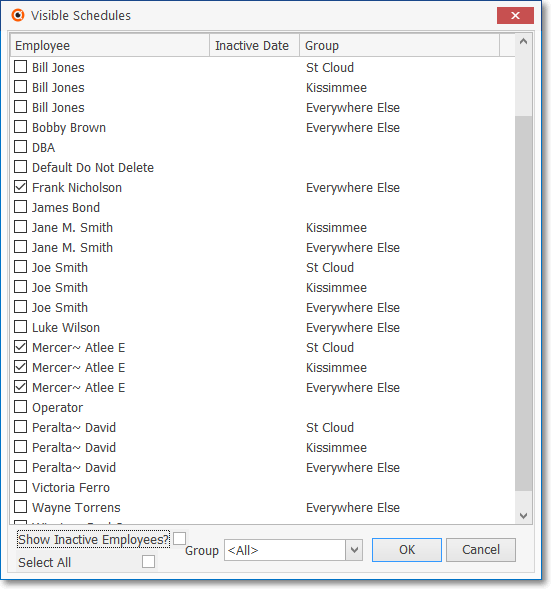
Visible Schedules dialog
c.Within the Task List Drag & Drop the Task that needs to be scheduled to the appropriate Time Slot on the Day View of the Employee Calendar
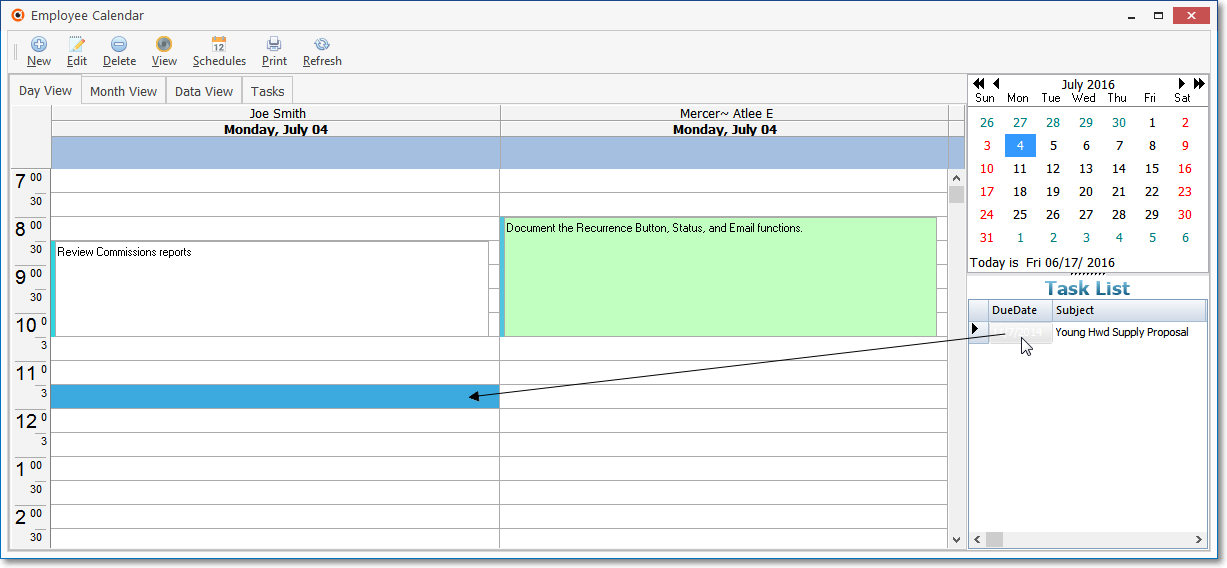
Employee Calendar - Task List - Task to be moved to Schedule
i.Click on the Task to be assigned to an Employee.
ii.Drag & Drop the appropriate Task item to the appropriate Date & Time location for that Employee
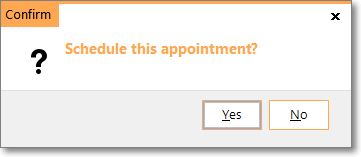
▪Following a Confirmation question, the Task Appointment Editor will open automatically.
i.The Task Appointment Editor Form, with Appointment and Task tabs, will be displayed.
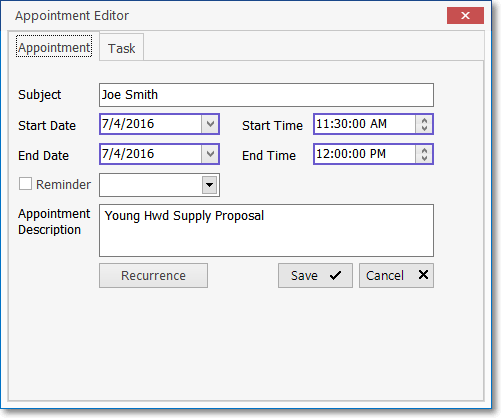
Appointment Editor - Appointment tab - New Task being Scheduled
ii.The Start Date, End Date, Start Time, End Time, the selected Employee's Name (Subject), and Appointment Description of the Task will be filled in automatically.
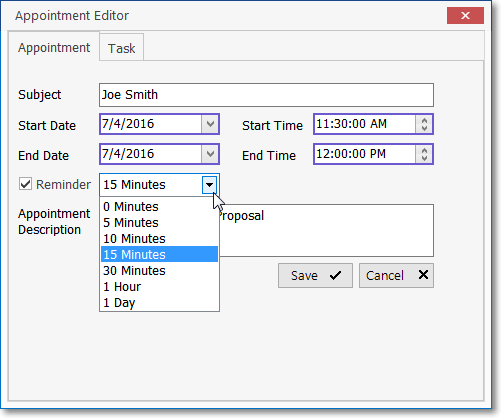
iii.Reminder - Check this box to have an Appointment Reminder displayed when this Task is due to be started.
▪Use the Drop-Down Selection List to Choose a appointment reminder time of either 0 minutes, or 5 minutes, 10 minutes, 15 minutes, 30 minutes, 1 hour or 1 day, as appropriate.
iv.Click the Save button on the Appointment Editor Form to record this Appointment.
▪That Appointment Reminder will appear at the time of the appointment (or the Reminder Time set for 5 minutes, 10 minutes, 15 minutes, 30 minutes, 1 hour, or 1 day prior to it) as defined.

Sample of the Appointment Reminder message
d.Select and Edit the information using the Task dialog from the Task tab on the Appointment Editor Form with whatever additional information is required.
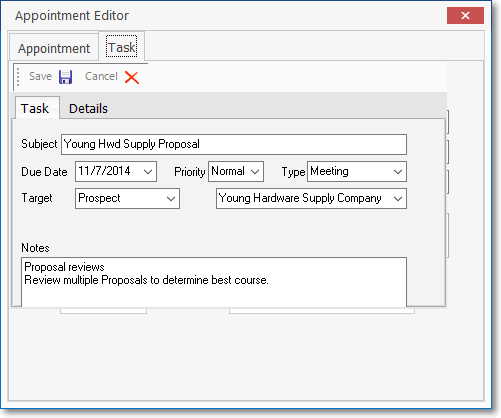
Task tab for assigning a Task to an Employee
i.Subject - The Name for, or concise description of, this Task.
ii.Due Date - By default, this will be Today, but may be modified, as required.
iii.Priority - By default, the Priority will be set to Normal, but may be changed, if required.
iv.Type - Use the Drop-Down Selection List to Choose a Reminder Type for this Task.
v.Target - Use the Drop-Down Selection List to Choose the "target" of this Task (a Prospect, Subscriber, or Vendor).
vi.Selection - Once the "Target" type has been Chosen, use the Drop-Down Selection List to Choose the appropriate person or Company.
vii.Notes - A detailed description of the Task's with parameters, schedules, interim steps, etc. to explain this Task.
viii.Click the Save button < above the Task tab to record this information.
➢Note: See "Entering a New Task" in the Task tab & Task List chapter for more information.
e.Select and Edit the information in the Details sub-tab (next to the Task sub-tab) on the Task tab of the Appointment Editor Form, or Double-Click on a Task listed in the Task tab, when you need to identify when and how this Task was Completed
oIn either case, the Details tab will be accessible as illustrated below:
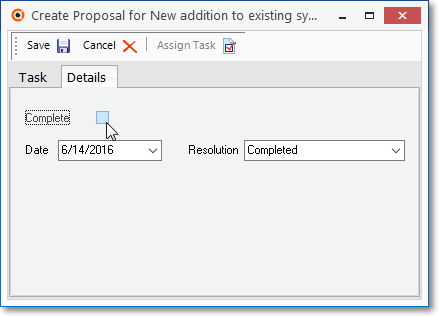
Details tab opened from the Tasks tab in the Appointment Editor
i.Complete - Check this box when the Task has been completed.
ii.Date - Use the Drop-Down Calendar/Date Entry field to Choose the appropriate Date for the completion of this Task.
iii.Resolution - Use the Drop-Down Selection List to Choose the appropriate Reminder Resolution code that best represents the completion of this Task.
iv.Click the Save button < to record this information.