❑Telephone Calls made to, and received from, Subscribers and Prospects should be documented - in real-time - using the Calls Form.
•The Calls Form allows any User to enter the time, date, comments and results of an Account related Telephone Call - both Incoming and Outgoing.
•As part of the documentation process, the Call's Source or Purpose is identified.
•Some examples of a Call Source are:
a.Collections - Call made to further a Collections effort.
b.Customer Service Call - Call made to enhance Customer Service.
c.PBX Dealer - Call to or from a Dealer via your Company's PBX system
d.PBX Employee - Call to or from an Employee via your Company's PBX system
e.PBX Prospect - Call to or from a Prospect via your Company's PBX system
f.PBX Subscriber - Call to or from a Subscriber via your Company's PBX system
g.PBX Vendor - Call to or from a Vendor via your Company's PBX system
h.Proposal follow up Call - Call made to forward the Sales Process.
i.Sales Call - Call made to close a Sale.
j.Service Call - Call made to create or confirm a Service Call.
k.Service follow up Call - Call made to confirm the Quality of the Service that was performed.
l.Vendor Communication - Call to or from a Vendor
▪Any number of other Call Sources may be defined.
•Entering Call Sources
a)From the Backstage Menu System Select Maintenance and Choose General and Click the General Maintenance option which displays the Maintenance Menu, or
b)From the Quick Access Menu, Select Maintenance and Choose General Maintenance to display the Maintenance Menu.
✓Once the Maintenance Menu is displayed, Select Miscellaneous and Choose Call Sources.
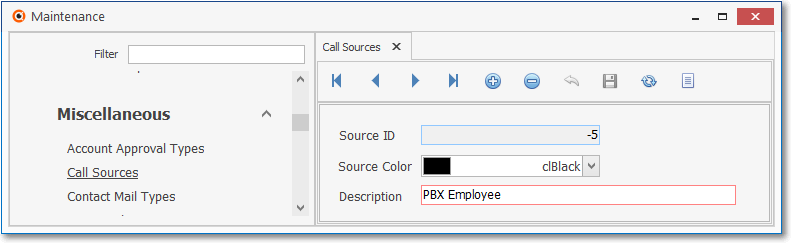
Call Sources Form
✓This Call Sources Form may be Re-sized by Dragging the Top and/or Bottom up or down, and/or the Right side in or out.
•Navigation Menu - The Navigation Menu is located at the top of the Call Sources Form.

✓This Navigation Menu provides the normal Record Movement, plus Add, Delete, Cancel, Save, Refresh, and List options.
•Record Editing View - The details of the currently selected record are displayed below the Navigation Menu at the center (Main Body) of the Call Sources Form.
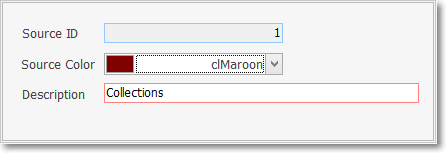
Call Sources Form - Record Editing View
•To define the Call Sources which will be used to identify the reason/purpose of a Call:
✓Click the Add ![]() Icon to start the Call Source entry in the Record Editing View.
Icon to start the Call Source entry in the Record Editing View.
✓Source ID - This is the system assigned record number which is inserted automatically when the record is initially saved.
✓Source Color - Use the Drop-Down Selection List to Choose the color for this Call Source.
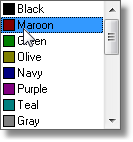
Source Colors
▪Why Pick a Source Color?
oAs stated above, each Telephone Call documented in the Calls Form is assigned a Call Source.
oWhen the Calls history is displayed, the text describing the purpose of the call (in a column named Source) is displayed in the color that is defined here.
oThe actual list is quite long, offering dozens of color choices.
✓Description - Enter a Description of this Call Source.
▪The Description may up to 254 characters in length and include upper and/or lower case letters, numbers, spaces and normally used punctuation marks.
✓Click the Save ![]() Icon to record this entry.
Icon to record this entry.
▪The system will assign an ID.
▪Any number of additional Call Sources may be defined.
![]() List Icon - The Navigation Menu also has a List option which provides a tabular view of these Call Source records.
List Icon - The Navigation Menu also has a List option which provides a tabular view of these Call Source records.
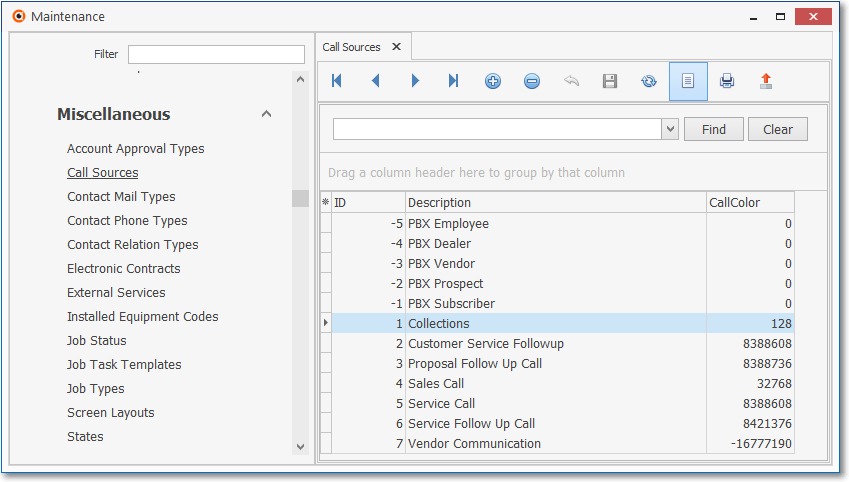
Call Sources Form - List View
✓The columns of listed Grid Data may be rearranged, filtered, sorted, and exported as a PDF file and/or an Excel formatted file.

✓Find - Enter text to search for a specific record, then Click the Find option.
✓Clear - To remove the text to search for entry, Click the Clear option

Navigation Menu shown with the Icons for List, Export and Print
![]() List Icon - Click the List Icon again to Close the List View and return to the Record Editing View.
List Icon - Click the List Icon again to Close the List View and return to the Record Editing View.
![]() Export Icon - Click the Export Icon to create (one of there types of) a spreadsheet compatible file containing the Grid Data as it is currently organized and filtered.
Export Icon - Click the Export Icon to create (one of there types of) a spreadsheet compatible file containing the Grid Data as it is currently organized and filtered.
![]() Print - Click the Print Icon to display the Print Preview Form from which a custom report may be designed and "printed" as an Adobe® PDF File.
Print - Click the Print Icon to display the Print Preview Form from which a custom report may be designed and "printed" as an Adobe® PDF File.
❖See the Grids - Print Preview - Export Data chapter for complete information on using the List View, including its Export & Print options.