|
|
Bills - Understanding the Bills FormThis Help File Page was last Modified on 10/06/2023 |


|
|
Bills - Understanding the Bills FormThis Help File Page was last Modified on 10/06/2023 |
 Scroll to Top of Page
 Print Topic
 Email Feedback
 Show/Hide Expanders
❑A Bill arrives from one of your company's Vendors.
•What do you do with their Invoice?
✓Examine the Bill for accuracy.
✓Enter the Bill into the Accounts Payable System.
a.If this Invoice fulfills a Purchase Order, use the Bill It button on the Purchase Order Form to automatically create the Bill within the Accounts Payable System.
b.If those Purchases (also see the Defining Inventory & Job Costing Items chapter for complete information on defining Inventory Items) on a Bill were not ordered from a Vendor using a Purchase Order, then you must manually create a Bill record and assign a Purchase Category code to each Detail Line Item on that Bill.
•To access a Bills Form:
1.Open the Vendors Form
2.Use the F2 Vendors Search option to locate the appropriate Vendor record.
3.Click the Bills option on the Vendor Options Menu to open the Bills Form.
•The Bills Form will be displayed.
Understanding the Bills Form:
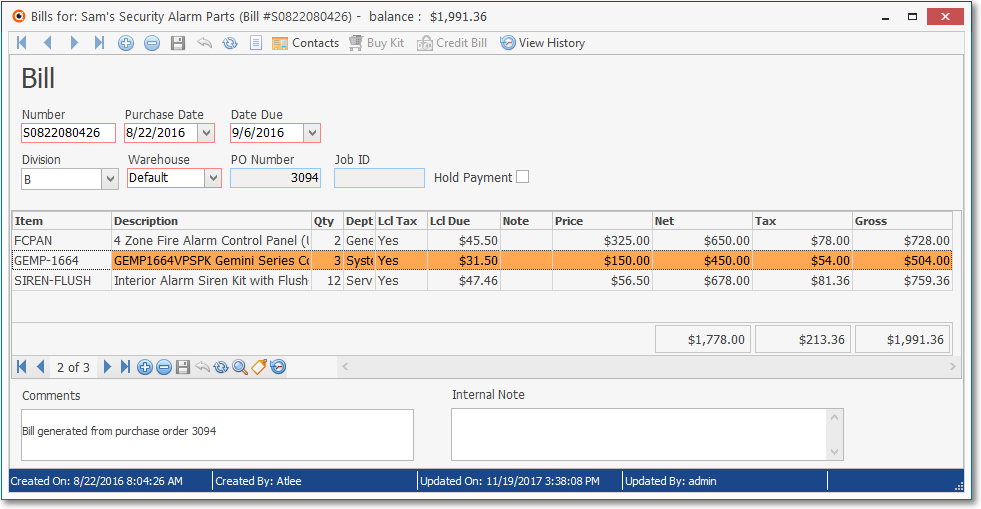
Bills Form - with 3 Detail Line Items
❑The Sections of the Bills Form:
•The Bills Form (an example is shown above) uses a "many Sections within One Form" format.
a.The Top Border with Vendor and Balance Information
![]()
b.The Ribbon Menu (see "The Ribbon Menu" information below)
![]()
c.The Header information
➢Note: The Divisions Form allows a Company to identify a Default Warehouse for that Division
Thereafter, when Bills and/or Purchase Orders are created for a Vendor who was assigned to a Division (a Division assignment to a Vendor is optional), by default, any Inventory related Transaction posted to one of those Bill and/or Purchase Order documents will automatically be assigned to that Warehouse but that Default Warehouse assignment may be changed as needed.
d.The Body with Detail Lines Items, Column Totals, and its own Ribbon Menu
e.The Footer with Comments and Internal Notes

•The Ribbon Menu - The Bills Form's Navigation and Actions Ribbon Menu Sections - at the very top of the Bills Form - display various Icons, but exactly which Icons will be displayed is based on the content and/or status of the currently displayed Bill record.
![]()
Bills Form - Ribbon Menu - Navigation, and Actions Sections
✓Not all Action Icons will appear on all Bills.
![]()
Bills Form - Actions Icons
▪Only those Icons which are needed, or may be needed based on what was Billed, will be displayed.
✓See the "Navigation Icons on the Bills Form's Ribbon Menu" information below.
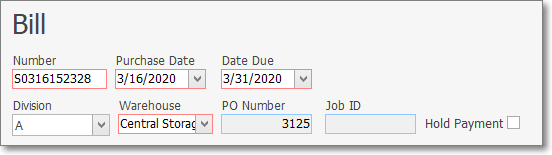
•Header Section - Below the Bills Tab's Ribbon Menu Sections is the Bills Header Section which includes:
✓Title Bar (e.g., Bill, Credit Note, Past Due)
✓General Information about this Bill (e.g., Vendor's Invoice Number, Purchase and Due Dates, Special messages).
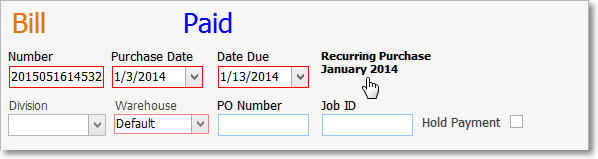
➢Note: Special messages - If this is an automatically billed Recurring Purchases Bill, a special message will be displayed on the right side of the Header Section identifying the Bill as a Recurring Purchase Invoice and identifying the Month and Year for which this Recurring Purchase was billed.
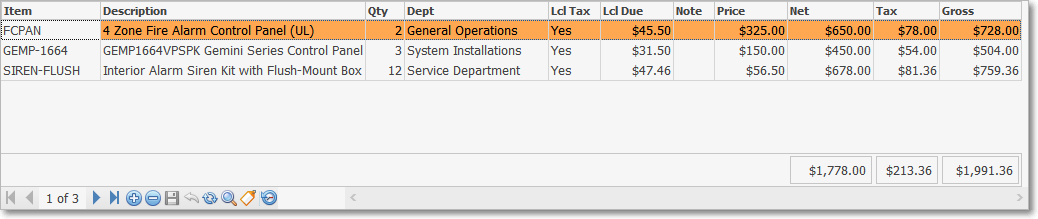
✓Body - The center of the Bills Form beneath the Header Section may have any number of Detail Line Items as needed (a sample of which is shown below) to itemize exactly what was purchased (e.g., Parts, Labor, Sub Contractor charges, Services), various Column Totals, along with its own type of Ribbon Menu
Bills Form - Detail Line Items with ColumnTotals
✓Footer - The bottom of the Invoice Form - referred to as the Bill Footer - shows various Column Totals and provides a Comments and Internal Note field, and the Status line (each are explained within the Bill Footer section of the Bills - Entering a Purchase chapter).
Bills Form - Bill Footer with Comments & Internal Notes
❑Navigation and Actions Icons on the Bills Form's Ribbon Menu:
![]()
Bills Form - Ribbon Menu - Navigation, and Actions Sections
•Navigation Icons (in addition to the Record Movement options):
![]() Click the Insert Icon to clear the fields in the Record Editing section in preparation for adding information to a new record.
Click the Insert Icon to clear the fields in the Record Editing section in preparation for adding information to a new record.
![]() Click the Delete Icon to remove the current record (or identify it as a Deleted record if it has already been used in the system)
Click the Delete Icon to remove the current record (or identify it as a Deleted record if it has already been used in the system)
![]() Click the Save Icon to record any modifications (or a new record entry) displayed in the Record Editing View.
Click the Save Icon to record any modifications (or a new record entry) displayed in the Record Editing View.
✓Keyboard Command = Ctrl+S
![]() Click the Cancel Icon to abandon any new or modified information that is displayed in the Record Editing section but has not yet been saved.
Click the Cancel Icon to abandon any new or modified information that is displayed in the Record Editing section but has not yet been saved.
![]() Click the Refresh Icon to update the Selected record with the most recently entered data (this assures the current User - working on a Network - is editing the most up to date version available for this record).
Click the Refresh Icon to update the Selected record with the most recently entered data (this assures the current User - working on a Network - is editing the most up to date version available for this record).
![]() Click on the List Icon to view a a tabular (spreadsheet style) view of the Bills previously entered from this Vendor.
Click on the List Icon to view a a tabular (spreadsheet style) view of the Bills previously entered from this Vendor.
•Actions Icons
✓Not all Icons appear on all Bills Forms.
✓Certain Icons will only appear when appropriate, based on the source, content and/or payment status of the Selected Bill.
![]()
Bills Form - Actions Icons
❑Contacts - As appropriate, enter Contact information for any individual who your Company may need to communicate with regarding this Bill.

•Contacts - Click this Contacts option to open the Contacts Form to identify anyone who should be associated with this Bill.
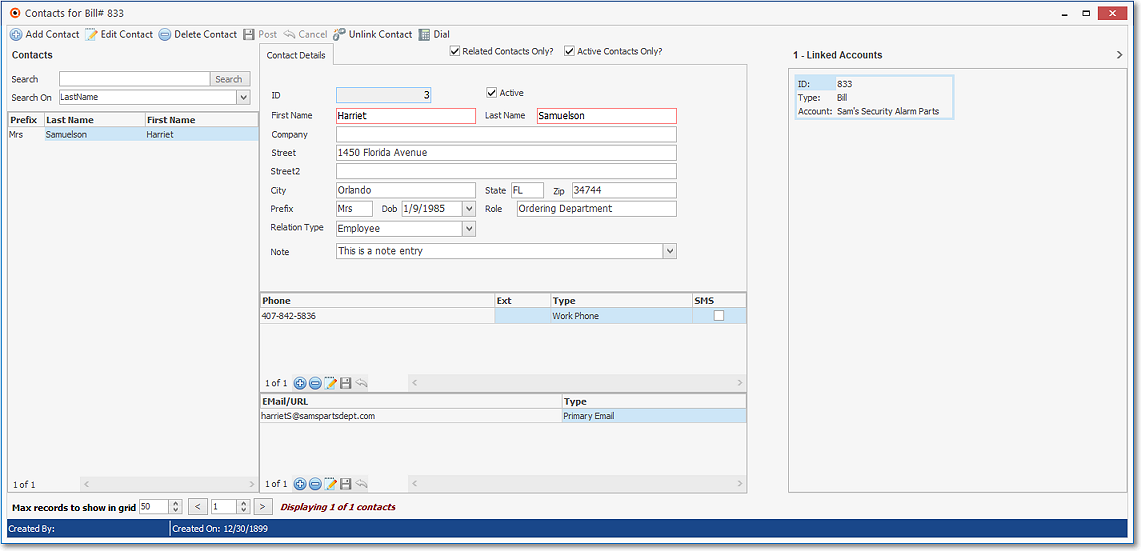
Contacts Form associated with a specific Bill
•Buy Kit - Order all of the predefined the Inventory Items which were identified as a Kit in the Purchase Items Form.
✓Click the Buy Kit Icon

▪Kit - Using the Drop-Down Selection List provided, Choose the required Kit code.
▪Quantity - Enter the Number of Kits that are needed.
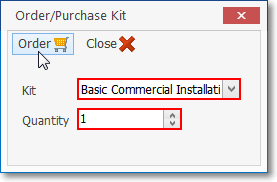
Order/Purchase Kit dialog
▪Order - Click the Order button.
•Credit Bill - Opens the Create Credit Memo dialog from which a Credit Memo may be instantly created for the currently selected Bill.
✓Click the Credit Bill Icon.

▪Select the generation options
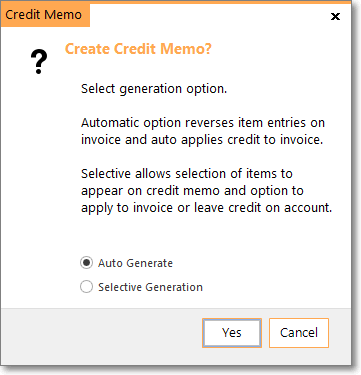
Create Credit Memo? dialog
a)Auto Generate - This will create the entire Credit Memo to off-set the currently selected Bill, or
b)Selective Generation - To enable you to select specific items on the Bill that are to be Credited (see Credit Memo Generation Form below).
❖See the Credit Memo chapter for complete instructions.
•Go To Job - Click this option to open the Job Costing record associated with the currently selected Bill.
 '
'
✓If a Job ID Number is inserted by the system, this Bill was created from the Job Costing System.
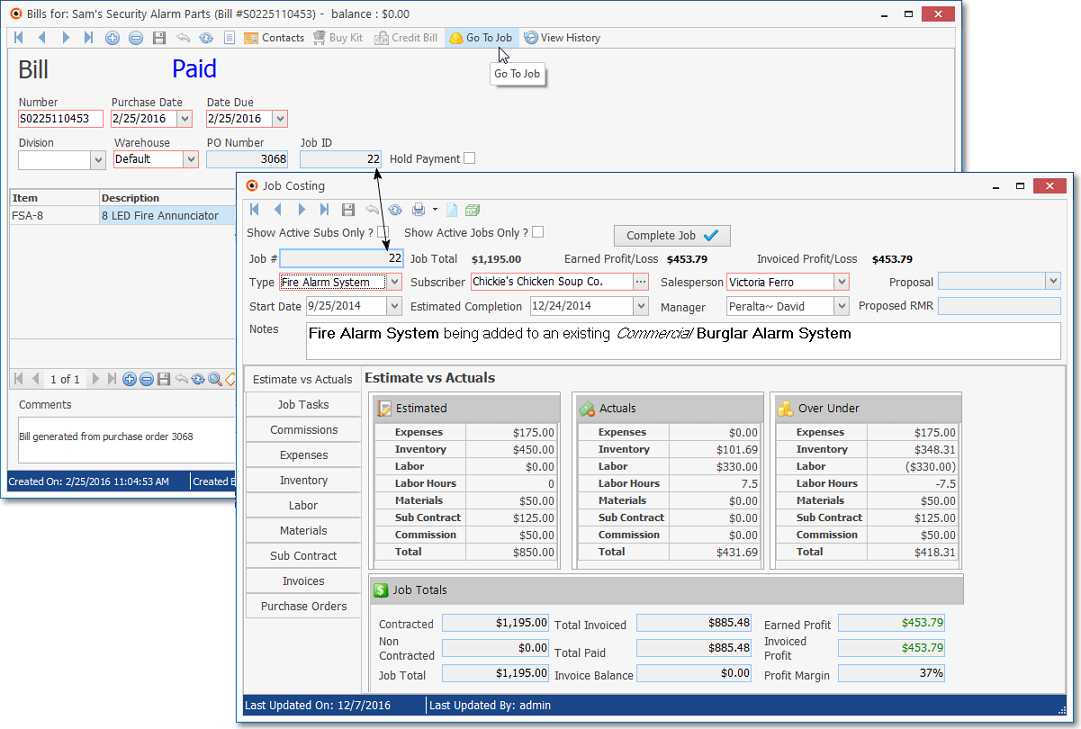
✓To view the Job Costing Form for this Job ID, Click the Go To Job Icon.
•View History - Click the View History Icon to display the Accounting History dialog (a list of any/all authorized changes made to the currently selected Bill).

✓Authorized changes that were made to the currently selected Bill are listed (newest to oldest).
•Credit Card Pay - Click the Credit Card Pay Icon to record a Payment by Credit Card using the Pay Bill Credit Card dialog.

✓Use the Drop-Down Select List to Choose the Credit Card that will be (was) used to Pay this Bill.
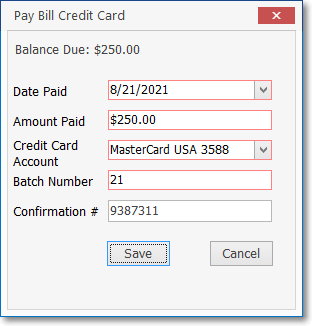
▪Save - Click the Save button.
▪A confirmation message will be displayed.
Bill Payment Complete
▪The Payments Grid on the List of Bills (see List Icon below) that were previously entered for this Vendor will be updated with an entry for this Credit Card Payment.
▪The Balance field in the Credit Cards Form will be updated.
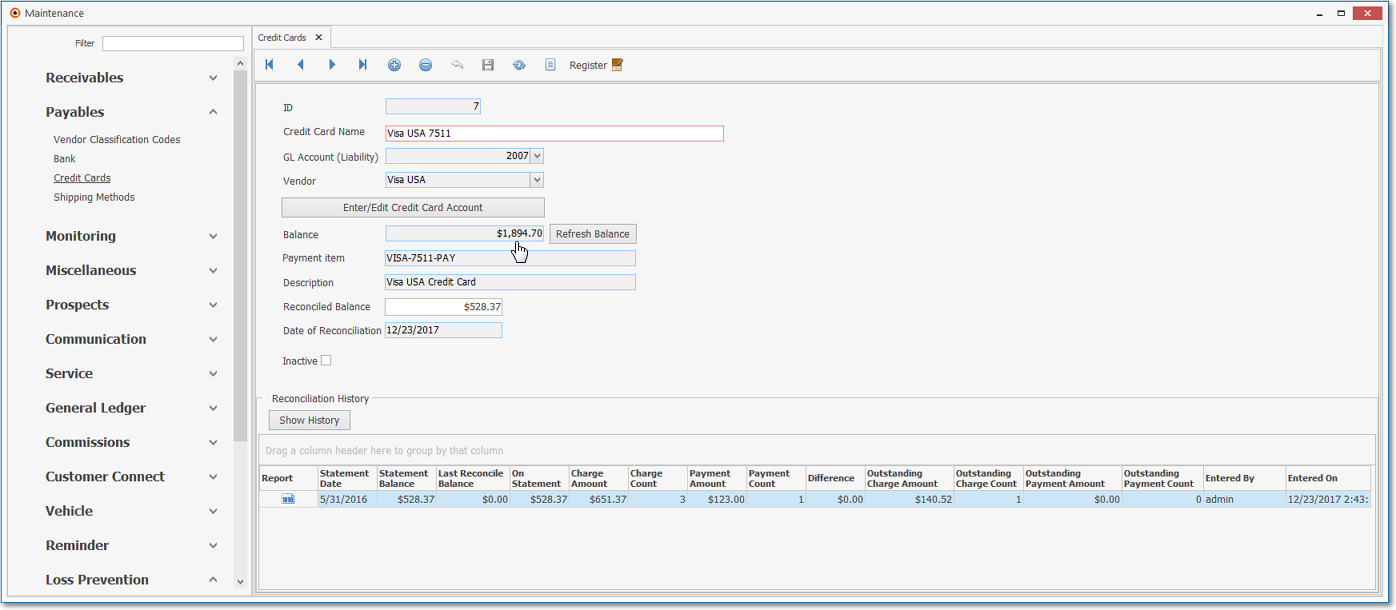
▪The Credit Card Register will contain a new entry for this Credit Card Pay transaction.

❖For more information see the Credit Card Pay Icon discussion within the Bills - Enter a Purchase chapter.
•Pay Bill By Bank - Click the Pay Bill By Bank Icon to record a Payment by Bank using the Pay Bill BY Bank dialog.

✓Date Paid - This will be entered automatically as Today
✓Amount Paid - This will be entered automatically as the Amount Due on the Bill
✓Bank Account - Use the Drop-Down Select List to Choose the Bank Account that will be (was) used to Pay this Bill.
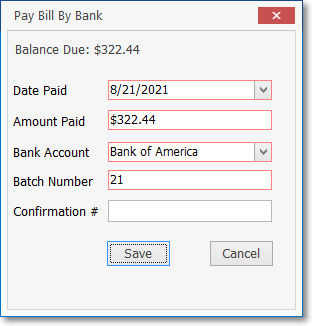
Pay Bill with Bank Account
✓Batch Number - This will be the Day Number of Today
✓Confirmation # - Not required
✓Save - Click the Save button.
•The Bill will be paid via Electronic Transfer and the Amount Paid will be Allocated to this Bill
✓A confirmation message will be displayed.
Bill Payment Complete
•The sample entry illustrated below - which documents an Electronic Payment - is the result of making a Payment to this Vendor with a Bank Account by using the Pay Bill By Bank option in the Bill Form.
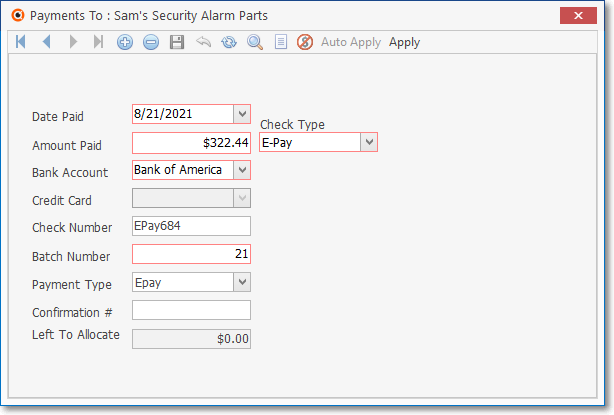
Payments Form - E-Pay entry from Bills Form
✓Date Paid - The Date on which the Bank Account was drafted
✓Amount Paid - The Amount that was applied to the Bill
✓Bank Account - This is the Bank Account from which this Payment Amount was sent to the Vendor.
✓Check Number -EPay plus the Payment's Record ID ( "EPay684" ) is inserted in the Check Number field automatically as the record is saved.
✓Batch Number - As assigned when the Payment was made through the Bills Form.
✓Payment Type - Epay is inserted automatically as the record is saved.
✓Confirmation # - Not required
➢Note: Once saved, you cannot modify a Payment entry in the Payments Form.
To make a modification to a Payment, Unallocate that Payment (if it was already Allocated), and simply Delete that Payment entry.
Then, re-enter the Payment correctly, as needed.
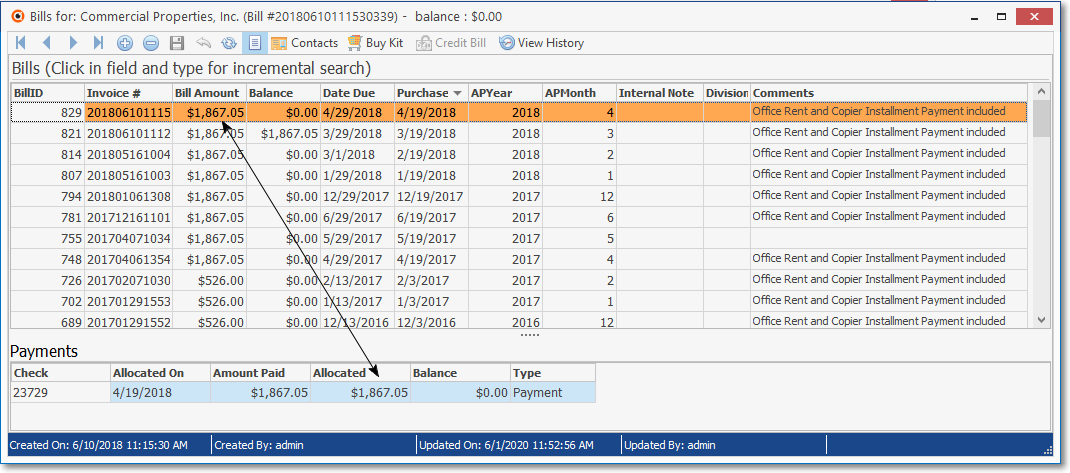
❑List Icon - Click the List Icon to open the list of Bills that were previously received from (and entered for) this Vendor.
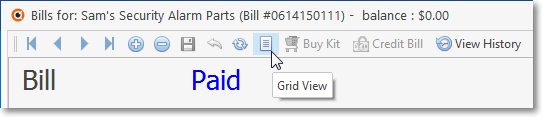
•The List Icon is located on the Navigation Menu and is used to open a list of Bills from which to select and display a specific Bill that had been previously entered for this Vendor.
✓The order of this List (in Invoice # order by default) of previously entered Bills may be set by the User by Clicking the Header Name representing the desired list order.
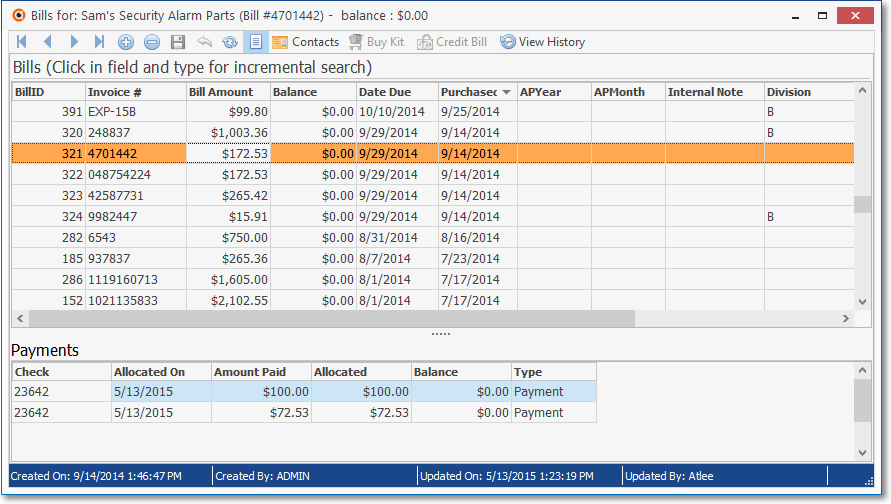
Bills Form - Prior Bills Grid
✓Using the List View - Generally, it is best to keep the list in the Vendor's Invoice Number Order unless you have a specific need for a different sorted order
▪Double-Click any line item in the List View to open that specific Bill record.
✓Sorting the List - Click a column's Header Name to change the sorted order to that column, with the sorted order automatically set from lowest to highest (a-z or 1 - 9).
▪To change this newly selected column's sorted order from highest to lowest, Click that column's Header Name again.
▪An Arrow next to the Header Name indicates the column that is determining the sorted order of the Grid Data.
o~ indicates lowest to highest (a-z or 1 - 9)
o€ indicates highest to lowest (z-a or 9-1).
▪It is recommended that you reset it to Invoice Number Order before closing the Bills Form.
✓Payments - Also illustrated above, the List View shows a tabular (spreadsheet style) list of all Payments and/or Credits which have been Applied to the currently selected Bill (see the Allocating Payments chapter for more information about applying Payments to specific Bills).
•Locating a specific Bill record when:
![]()
✓At the top of the List is a simple message representing a powerful functionality:
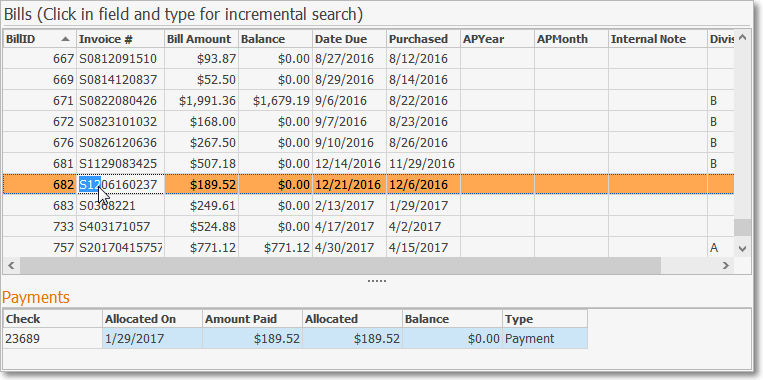
✓Click within any field by which you want to perform this search to perform an incremental search.
✓Type the characters that best identified that field's data as it exists for the desired Invoice.
▪This is a left to right incremental search process meaning that the entry is compared to the data in the selected column from left to right
✓To search for:
a)a Dollar Value: enter the Dollar sign ("$"), then the first number of the Value you are looking for.
b)an Invoice Number, just starting entering that number
c)a Date, enter the month number than a slash, then the day, then a slash, then the year, as needed.
✓Select the highlighted record by Clicking the List Icon to return to the Record Editing View.
❑What's Next?
•Bills - Entering a Purchase - Instructions on how to Record a new Bill
•Credits - Instructions on how to create a Credit Memo for existing Bill