❑Emergency Management Mode ("EMM") - created to comply with the Third Edition UL® 1981 Standard 6.3.4 (a-d) - may be implemented when your Central Station needs to better allocate and manage the Central Station Operator's Processing Time due to an external emergency (e.g., weather event, major power loss, flood) that is affecting the entire Central Station.
•Severe Weather and broadly based Power Outages are the two most common reasons to implement the Emergency Management Mode.
✓During these types of emergency situations, Central Stations are often flooded with Active Signals reporting various Non Life Threatening Supervised Events of low importance, but which still require a Response from an Operator.
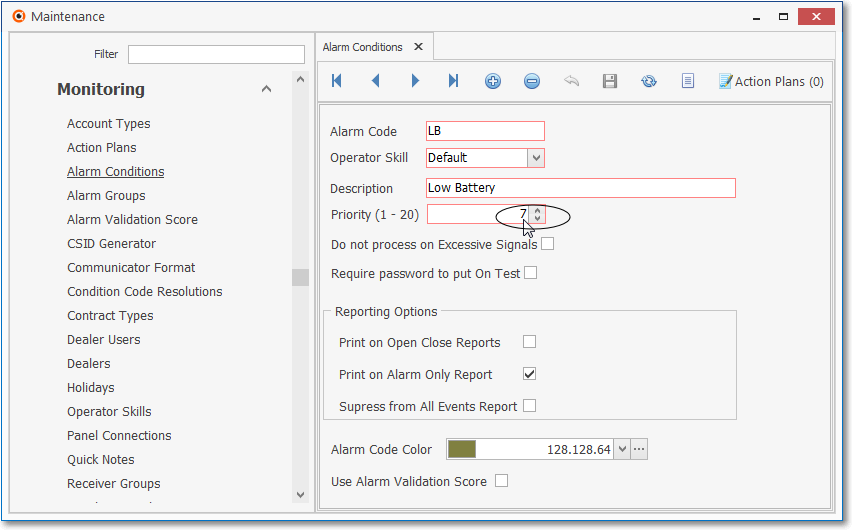
✓These types of Non Life Threatening Supervised Events (e.g., Low Battery, AC Loss, Failed to Open or Close, Hi Temp, Low Temp) are normally assigned a less important Priority Level (i.e., a higher Priority Number) in the associated Alarm Conditions Form
•In larger Central Stations that provide monitoring services for a much larger geographical area, implementation of the EMM can and usually will be regional or situational in nature.depending on what and where those Emergency exist.
❑Emergency Management Mode - EMM Cases and/or Situational Possibilities
•More than one Emergency Management Mode definition may be created:
✓Any of these Emergency Management Mode cases may be implemented "Regionally" or be implemented for some other "Situation Dependent" case.
✓More than one Emergency Management Mode definitions may be implemented (in effect) at the same time
✓All the EMM definitions are defined and activated using the Smooth Operator Form
•Any combination of the Cases and/or Situations listed below may be used to define an Emergency Management Mode record
a)Alarm Conditions - The higher the Priority Number (see the circled mouse pointer in the illustration above), the lower its importance in relation to life safety.
i.Typically, assigning a Priority Level of 6 or higher indicates that the Alarm Condition Code is not directly related to a Life Safety related event.
ii. A specific set of one or more Alarm Condition Codes may be specified
b)Alarm Group - Subscribers assigned to a specific set of one or more Alarm Processing Groups may be specified
c)Account Types - Subscribers assigned a specific set of one or more Accounts Types may be specified
d)CSID List - A list of specific CSID(s) may be defined
e)Town Codes - Subscribers assigned to a specific set of one or more Town Codes may be specified
f)Dealer Codes - Subscribers assigned to a specific set of one or Dealer Codes may be specified
g)City List - Subscribers residing within a specific set of one or more Cities may be specified
h)State List - Subscribers residing within a specific set of one or more States may be specified
i) Zip List - Subscribers residing within a specific set of one or more Zip Codes may be specified
j)Priority - A minimum Priority may be specified
k)Execution Time - A pre-set Starting and Ending time may be specified.
•Multiple Smooth Operator records assigned the Emergency Management Mode Category may be created, as needed, to accommodate any or all of these cases.
✓Each Smooth Operator EMM definition may have its own set of Action List parameters (See Understanding the Action List field's Action Options for more detailed information)
❑By implementing the Emergency Management Mode,
•The specified Alarm Signals may be contacted electronically as specified
✓Text Message responses will be sent if the SM# Action is assigned to the Emergency Mode record and an affected Account has Contacts (People To Call) with one or more Call Numbers (telephone numbers) designated as SMS compatible
✓See the Understanding the Action List field's Action Options discussion in the Smooth Operator chapter for more information about Actions.
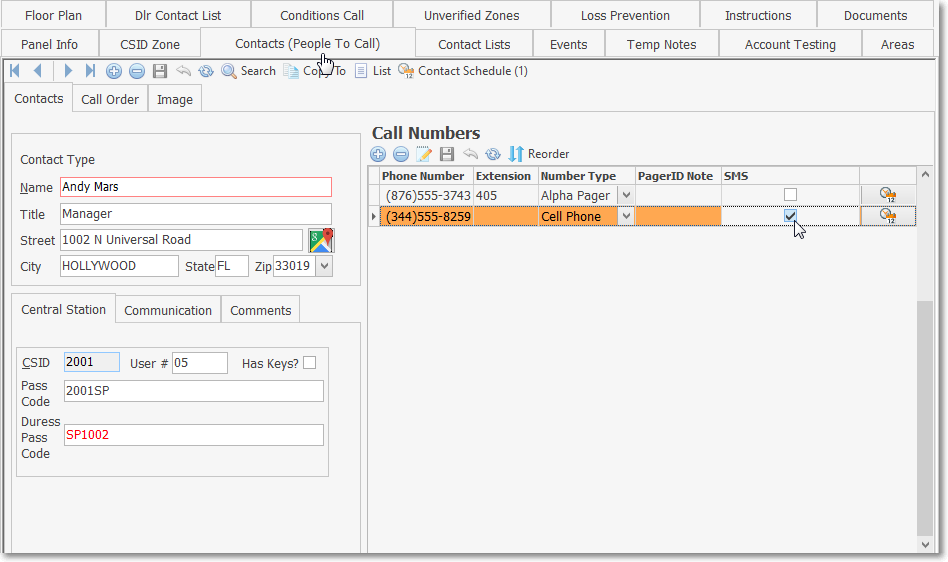
Contacts (People To Call) - Call Numbers section - Telephone Numbers designated as SMS
•While the Emergency Management Mode is activated, those specified Active Signals are automatically placed on Hold and will remain in the Alarm Stack
•As time permits, those Active Signals from Subscribers who could not be notified, may easily be retrieved from the Alarm Stack and properly Processed as the Emergency abates.
•In summary, by implementing the Emergency Management Mode,
✓Your Central Station Operators will be able to concentrate and process the most important signals - those relating to life safety
✓Electronic Contacts will be made when possible
✓As the emergency situation subsides, the Operators may retrieve the remaining signals from the Alarm Stack, and completed as required
❑To access the Emergency Management Mode dialog,
•From within MKMSCS, Press Ctrl+F2, or Select the Emergency Management Mode option available as an option on the Actions Menu located on the Actions Tab
✓This action will display the Emergency Management Mode dialog (created using the Smooth Operator Form).
•There are three tabs on the Emergency Management Mode dialog:
1.Main - The Main tab shows the previously defined options that specify which Accounts and/or what Alarm Signals will be managed by the Emergency Management Mode.
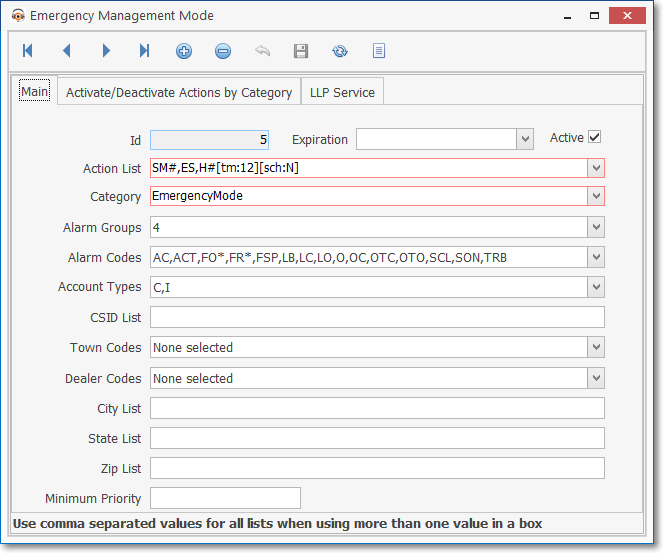
Emergency Management Mode Form Category - Options
2.Activate/Deactivate Actions by Category - The Activate/Deactivate Actions by Category tab allows an Authorized Operator to choose whether or not to apply the selected Actions to the Alarm Signals in the Alarm Stack, enter a reason for activating this EMM process, and to either Activate or Deactivate this function, as appropriate.
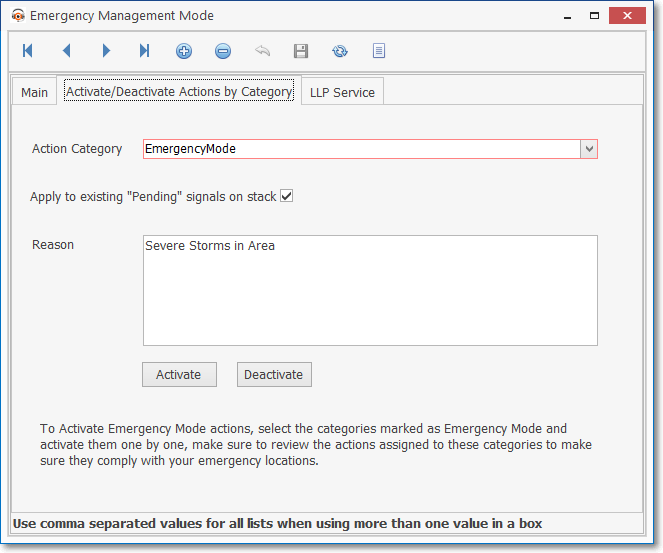
Emergency Management Mode dialog - Activate/Deactivate by Category tab - Options
3.LLP Service - The LLP Service tab is not used for an Emergency Management Mode record.
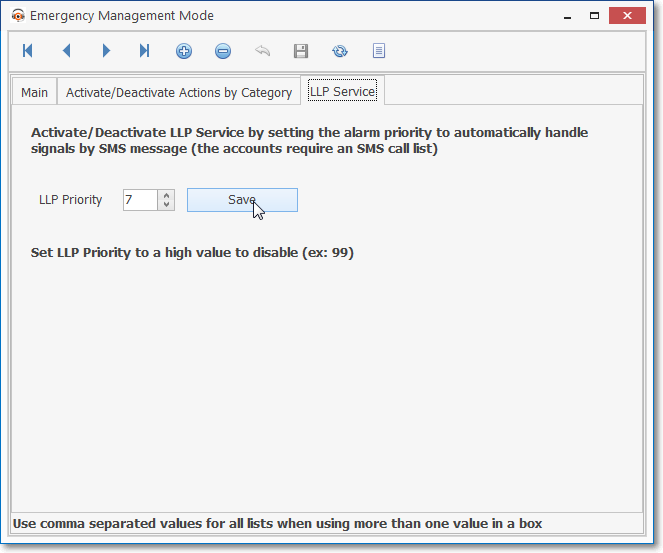
Emergency Management Mode dialog - LLP Service tab - no entries required
❑Understanding the Emergency Management Mode dialog created using the Smooth Operator Form
•Emergency Management Mode - Main tab - This Smooth Operator Form's Main tab provides the options that are used to clearly define which Accounts will be affected by the Emergency Management Mode
✓More than one Emergency Management Mode (Category = "EmergencyMode") record may be defined.
✓Each EmergencyMode classified record may then have additional (or no) settings for each of the Option fields circled in the illustration below.
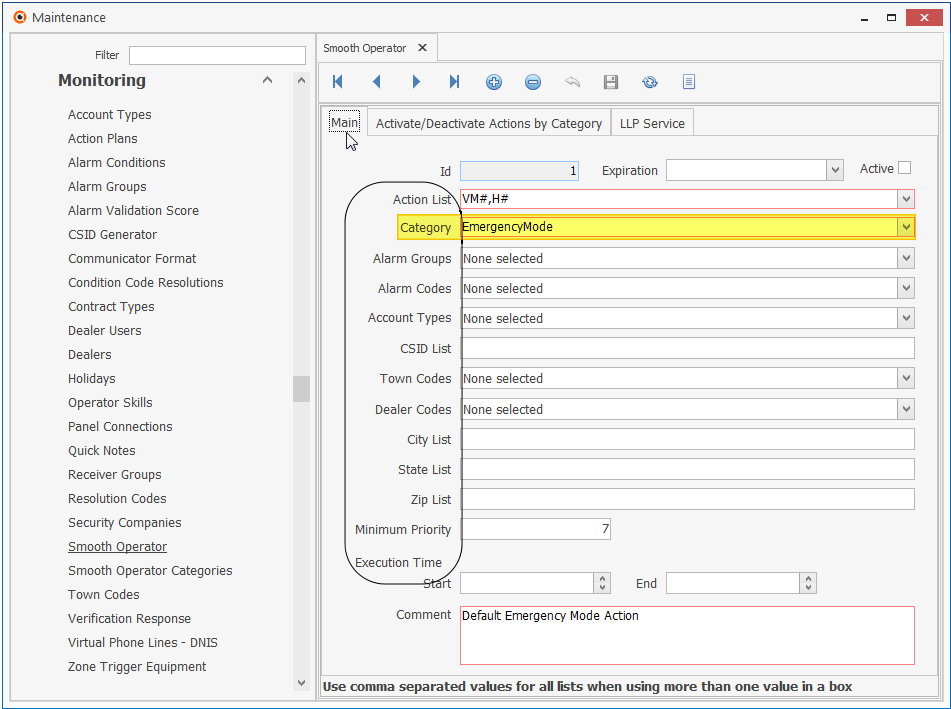
Smooth Operator Form - Main tab - Emergency Management Mode record - options
A.Defining an Emergency Management Mode: First, Click the ![]() Icon to start entering a Smooth Operator procedure entry in the Record Editing section of the Main tab
Icon to start entering a Smooth Operator procedure entry in the Record Editing section of the Main tab
1.ID - A record number for this Smooth Operator procedure will be assigned when this entry is initially saved.
2.Expiration - If appropriate, use this Drop-Down Date/Calendar to choose an Expiration Date for this Smooth Operator procedure
a.If blank, the availability of this Smooth Operator procedure never expires
3.Active - By default, this box will be Checked
a.Remove this Check Mark to deactivate this Smooth Operator procedure
4.Action List - (Mandatory) - Use the Drop-Down Check Box List provided to Check the appropriate Action List item(s) that are to be executed (automatically) when this Smooth Operator procedure is required
❖See Understanding the Action List field's Action Options for more information
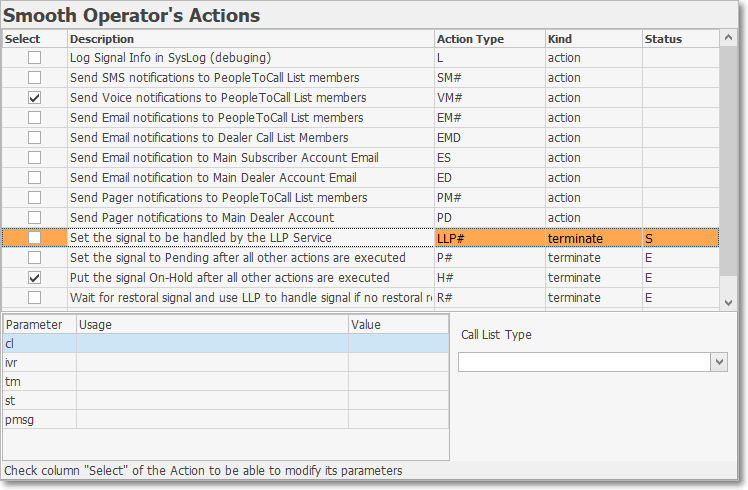
Smooth Operator - Record Editing View - Action List items
5.Category - (Mandatory) - Use the Drop-Down Selection List provided and Choose EmergencyMode

6.Alarm Groups - (Optional) - Use the Drop-Down Check Box List provided to Choose the Alarm Group(s) that are to be included in this Emergency Mode entry
7.Alarm Codes - (Optional) - Use the Drop-Down Check Box List provided to Choose the Alarm Condition Code(s) that are to be included in this Emergency Mode entry
8.Account Types - (Optional) - Use the Drop-Down Check Box List provided to Choose the Account Type(s) that are to be included in this Emergency Mode entry
9.CSID List - (Optional) - Specific CSID(s) may be identified that are to be included in this Emergency Mode entry, each one must be separated by a comma
10.Town Codes - (Optional) - Use the Drop-Down Check Box List provided to Choose the Town Code(s) that are to be included in this Emergency Mode entry
11.Dealer Codes - (Optional) - Use the Drop-Down Check Box List provided to Choose the Dealers that are to be included in this Emergency Mode entry
12.City List - (Optional) - Specific Cities that may trigger this Smooth Operator procedure may be identified, each one must be separated by a comma
13.State List - (Optional) - Specific State Code(s) identified that are to be included in this Emergency Mode entry, each one must be separated by a comma
14.Zip List - (Optional) - Specific Zip Code(s) identified that are to be included in this Emergency Mode entry, each one must be separated by a comma
15.Minimum Priority - (Mandatory) - Enter the minimum Priority Level that is to be included in this Emergency Mode entry
16.Execution Time - (Optional) - Establish a Time Range within this Emergency Mode entry when it should be executed
a.Start - Enter the Starting time
b.End - Enter the Ending time
17.Comment - (Mandatory) - Enter a clear/precise description of the purpose for this Emergency Mode entry
B.Emergency Management Mode - Activate/Deactivate tab
1)Once the appropriate Emergency Management Mode record is located, Select the Activate/Deactivate by Category tab
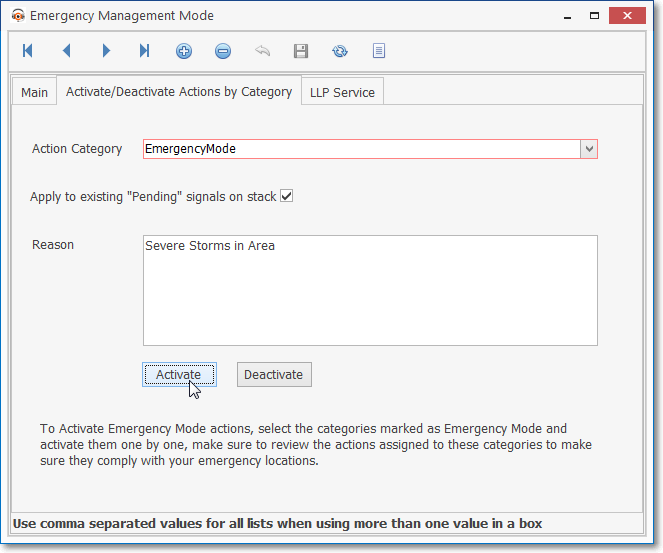
2)Apply to existing "Pending" signals in the Alarm Stack - Check this box to have that Pending Alarm Signals which match the options selected on the Main tab be included
3)Reason - Enter the reason this Emergency Mode action is being activated
4)Activate - Click the Activate button and a confirmation message will be displayed
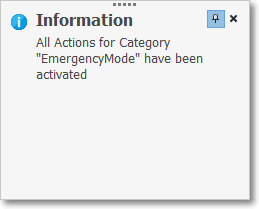
Information Emergency Mode Activated
5)If more than one Emergency Management Mode record is to be activated, activate them one by one
6)If an Emergency Management Mode record is to be Deactivated, Deactivate them one by one
7)Deactivate - Click the Deactivate button and a confirmation message will be displayed
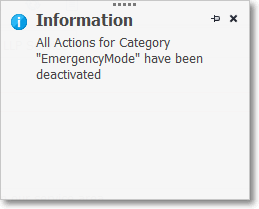
Information Emergency Mode Deactivated
•When the Emergency Management Mode ("EMM") is Activated, an A115 Signal is inserted into the SPA Account's Alarm History.

✓A message (" EMM ACTIVE ") is displayed at the bottom of the MKMSCS Desktop indicating the Emergency Management Mode is Active.
![]()
•When the Emergency Management Mode ("EMM") is Deactivated, an A116 Signal is inserted into the SPA Account's Alarm History.
✓The data lines below refer to the SPA Special Subscriber Account which has a Subscriber Panel record with a CSID of "SPA" and - among others - must have these EMM Activation and Deactivation Signal Identifiers defined in CSID Zones.
▪Signal ID = A115 Alarm Code = System Messages OCTAR = Alarm Description = Emergency Mode Activation
▪Signal ID = A116 Alarm Code = System Messages OCTAR = Alarm Description = Emergency Mode Deactivation