❑The All Events Report can list every Signal received by the Central Station - within the specified Date Range - and accommodates special formatting options.
•To view the All Events Report dialog:
1.From the Backstage Menu System Select Reports and Choose Monitoring and Select the All Events option, or
2.From the Quick Access Menu, Select Reports and Choose Monitoring and Select the All Events option
❑All Events Report tabs - There are two tabs on the All Events Report dialog.
•Options - Initially only the Options tab is shown (until you make your Options selections and Select Print).
➢Note: Once a set of Options are Chosen for the All Events Report, they become the new default Options.
These default Options may be reset at any time by simply making a different set of Choices.
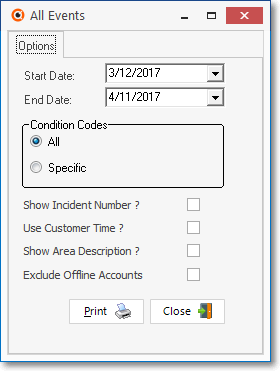
All Events Report - Options tab
✓Start Date - By default, the Date representing 30 Days prior to Today will be shown.
▪Use the Drop-Down Calendar/Date Entry field to re-set the Starting Date, if desired.
▪By default, the Time that is displayed will be 12:00AM, which may be modified, as required.
oIf no Time is showing, Click on the Year and then Press the Right Arrow ’ to set a specific Starting Time.
oRight-Click anywhere within the End Date field to display and set the Time's Format.
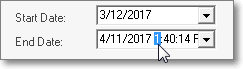
✓End Date - By default, Today will be shown. Use the Drop-Down Calendar/Date Entry field to re-set the Ending Date, if desired.
▪Use the Drop-Down Calendar/Date Entry field to re-set the Ending Date, if desired.
▪By default, the Time that is displayed will be 12:00AM, which may be modified, as required.
oIf no Time is showing, Click on the Year and then Press the Right Arrow ’ to set a specific Ending Time.
▪Right-Click anywhere within the End Date field to display and set the Time's Format.
✓Condition Codes box - All, One or Many Condition Codes may be reported.
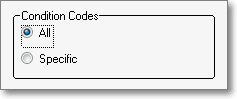
All Events - All Condition Codes
▪All - By default, All Condition Codes will be reported.
▪Specific - To limit this report to a specified group of (one or more) Condition Codes, Click this button.
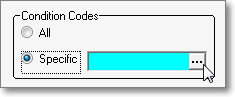
oClick the Ellipse on the right of the Specific field to open the Select Condition Code dialog.
▪Select Condition Codes - To Choose the Condition Codes required for this report;
oCheck the Selected box for one or more Condition Codes on this Select Condition Code dialog.
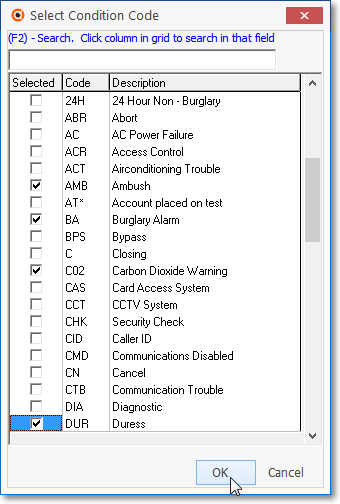
oClick the OK button to Close the Select Condition Code dialog.
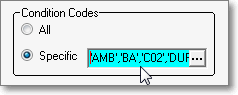
All Events - Specific Condition Codes
▪The Selected Condition Code(s) will be inserted into the Specific field.
✓Show Incident Number? - If the incident number is to be included in the report, Check this box.
✓Use Customer Time? - If you want the Subscriber's (local) Time (instead of your Central Station's Time - if it is different) to be what the Date Range time period selection is based on, Check this box.
✓Show Area Description? - If you use Areas within Alarm Systems, and want the Description of those Areas included, Check this box.
✓Exclude Offline Accounts? - To skip those Accounts that are off line, Check this Box.
✓Print - Click the Print button ![]() to Preview and optionally Print (to a File or a Printer) this All Events Report.
to Preview and optionally Print (to a File or a Printer) this All Events Report.
✓To Exit this All Events Report dialog, Click the Close button ![]() at the bottom of the Options tab.
at the bottom of the Options tab.
•Preview - The Preview tab presents the report which resulted from the Options you've selected.
✓Up Arrow/Down Arrow - hi - Moves the report one line up, or one line down, respectively.
✓Page Up/Page Down - Moves the report to the previous or next page, respectively.
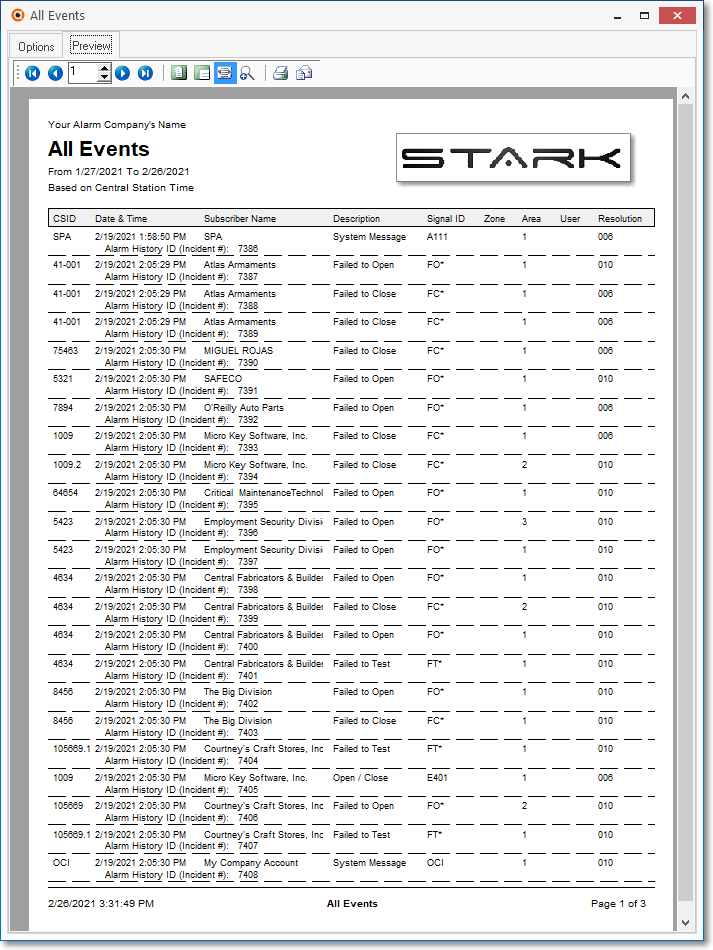
All Events Report - Preview tab
✓Home - ![]() - Using either the screen Icon or your Keyboard's Home key, moves the report to the top of the first page.
- Using either the screen Icon or your Keyboard's Home key, moves the report to the top of the first page.
✓End - ![]() - Using either the screen Icon or your Keyboard's End key, moves the report to the bottom of the last page.
- Using either the screen Icon or your Keyboard's End key, moves the report to the bottom of the last page.
✓Arrows - The arrows allow you to move back and forth, from page to page.
✓Number - Indicates the page number you are viewing.
▪You may also type in a specific page number, Press 8 Enter and that page will be displayed immediately.
▪If you enter an invalid page number, it will be ignored.
✓Fit To Page - Click the first button after the arrows to size a full page of the report to fit the screen.
✓Zoom To 100% - Click the second button after the arrows to display the page at 100% (of the printed view).
✓Fit To Page Width - Click the third button after the arrows to size the page of the report to fit the full width of the screen.
✓Zoom To Percentage - Click the fourth button after the arrows to re-size the page of the report by percentage.
![]()
▪When you Click the Zoom To Percentage button, the Percentage selector will be displayed.
▪You may then Click the Up or Down ‚ arrows to set the exact amount of Zoom you want.
✓Print - Click the Print button to Print (to a File or a Printer) ![]() the displayed All Events Report.
the displayed All Events Report.
✓Email - Click the Email ![]() button to send this report to an Email address of your choosing.
button to send this report to an Email address of your choosing.
✓To Exit the Preview tab and Close this Report dialog Form, Click the Close ![]() box on the right at the top of the Preview tab.
box on the right at the top of the Preview tab.