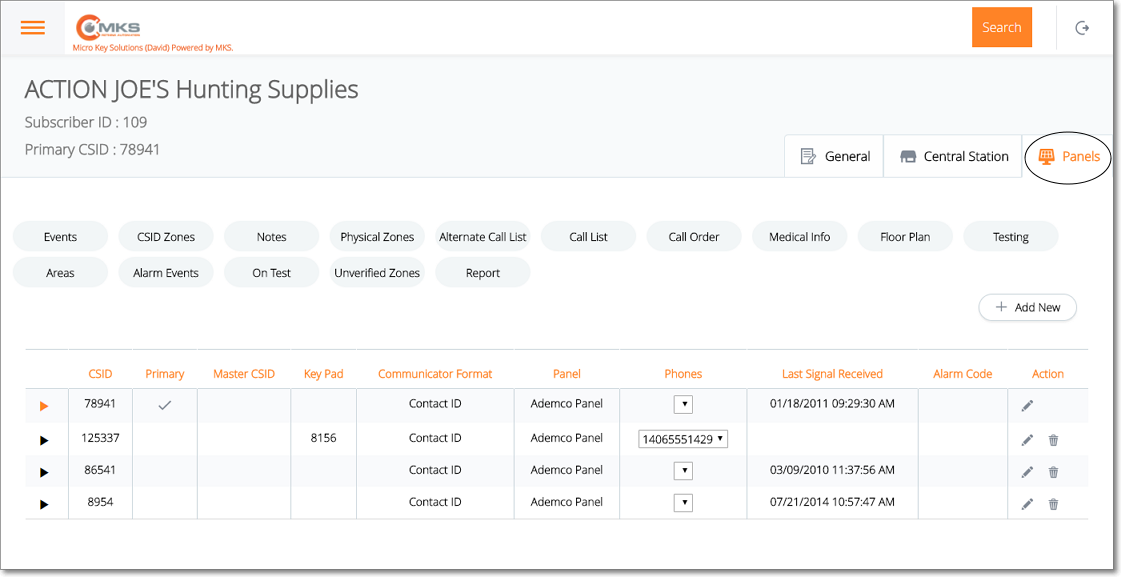
❑The Subscriber Information page has three (3) tabs one of which is the Panels tab

Web Dealer Access - Subscriber Information - Panels tab
•The Panels tab contains the list of CSIDs which are being monitored for this Subscriber; and (among other options) has a Temp Notes option.
✓Select the CSID from the list on the Panels tab which has the Temporary Notes that are to be viewed, added to, modified and/or deleted.
✓Tap or Click on the Notes option to display the Notes page for that CSID.

Web Dealer Access - Subscriber Information - Panels tab - Notes page
✓Once you have finished using the Notes page, Tap or Click on the Panels tab to return to it.
❑Understanding and Using Temporary Notes
•The ability to enter a Temporary Note, and have it displayed when that Subscriber's Alarm System is activated (sends an Alarm Signal to the Central Station), is a useful tool for helping Operators provide a more accurate alarm response.
•When a Temporary Note is entered as a result of a Subscriber call-in, a previous alarm event, a verification response, and/or some other Subscriber related situation that occurs in a Central Station, it can help eliminate a double dispatch, contacting the wrong (unavailable) person, or knowing important information like a family being on vacation, or business closed because of an unusual schedule change.
✓So, it is very useful to be able to attach a Temporary Note to the Subscriber's record - with a starting and ending date and time in which it will be shown to an Operator when she/he is Processing an Alarm Signal for this Subscriber.
✓If another signal is transmitted from that Subscriber, that Operator will also be informed of the "issue" through the display of the Temporary Notes message.
1.To edit an existing Temporary Note, Click the Edit Icon ![]() in the Action column of the Note that is to be modified.
in the Action column of the Note that is to be modified.
2.To remove an existing Temporary Note, Click the Delete Icon ![]() in the Action column of the Note that is to be deleted.
in the Action column of the Note that is to be deleted.

Web Dealer Access - Subscriber Information - Panels tab - new Temporary Note entry
3.To add a new Temporary Note, Click the + Add New button and enter/modify the following fields
✓Start Date/Time - By default, it will be Now. Modify as appropriate using the Drop-Down Date/Time Calendar box provided.
✓End Date/Time - By default, it will be Now. Modify as appropriate using the Drop-Down Date/Time Calendar box provided.
✓Notes - Enter the appropriate Temporary Note. Basic text enhancement formatting is available.
✓Action - Click the Save Icon (see the mouse pointer in the illustration above) in the Action column to store this Temporary Note.
•Once you have finished using the Notes page, Tap or Click on the Panels tab to return to it.