|
Web Dealer Access - Panels Tab - On TestThis Help File Page was last Modified on 11/08/2017 |


|
|
Web Dealer Access - Panels Tab - On TestThis Help File Page was last Modified on 11/08/2017 |
 Scroll to Top of Page
 Print Topic
 Email Feedback
 Show/Hide Expanders
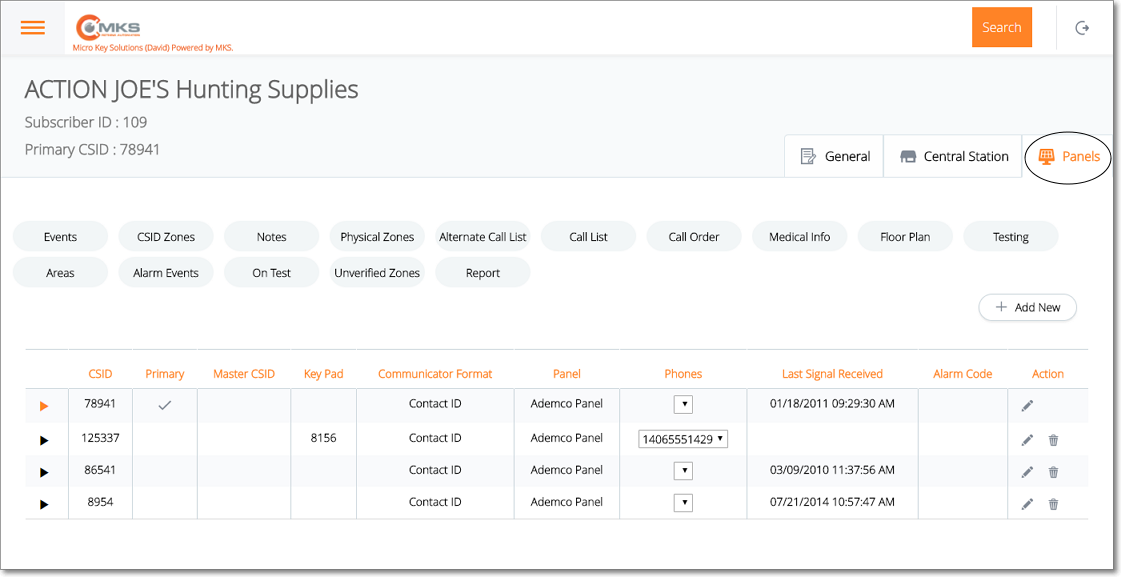
❑The Subscriber Information page has three (3) tabs one of which is the Panels tab
Web Dealer Access - Subscriber Information - Panels tab
•The Panels tab contains the list of the CSIDs which are being monitored for this Subscriber; and (among other options) has an On Test option.
✓Select the CSID from the list on the Panels tab that has the On Test records which are to be viewed, added to, modified and/or deleted.
✓Tap or Click on the On Test option to display the On Test page for that CSID.
Web Dealer Access - Subscriber Information - Panels tab - On Test option
❑Understanding and Using the On Test page:
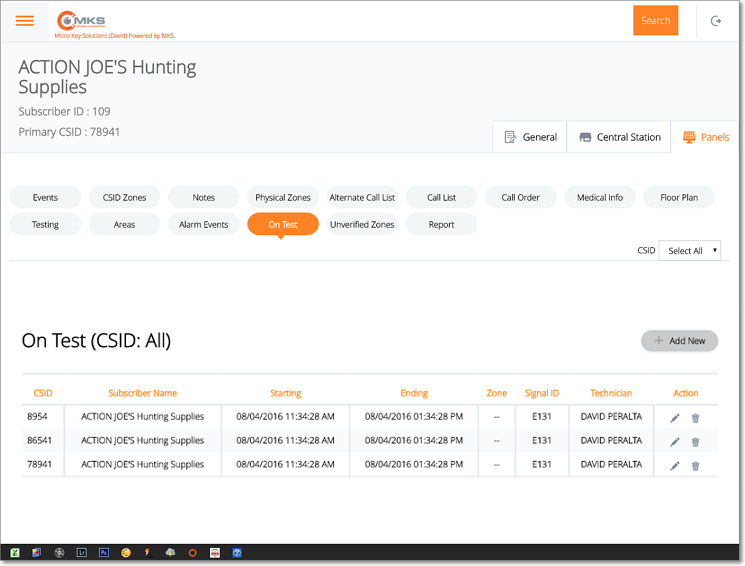
•This On Test page provides three features:
A.List - A List of all previously entered On Test records
B.Actions - Ability to Edit and/or Delete previously defined On Test records.
C.Add New - Ability to Add a new On Test entry
A.List - List of On Test records has several columns
1.CSID - The Account (and/or Signal ID and/or Physical Zone) which is currently on test
2.Subscriber Name - The Subscriber's Name on the Account
3.Starting - Date and Time when the on test status is to be (was) initiated
4.Ending - Date and Time when the on test status is to end
5.Zone - If a specific Physical Zone was placed on test, that will be inserted here
6.Signal ID - If a specific Signal ID was placed on test, that will be inserted here
7.Technician - The Technician who requested the on test status
8.Actions - The Actions available (see B. Actions below)
B.Actions - Offers an Edit (select to update existing On Test records), and a Delete (select to remove this On Test record) option
1.Edit - Tap or Click  to open the On Test page
2.Trash - Tap or Click  to remove this On Test entry.
C.+ Add New - Tap or Click this button to open the On Test entry page.
Web Dealer Access - Subscriber Information - Panels tab - On Test entry page
❑Entering an On Test record:
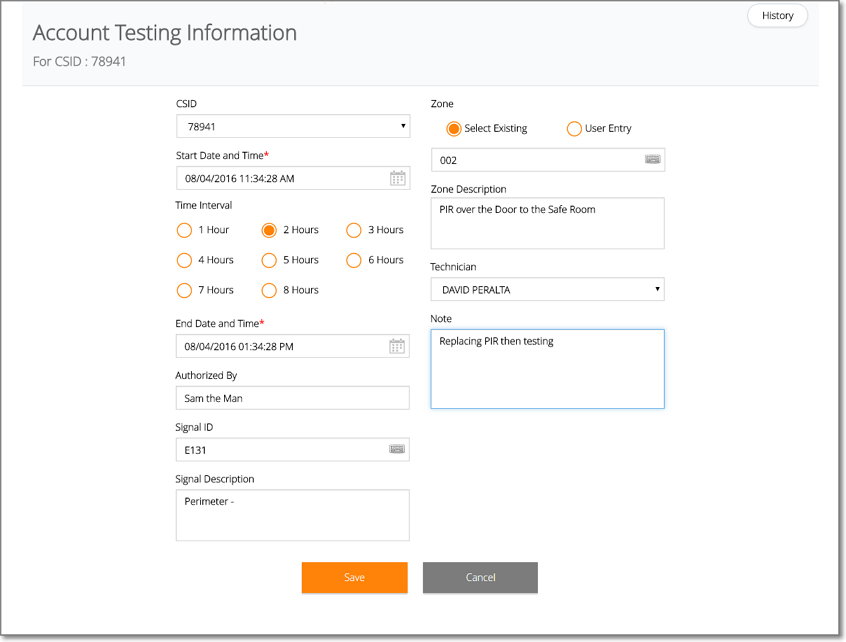
•Tap or Click on the + Add New button to open the On Test entry page.
•CSID - By default, All CSIDs defined for this Subscriber will be placed on test. If there are multiple CSIDs installed at this premises, there will be a Drop-Down Selection List available to Choose a specific CSID to be placed on test.
•Start Date and Time - By default, the current Date and Time - adjusted back one hour to compensate for any time differences between system, receiver and transmission times - is inserted. This information may be modified as appropriate.
•Time Interval - By default 2 Hours is selected. You may select any of the other Time Intervals, as appropriate; or manually set the End Date and Time (see below).
•End Date and Time - By default it will be 2 Hours from the Start Date and Time. If a different Time Interval was selected, this End Date and Time entry will be set based on that selection; or you may manually set the End Date and Time
•Authorized By - Enter the person's name who authorized this On Test status.
•Signal ID - If you are not placing the entire system On Test, using the Drop-Down Selection List provided, Choose the Signal ID to be placed On Test.
✓The Drop-Down Selection List lists all of the CSID Zones defined for the selected CSID.
✓Alternately, you may Manually enter a specific Signal ID which may, or may not have been previously defined (which is useful when testing a newly activated Signal ID that's being added to an existing Account)
•Signal Description - The description of the selected Signal ID
•Zone - You may limit the On Test status to one, or more than one, specifically selected Zones, use either method i. or method ii. (see below) based on your need:
✓If you are not putting the entire system on test, and want to put only one specific Zone on test:
a)Select Existing - Use the Drop-Down Selection List provided to Choose the appropriate Zone.
b)User Entry - Alternately, you may Manually enter a specific Zone which may, or may not have been previously defined (which is useful when testing a newly activated Zone that's being added to an existing Account)
•Zone Description - If available, the description of the selected Zone
•Technician - Use the Drop-Down Selection List to Choose the Technician requesting to put the system on test.
•Note - Enter any information that is pertinent the On Test status
•Save - Tap or Click the Save option to record this information.
✓A Confirmation message will be displayed when the changes have successfully been posted to the database.
✓Tap or Click the OK button to continue.
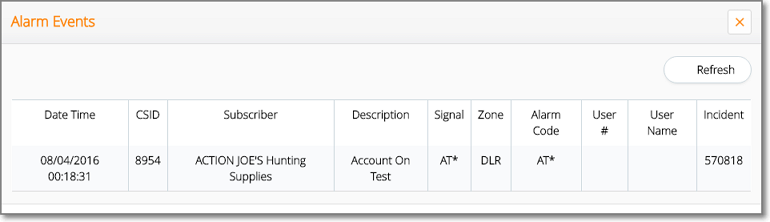
❑History - The History button on the top right of the On Test entry page will display the Alarm Events received from this Account since being placed on test.