|
Web Dealer Access - Panels Tab - Alarm EventsThis Help File Page was last Modified on 11/08/2017 |


|
|
Web Dealer Access - Panels Tab - Alarm EventsThis Help File Page was last Modified on 11/08/2017 |
 Scroll to Top of Page
 Print Topic
 Email Feedback
 Show/Hide Expanders
❑The Subscriber Information page has three (3) tabs one of which is the Panels tab
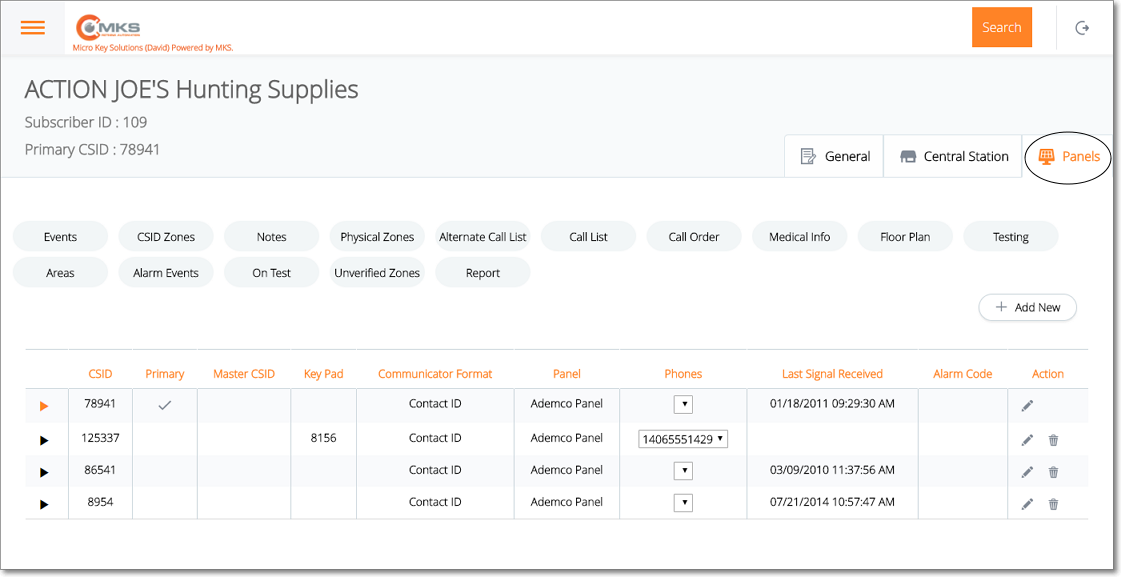
Web Dealer Access - Subscriber Information - Panels tab
•The Panels tab contains the list of the CSIDs which are being monitored for this Subscriber; and (among other options) has an Alarm Events option.
✓Select the CSID from the list on the Panels tab that has the Alarm Event records which are to be viewed, added to, modified and/or deleted.
✓Tap or Click on the Alarm Events option to display the Alarm Events page for that CSID.
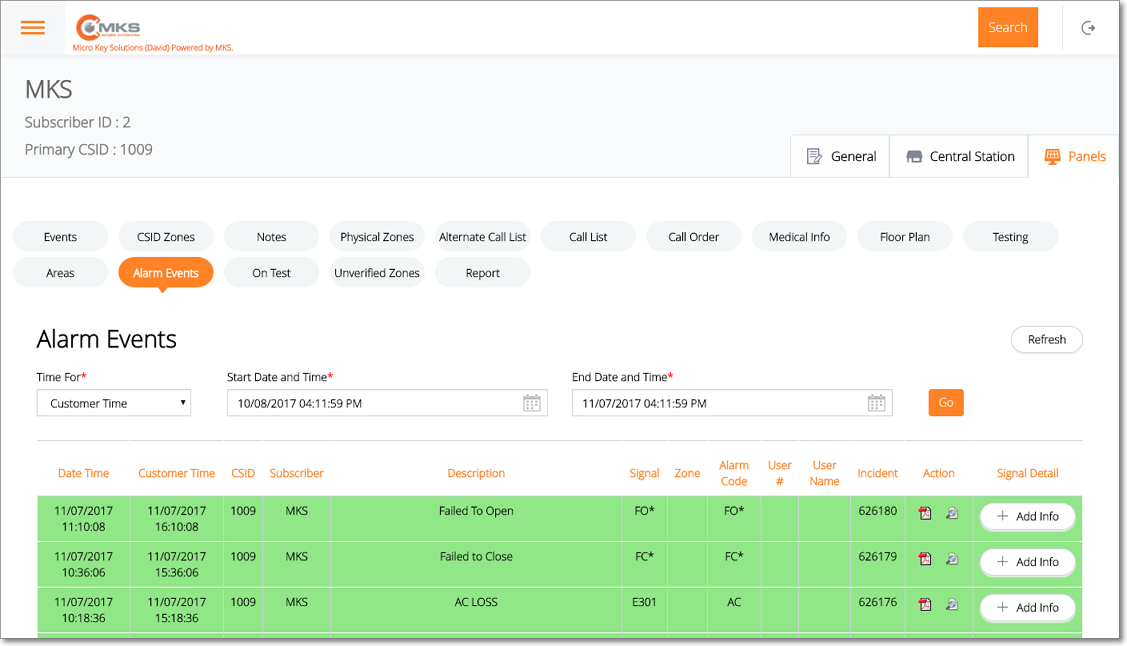
Web Dealer Access - Subscriber Information - Panels tab - Alarm Events option
❑Understanding and Using the Alarm Events page:
•This Alarm Events page provides three features:
A.Filter - Set the Time and Date Range parameters
B.List - A List of the selected (filtered) Alarm Events
C.Actions - Ability to export the selected list of Alarm Events as a PDF report, or to display the Signal Processing Details of the selected Alarm Event.
A.Filter - Setting the Time and Date filter parameters to determine which the selected are listed
1.Time For - Using the Drop-Down Selection List provided to Choose the Time Type (i.e., Central Station or Customer Time ) that will be used when filtering this List of Alarm Events.
2.Start Date and Time - Select the starting date and time using the Drop-Down Date/Time Calendar Selection Box provided
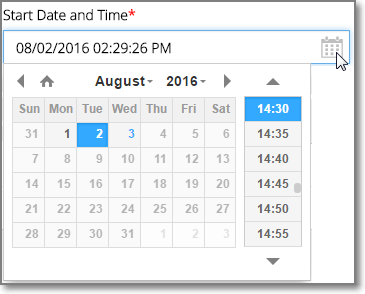
Drop-Down Date/Time Calendar Selection Box
3.End Date and Time - Select the ending date and time using the Drop-Down Date/Time Calendar Selection Box provided
4.Go - Tap or Click on the Go option on the right to display the chosen Alarm Events
B.List - List of Alarm Events records which has several columns
1.Date Time - The Number assigned to this Area
2.Customer Time - A brief, concise description of the Area.
3.CSID - Will initially be None,then either Open or Closed
4.Subscriber - Date of the last Opening or Closing in this Area
5.Description - A Description of this Alarm Event
6.Signal - The Signal ID that was transmitted for this Alarm Event
7.Zone - The Physical Zone associated with this Alarm Event
8.User # - The User # if one was transmitted by the system
9.User Name - If a User # was transmitted which matches and Employee's User #, that Name will be inserted by the system
10.Incident - The Incident number for this Alarm Event that was assigned by the system
11.Actions - Special purpose Icons (see C. below).
12.Signal Detail -
C.Action - There are two Action Icons available
1.PDF Icon - Creates the selected Alarm Event as a PDF report,
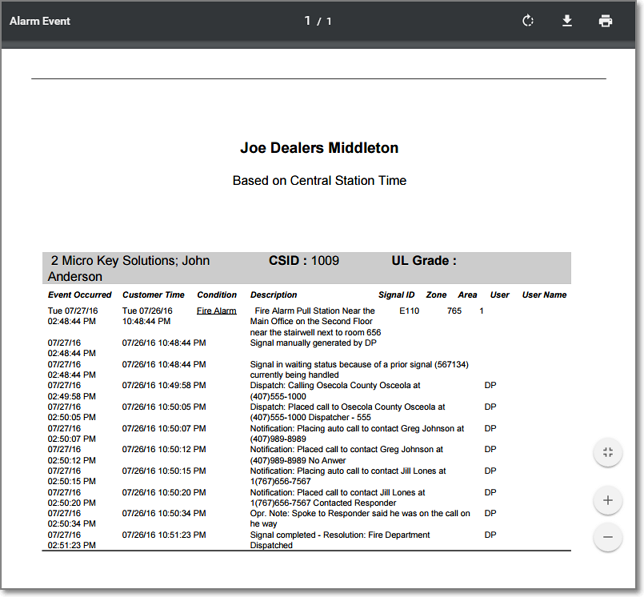
2.Look Up Icon - Displays the details of the selected Alarm Event in an Alarm Event pop-up
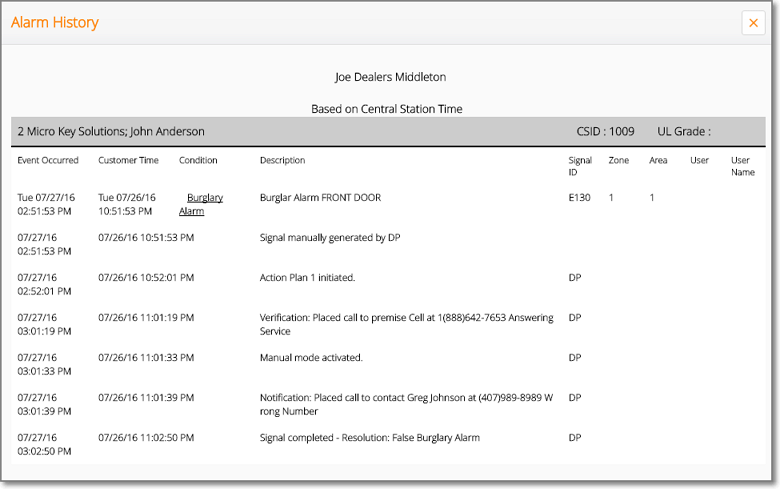
D.Signal Detail - Additional information may be added to an existing Alarm Event
1.Add Info - Tap or Click on the Add Info option to display the Signal Detail page
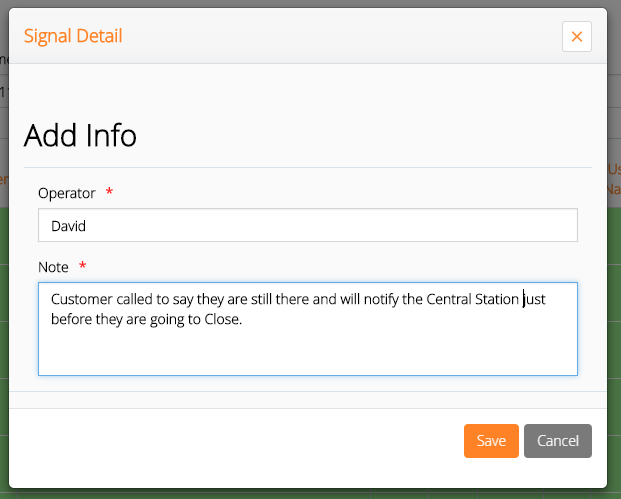
2.Operator - By default, the Login Name of the User is inserted but this may be changed, if appropriate.
3.Note - Enter the comment information that is to be appended to the Alarm Activity of this Alarm Event.
4.Save - Tap or Click on the Save option to record this entry.
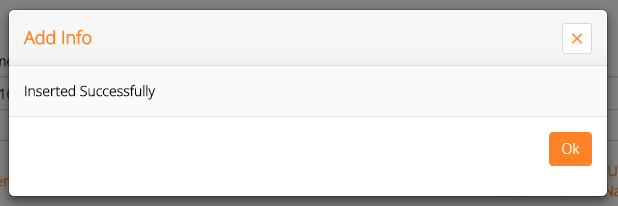
5.Inserted Successfully - A confirmation message will be presented. Tap or Click OK to return to the Alarm Event page.
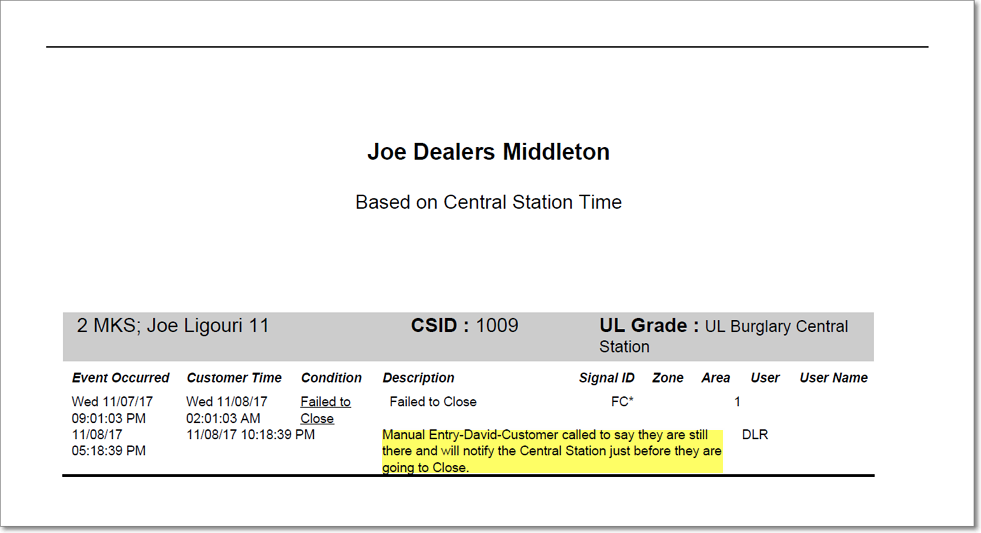
6.Alarm Activity Report - The entry is added to the history for this Alarm Event and will appear in the Alarm Activity Report.
7.PDF Icon - Tap or Click on the PDF Icon for this Alarm Event to view this added Signal Detail in a PDF report