❑Once you have been given a Reminder, and (hopefully) completed the task described in the Reminder, you must Post a Reminder Resolution and Close Date.
•Open the Form representing the entity (Subscriber, Prospect) with the Reminder attached.
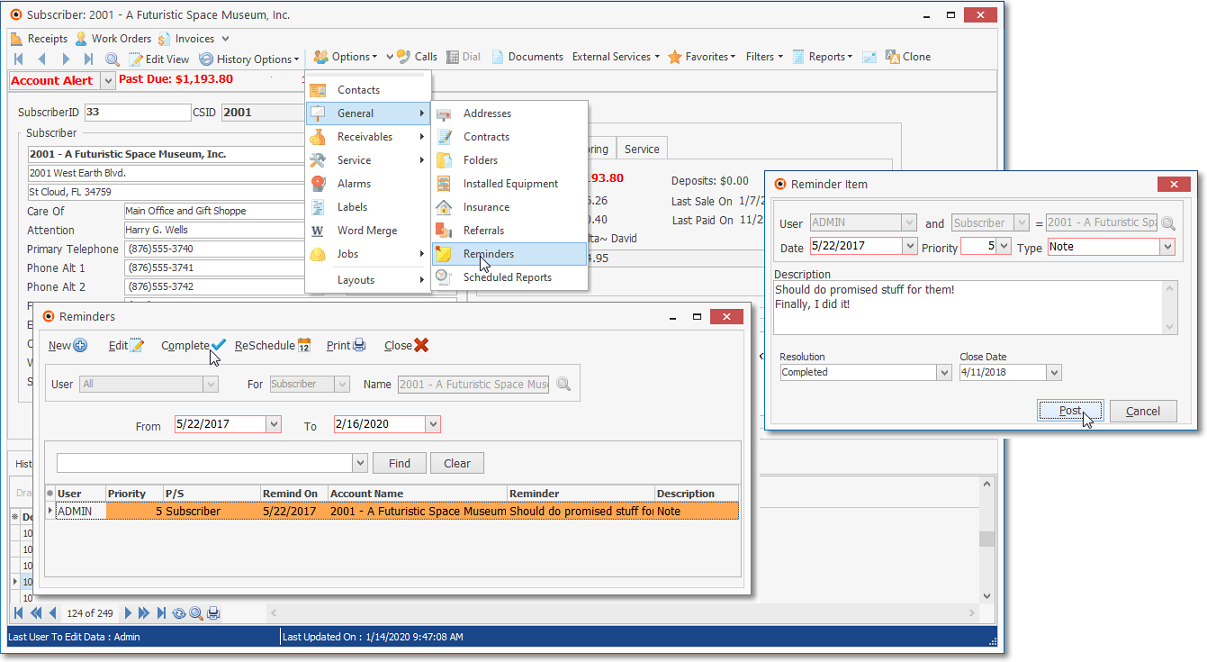
Select a Resolution & Close Date to Complete Reminder Item
✓On the Subscriber (Prospect) Options Menu, Choose General, than Select the Reminders option.
✓Set the appropriate From and To Date Range.
✓Select the Reminder to be Completed and Closed.
✓Select the appropriate Reminder Resolution (see "Reminder Resolutions" below) using the Drop-Down Selection List provided.
✓Enter the Close Date of this completed Reminder using the Drop-Down Calendar/Date Entry field provided.
a)Click on the Date field and type the desired Date using a MM/DD/YYYY format; or
b)Use the Drop-Down Calendar/Date Entry field provided to Choose the desired Date
•Reminder Resolutions - There are four predefined Reminder Resolutions and a few more that are recommended
1.Completed - a default - No more action is required by this User.
2.Rescheduled - a default - Another Reminder Item has been created for further follow up.
3.Note - a default - See the Note for why no more action is required by this User.
4.Sold - User Defined (if desired) - Prospect has been sold and requires no more follow up by the Salesman.
5.Collected - User Defined (if desired) - Accounts Receivable Department has received Payment.
6.Sent to Collection - User Defined (if desired) - Accounts Receivable Department has determined this Past Due Account is not collectable using in-house procedures.
7.Left Message - User Defined (if desired) - See the Subscriber's Comments for reason no more action is required by this User.
❑Using Reminder Resolutions within the MKSales Application:
•When a Salesperson's Task has been completed, a Resolution must be assigned as part of that Task Completion process.
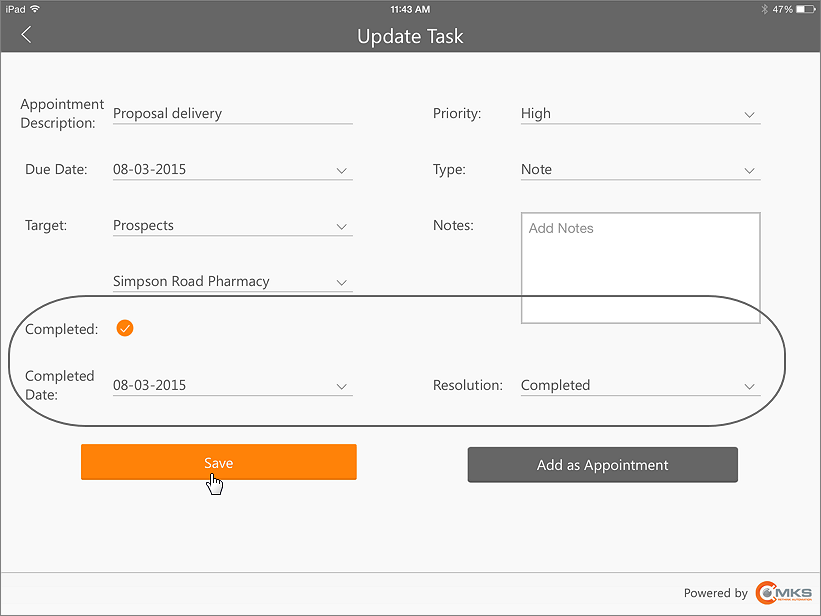
MKSales Application - Update Task - Completed
❑Defining your Reminder Resolutions
a)From the Backstage Menu System Select Maintenance and Choose General and Click the General Maintenance option which displays the Maintenance Menu, or
b)From the Quick Access Menu, Select Maintenance and Choose General Maintenance to display the Maintenance Menu.
✓Once the Maintenance Menu is displayed, Select Reminder and Choose Resolutions.
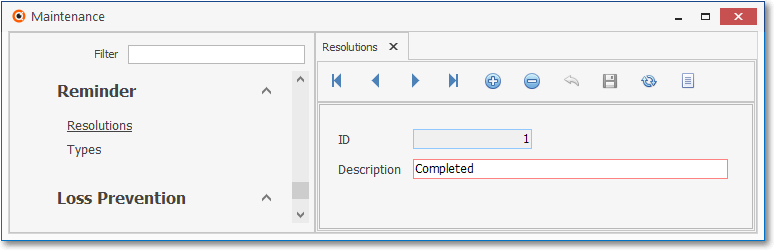
Reminder Resolutions Form
✓This Reminder Resolutions Form may be Re-sized by Dragging the Top and/or Bottom up or down, and/or the Right side in or out.
•Navigation Menu - The Navigation Menu is located at the top of the Reminder Resolutions Form.

✓This Navigation Menu provides the normal Record Movement, plus Add, Delete, Cancel, Save, Search, and List options.
•Record Editing section - The details of the currently selected record are displayed below the Navigation Menu at the center (Main Body) of the Reminder Resolutions Form.
•To define the Reminder Resolutions which will be used to identify how a Reminder was completed:
✓Click the ![]() Icon to start the Reminder Resolution entry in the Record Editing section.
Icon to start the Reminder Resolution entry in the Record Editing section.
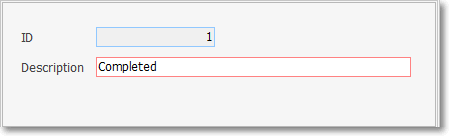
✓ID - This is the system assigned record number which is inserted automatically when the Reminder Resolution record is initially saved.
✓Description - Enter a brief Description for this Reminder Resolution entry.
▪By default, there are seven Reminder Resolution already defined:
1)Completed - a default - No more action is required by this User.
2)Rescheduled - a default - Another Reminder Item has been created for further follow up.
3)Note - a default - See the Note for why no more action is required by this User.
4)Sold - User Defined (if desired) - Prospect has been sold and requires no more follow up by the Salesman.
5)Collected - User Defined (if desired) - Accounts Receivable Department has received Payment.
6)Sent to Collection - User Defined (if desired) - Accounts Receivable Department has determined this Past Due Account is not collectable using in-house procedures.
7)Left Message - User Defined (if desired) - See the Subscriber's Comments for reason no more action is required by this User.
▪Additional Reminder Resolutions may be defined.
▪The Description may up to 40 characters in length and include upper and/or lower case letters, numbers, spaces and normally used punctuation marks.
✓Click the ![]() Icon to record this Reminder Resolution entry.
Icon to record this Reminder Resolution entry.
▪The system will assign an ID.
✓Repeat this process to add additional Reminder Resolutions.
![]() List Icon - The Navigation Menu also has a List option which provides a tabular view of these Reminder Resolutions records.
List Icon - The Navigation Menu also has a List option which provides a tabular view of these Reminder Resolutions records.
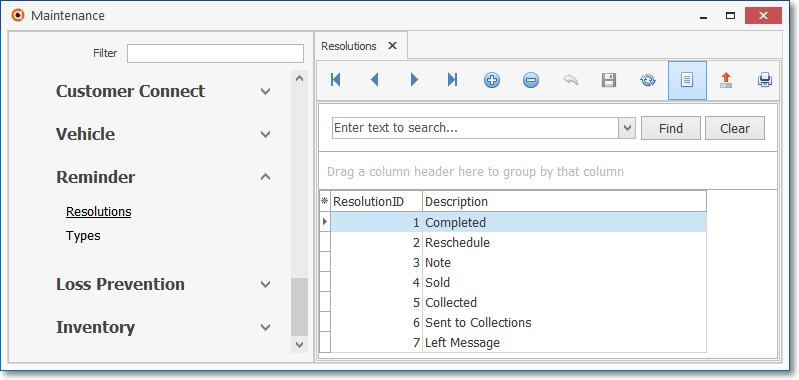
Reminder Resolutions Form - List View
✓The columns of listed Grid Data may be rearranged, filtered, sorted, and exported as a PDF file and/or an Excel formatted file.

✓Find - Enter text to search for a specific record, then Click the Find option.
✓Clear - To remove the text to search for entry, Click the Clear option

Navigation Menu shown with the Icons for List, Export and Print
![]() List Icon - Click the List Icon again to Close the List View and return to the Record Editing View.
List Icon - Click the List Icon again to Close the List View and return to the Record Editing View.
![]() Export Icon - Click the Export Icon to create (one of there types of) a spreadsheet compatible file containing the Grid Data as it is currently organized and filtered.
Export Icon - Click the Export Icon to create (one of there types of) a spreadsheet compatible file containing the Grid Data as it is currently organized and filtered.
![]() Print - Click the Print Icon to display the Print Preview Form from which a custom report may be designed and "printed" as an Adobe® PDF File.
Print - Click the Print Icon to display the Print Preview Form from which a custom report may be designed and "printed" as an Adobe® PDF File.
❖See the Grids - Print Preview - Export Data chapter for complete information on using the List View, including its Export & Print options.