
|
Word Merge DialogThis Help File Page was last Modified on 06/21/2016 |


|
|
Word Merge DialogThis Help File Page was last Modified on 06/21/2016 |
 Scroll to Top of Page
 Print Topic
 Email Feedback
 Show/Hide Expanders
❑Word Merge- The dialogue shown below is only available if Microsoft Word® is installed on your computer.
•To defined the parameters for a Work Merge process:
✓Use the Search Icon on the Navigation section of the the Subscribers Form to locate the appropriate Subscriber record.
✓Open the Subscriber Options Menu on the Navigation section of the Subscribers Form, Select the Word Merge option.
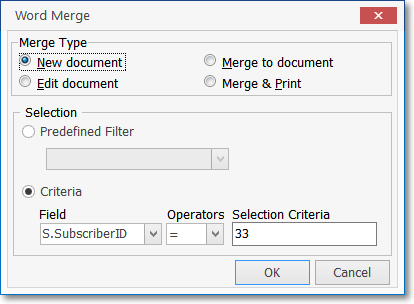
Word Merge dialog
✓New Document - Select New Document and Click OK.
▪Word will - by default - open a dialogue box that will allow you to select an existing Template from your Templates folder.
▪You will start your document based on that template (see document creation techniques in Edit Document below).
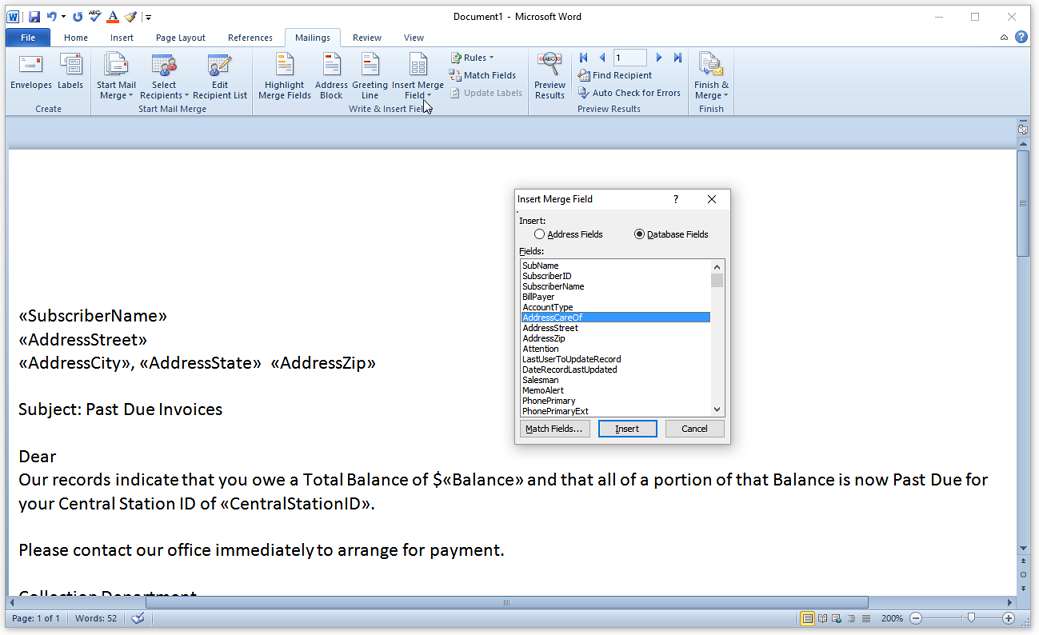
▪Add database fields using the Insert Merge Fields selection (see mouse arrow below for location), as needed.
▪All of the database and mail merge functionality of Microsoft Word® is supported here.
▪Consult your Microsoft Word® help files for more information.
✓Edit Document - Select Edit Document and Click OK.
▪Word will - by default - open a dialogue box that will allow you to select an existing file from your Documents folder.
▪Modify the document as needed.
▪Add or remove database fields using the Insert Merge Fields selection (see mouse arrow below for location), as needed.
▪Merge Fields are represented as follows: <<FieldName>>
▪All of the database and mail merge functionality of Microsoft Word® is supported here.
✓Merge to document - Select Merge to document and Click OK.
▪Word will - by default - open a dialogue box that will allow you to select an existing file from your Documents folder.
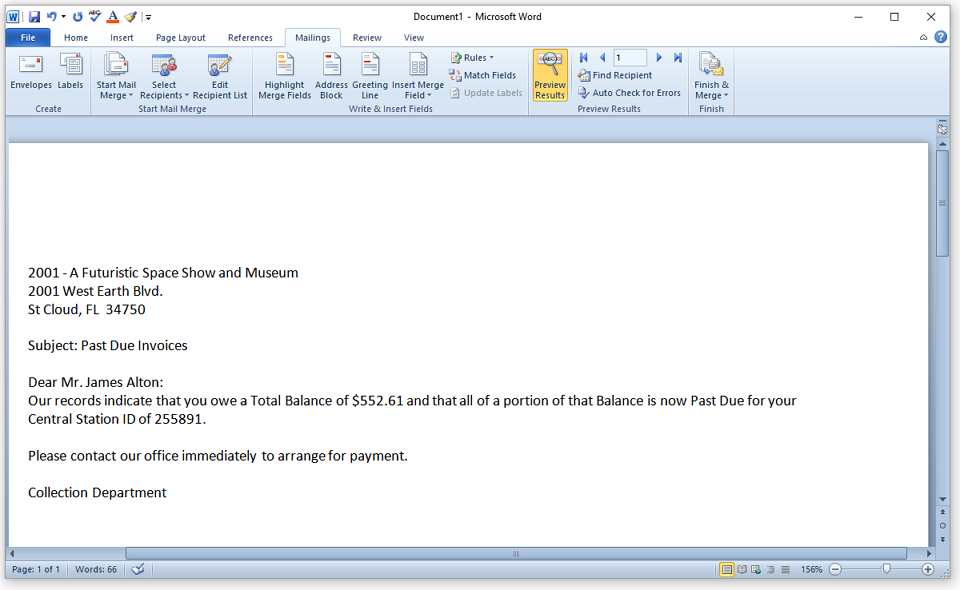
▪All predefined <<Merge Fields>> in the selected document will be populated automatically with the information from the currently selected Subscriber.
▪Modify the document as needed.
▪The result is a completed document which you may save to disk (do not overwrite the generic document you used to create this current populated version).
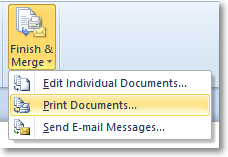
✓Merge & Print - Select Finish & Merge then Print Document and Click OK.
▪As with Merge to document above, Word will - by default - open a dialogue box that will allow you to select an existing file from your Documents folder.
▪All predefined <<Merge Fields>> in the selected document will be populated automatically with the information from the currently selected Subscriber.
▪The completed document will immediately be sent to your default printer.
✓Selection
▪Predefined Filter - If you have created predefined Subscriber Filters for this selection, Click Predefined Filter and use the Drop-Down Selection List to find the one you need.
▪Criteria - simple selection criteria may be used to filter out or filter in a group of Subscribers for (among the many reasons) a mail campaign or a special notification.
i.Field - select a Field to compare like CSID, Balance, Sortcode,DateOfLastSale
ii.Operators - select an Operator to evaluate against the Field.
iii.Selection Criteria - specify the Search Criteria (value) based on how the Operator makes a comparison to the Field.