❑The MKS Web Dealer (and Web Dealer Enhanced) Access - Dashboard is displayed by default when the MKS Web Dealer (and Web Dealer Enhanced) Access module is opened.
•Tap or Click the Main Menu Icon (see the Hand Pointer in the illustration below) to open the Main Menu.
![]()
MKS Web Dealer Access - Main Menu Icon
•Tap or Click the Alarm Events option to view the Alarm Events page.

MKS Web Dealer Access - Alarm Events option - Alarm Events page
❑Understanding and Using the Alarm Events page:
•This Alarm Events page provides three features:
a)Search - Uses the Multi Field Search dialog to locate a specific set of one or more Subscriber(s) by their CSID, Name, and/or many other data types.
b)Filter - Set the Time and Date parameters to define what Alarm Events will be listed
c)List - A List of the selected (filtered) Alarm Events
d)Actions - Ability to export the selected list of Alarm Events as a PDF report, or to display the Signal Processing Details of the selected Alarm Event.
e)Refresh - Pull the most recent set of data to the Alarm Events page.
A.Search - Locate a specific Subscriber by their CSID or Name.
✓Tap or Click the Search button at the top of the Insurance Certificate page to locate a specific Subscriber Information page.
▪The Search dialog described below will be activated.

MKS Web Dealer Access- Search option
a.Search By - Tap or Click the down arrow in this Search By field (see the mouse pointer in the illustration above) to display a Drop-Down Selection List from which the appropriate Search By method (i.e. field name) may be chosen.
b.Search Text - Enter the characters that will identify the desired Subscriber record (see the circled data in the illustration above) based on the Search By method chosen above.
c.Search - Tap or Click this Search button (see the hand pointer in the illustration above) to execute the Search.
d.List - The Subscriber(s) that best match your entry will be listed.
e.Go To Subscriber - Tap or Click on the desired Subscriber record within this list to open that Subscriber Information page.
B.Filter - Setting the Time and Date filter parameters to determine which Alarm Events are listed
a.Time For - Using the Drop-Down Selection List provided to Choose the Time Type (i.e., Central Station or Customer Time ) that will be used when filtering this List of Alarm Events.
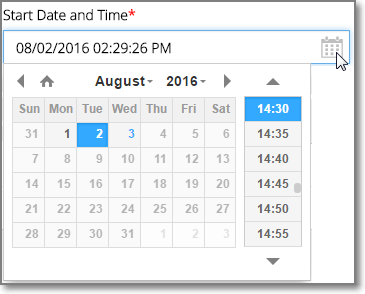
b.Start Date and Time - Select the starting date and time using the Drop-Down Date/Time Calendar Selection Box provided

Drop-Down Date/Time Calendar Selection Box
c.End Date and Time - Select the ending date and time using the Drop-Down Date/Time Calendar Selection Box provided
d.Go - Tap or Click on the Go option to display the chosen Alarm Events
C.List - List of Alarm Events records which has several columns
a.Date Time - The Number assigned to this Area
b.Customer Time - A brief, concise description of the Area.
c.CSID - Will initially be None,then either Open or Closed
d.Subscriber - Date of the last Opening or Closing in this Area
e.Description - A Description of this Alarm Event
f.Signal - The Signal ID that was transmitted for this Alarm Event
g.Zone - The Physical Zone associated with this Alarm Event
h.User # - The User # if one was transmitted by the system
i.User Name - If a User # was transmitted which matches and Employee's User #, that Name will be inserted by the system
j.Incident - The Incident number for this Alarm Event that was assigned by the system
k.Actions - Special purpose Icons (see D. below).
D.Action - There are two Action Icons available
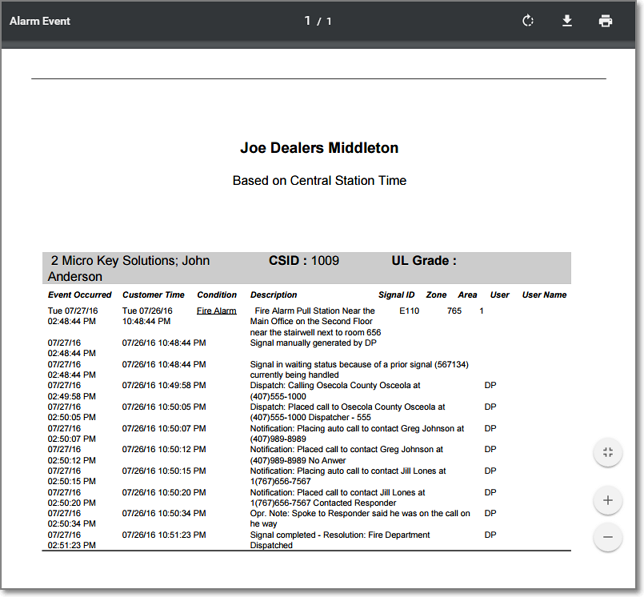
i.PDF Icon - Creates the selected Alarm Event as a PDF report,

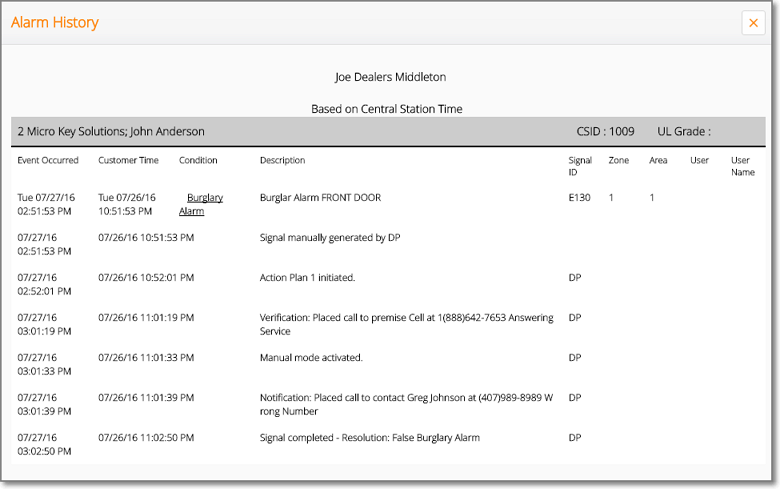
ii.Look Up Icon - Displays the details of the selected Alarm Event in an Alarm Event pop-up

E.Refresh - Tap or Click on the Refresh button to insert most recent set of data into the Alarm Events page.

MKS Web Dealer Access - Alarm Events option - Alarm Events listing