
|
Review Audit FormThis Help File Page was last Modified on 02/28/2017 |


|
|
Review Audit FormThis Help File Page was last Modified on 02/28/2017 |
 Scroll to Top of Page
 Print Topic
 Email Feedback
 Show/Hide Expanders
❑The Review Audit Form provides a dialog where records, created in those Forms which (among others) were assigned the Access Right of A (Audit) in the Employee Groups and User Access Rights Forms, are available for viewing.
•Using the Main Filter options are used to select a specific set of Audit records for further review.
✓Because these records are displayed in a Grid, there are many more ways these records may be sorted, filtered, printed and/or exported.
✓Ultimately this Review Audit Form offers an easy way to examine who, when and what Data Entry and Financial Transactions were affected within MKMS.
•To Review Audit Entries:
a)From the Backstage Menu System Select File, then on the General sub-menu Choose Review Audit to access this Review Audit Form, or
b)From the Quick Access Menu, Select File and Choose Review Audit to access this Review Audit Form.
❑Using the Review Audit Form:
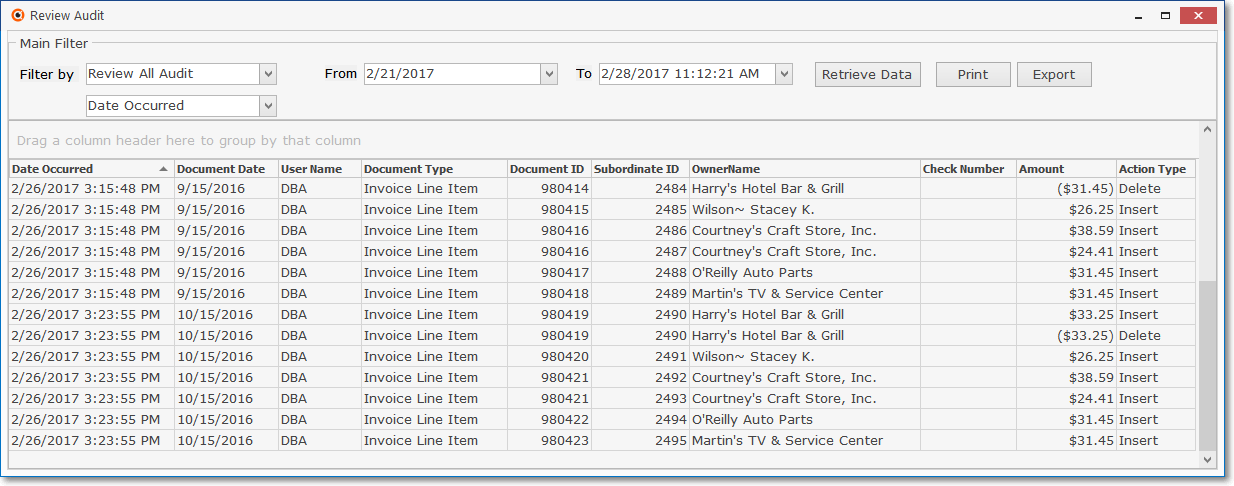
Review Audit Form
•Main Filter options (used to select a set of Audit records for further review):
✓Filter by - Select the record types that are to be reviewed:
▪Review All Audit (records)
▪Review Receivable Audit (records)
▪Review Payable Audit (records)
✓Dated - Select which type of Date will be used to apply the (From and To ) Date Range that will be identified below.
▪Date Occurred - Use the computer's date stamped in the record
▪Document Date - Use the date selected by the user for each record
✓Date Range - By default, the Date Range offered is the most recent Week ending Today.
▪From - Using the Drop-Down Calendar/Date Entry field provided, Choose a different Starting Date, if needed.
▪To - Using the Drop-Down Calendar/Date Entry field provided, Choose a different Ending Date, if needed.
a)Click on the Date field and type the desired Date using a MM/DD/YYYY format; or
b)Use the Drop-Down Calendar/Date Entry field provided to Choose the desired Date
✓Action options
▪Retrieve Data - Click this option to list the records - based on the selected Filter options - in the Grid below the Main Filter box.
▪Print - Click this option to display the Print Preview of the listed records (as formatted using any additional sort, selection and filtering options) displayed in this Grid.
▪Export - Click this option to Export the listed records (as formatted using any additional sort, selection and filtering options) displayed in this Grid.
❖See the Grids & Lists - Print Preview - Export Data chapter for complete information on using those additional Sort, Filter, Print and Export options.