|
|
Purchases Analysis ReportThis Help File Page was last Modified on 04/10/2017 |


|
|
Purchases Analysis ReportThis Help File Page was last Modified on 04/10/2017 |
 Scroll to Top of Page
 Print Topic
 Email Feedback
 Show/Hide Expanders
❑The Purchase Analysis Report provides quick, and easy to understand, Answers to some pretty complex questions.
•What and how much did the Company Buy?
a.Last week?
b.Last month?
c.Last year?
d.This month last year?
e.For whatever Date Range is needed?
•How are those results to be calculated?
a.Purchases from a specified set of (one or more) Vendors?
b.Purchases for a specified set of (one or more) Purchase Category Codes?
c.Purchases from a specified set of (one or more) Vendors for a specified set of (one or more) Purchase Categories?
d.Purchases for a specific Purchase Category from all Vendors?
e.Purchases on a specified set of (one or more) Invoices for a specified set of (one or more) Purchase Categories?
f.Purchases made within a specified Division?
g.Or any combination of these!
❖By default, All Vendors, All Purchase Categories, All General Ledger Account Numbers representing Purchase Accounts, and All Invoices for All Divisions will be included in this Purchase Analysis Report.
❑There are two ways to access the Purchase Analysis dialog:
a)From the Backstage Menu System Select Reports and Choose Payable Reports, or
b)From the Quick Access Menu, Select Reports and Choose Payable Reports.
•Then, Select Purchase Analysis.
•Options - Initially only the Options tab is shown (until you make your Options selections and Select Print).

Purchase Analysis Report - Options tab
✓Report Type - How much information do you want included on this Purchase Analysis Report?
▪Detail - (This is the default option) - Sorted by Purchase Category, this Report Type includes the Purchases from every Vendor and the Total Amount and Quantity that was purchased on each Bill (and showing each Bill's Invoice Number), with sub-totals for the Purchase Amounts and Quantities of each Purchase Category - based on the specified Date Range (see below).
▪Summary - Sorted by Purchase Category, this Report Type includes the total Amounts and Quantities that were purchased for each Purchase Category - within the specified Date Range (see below).
oSummary version includes Total Net Purchases, Total Sales Taxes, and the Gross Purchase Amounts.
✓Ordered By - Choose the sequence in which the data will be listed on the Purchase Analysis Report.
▪Vendor - Lists Vendors in Vendor ID (system assigned record number) order and their associated Invoices.
▪Purchase Item - Lists by Purchase Category code, and within each code, alphabetically by Vendor, then each Vendor's Invoices
▪GL Account - Lists by General Ledger Account Number, then Purchase Category.
✓Date Range - What is the Date Range within which these Purchases should be reported?
▪From - The default starting date is the first day of the most recently completed month.
oUse the Drop-Down Calendar/Date Entry field to change the starting date, as needed.
▪To - The default ending date is the last day of the most recently completed month.
oUse the Drop-Down Calendar/Date Entry field to change the ending date, as needed.

Purchase Analysis options - For Selected Vendors & Selected Purchase Items
✓Display Amount - Specify how the Purchase Amount will be reported:
▪Net - Display the net cost of the Purchase Item(s) (exclusive of any Sales Tax).
▪Gross - Display the gross cost of the Purchase Item(s) (including all Sales Taxes).
✓Vendors - Specify which Vendor's Purchases are to be included:
▪All Vendors - By default, All Vendors from whom a qualified Purchase was made, within the Date Range specified above, will be included (only limited by any Specific Selection Options chosen below).
▪Select Vendors - Click this button to only include those Purchases made from a selected set of (one or more) Vendors within the specified Date Range.

oClick the Search button (as shown above) in the Select Vendors field to open the Select Vendor dialog.
oLocate the desired Vendor(s).
oUsing the (F2)-Search field feature to locate a Vendors record:
i.Click on the Field in the first record line of that selected Header Name Column to Select the Header Name to search by.
ii.Press F2 to position the cursor (and clear any previous entries) in the(F2)-Search field.
iii.Enter characters for the search which will then be compared to the data in the selected Column.
iv.As characters are entered, an incremental search is performed on the data within that Column.
v.Check the desired record(s) when the desired record(s) are located.
oRepeat this process until you have located, and Checked each required record.
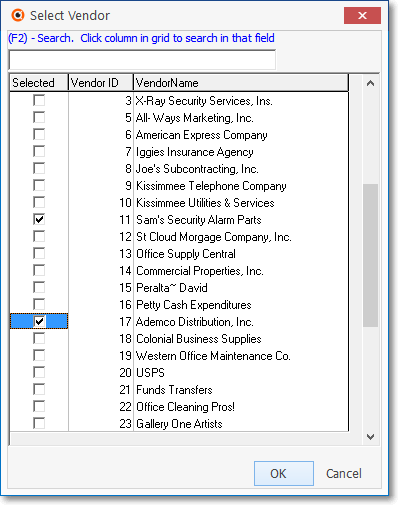
Select Vendor dialog
oCheck the Selected box for each Vendor's Purchases which are to be included in the report.
oRemember, more than one Vendor may be selected.
oClick the OK button to Close the Select Vendor dialog and insert the selected Vendor IDs in the Select Vendors field.
✓Purchase Items - Specify which Purchase Categories - and the Invoices with Purchases for those (selected) Purchase Category Codes - are to be listed.
▪All Items - By default, Any Purchase Categories that were Invoiced within the specified Date Range will be included (limited only by any Specific Selection Options chosen above or below).
▪Select Items - Click this button to specify which Purchase Category Codes are to be included in the report.

oClick the Search button (as shown above) in the Select Items field to open the Select Purchase Item dialog.
oLocate the desired Purchase Item(s).
oUsing the (F2)-Search field feature to locate a Purchase Category record:
i.Click on the Field in the first record line of that selected Header Name Column to Select the Header Name to search by.
ii.Press F2 to position the cursor (and clear any previous entries) in the(F2)-Search field.
iii.Enter characters for the search which will then be compared to the data in the selected Column.
iv.As characters are entered, an incremental search is performed on the data within that Column.
v.Check the desired record(s) when the desired record(s) are located.
oRepeat this process until you have located, and Checked each required record.

Select Purchase Item dialog
oCheck the Selected box for each Purchase Item that is to be included in the report.
oRemember, more than one Purchase Item may be selected.
oClick the OK button to Close the Select Purchase Items dialog and insert the selected Purchase Category Codes in the Select Items field.
✓GL Purchases Accounts - Specify which General Ledger Accounts assigned to Purchase Categories are to be listed.
▪All - By default, any General Ledger Account assigned to any Purchase Categories that were on any Bills entered within the Date Range specified above, will be listed (limited only by any Specific Selection Options chosen above or below)
▪Select Accounts - Click this button to choose which General Ledger Accounts are to be included in the report.

oClick the Search button (as shown above) in the Select Accounts field to open the Select Purchase Item dialog.
oLocate the desired Purchase Item(s).
oUsing the (F2)-Search field feature to locate a General Ledger Account Number:
i.Click on the Field in the first record line of that selected Header Name Column to Select the Header Name to search by.
ii.Press F2 to position the cursor (and clear any previous entries) in the(F2)-Search field.
iii.Enter characters for the search which will then be compared to the data in the selected Column.
iv.As characters are entered, an incremental search is performed on the data within that Column.
v.Check the desired record(s) when the desired record(s) are located.
oRepeat this process until you have located, and Checked each required record.

Select GL Purchase Acct. dialog
oCheck the Selected box for each General Ledger Account Number that is to be included in the report.
oRemember, more than one Purchase Account Number may be selected.
oClick the OK button to Close the Select GL Purchase Acct dialog and insert the selected General Ledger Account Numbers in the Select Accounts field.
✓Invoices - Specify which Invoice Numbers assigned to Bills are to be included in the report.
▪All - By default, all Invoice Numbers assigned to Bills that were Invoiced within the specified Date Range will be included (limited only by any Specific Selection Options chosen above or below).
▪Select Invoices - Click this button to choose which Invoice Numbers assigned to Bills are to be included in the report.

oEnter the desired Invoice Numbers (each one separated by a comma) of the Bills with the Purchases that are to be included in the report
✓Division - Using the Drop-Down Selection List provided, you may Choose a Division or Division Group code to restrict the report to Purchases entered within the Date Range specified above (and limited by any Specific Selection Options chosen above) to only those Purchases made from Vendors that were assigned to the selected Division or Division Group.
✓Department - Using the Drop-Down Selection List provided, you may Choose a Department Name to restrict the report to Purchases entered within the Date Range specified above (and limited by any Specific Selection Options chosen above) to only those Purchases made for a specific Department.
✓Charts - If a selected set of One or more Vendors and All Purchase Items, or All Vendors and a selected set of One or more Purchase Item is Chosen, a Chart may be included in the report so that option will be displayed automatically at the bottom of the Purchase Analysis Report dialog.
▪A Chart selection is not required - the default is[none].
▪If a Chart is desired, use the Drop-Down Selection List provided to Choose either the Pie or Bar Chart (which will include an explanatory Legend) that is to be included as part of the Purchase Analysis Report output (see sample below).

Purchase Analysis Report - Charts option - Selected Vendors, All Items, & GL Accts
▪The Charts Drop-Down Selection List is only offered when either the combination of the All Vendors and Select Items, or the Select Vendors and All Items Selection Option set is chosen.
▪When one of these option sets is selected above, the Charts Drop-Down Selection List will be displayed.

Purchase Analysis Report with Pie Chart and associated Legend
✓Print - Click the Print button ![]() to Preview and optionally Print (to a File or a Printer) this Purchases Analysis Report.
to Preview and optionally Print (to a File or a Printer) this Purchases Analysis Report.
✓To Exit this Report dialog, Click the Close button ![]() toward the bottom of the Options tab.
toward the bottom of the Options tab.
•Preview - The Preview tab presents the report which resulted from the Options you've selected.
✓Click the Plus Sign ("+") to the left of any Invoice Number (within the Invoice # column as shown in the illustration below) to display that Bill Form.

Purchases Analysis Report - Preview tab with Bill Form
✓Arrows - Click the arrows to move through the record.
✓Home - ![]() - Using either the screen Icon or your Keyboard's Home key, moves the report to the top of the first page.
- Using either the screen Icon or your Keyboard's Home key, moves the report to the top of the first page.
✓End - ![]() - Using either the screen Icon or your Keyboard's End key, moves the report to the bottom of the last page
- Using either the screen Icon or your Keyboard's End key, moves the report to the bottom of the last page
✓Arrows - The arrows allow you to move back and forth, from page to page.
✓Number - Indicates the page number you are viewing.
▪You may also type in a specific page number, Press 8 Enter and that page will be displayed immediately.
▪If you enter an invalid page number, it will be ignored.

Purchases Analysis Report - No Chart - Preview tab
✓Fit To Page - Click the first button after the arrows to size a full page of the report to fit the screen.
✓Zoom To 100% - Click the second button after the arrows to display the page at 100% (of the printed view).
✓Fit To Page Width - Click the third button after the arrows to size the page of the report to fit the full width of the screen.
✓Zoom To Percentage - Click the fourth button after the arrows to re-size the page of the report by percentage.
![]()
▪When you Click the Zoom To Percentage button, the Percentage selector will be displayed.
▪You may then Click the Up or Down ‚ arrows to set the exact amount of Zoom you want.
✓Print - Click the Print button to Print (to a File or a Printer) ![]() the displayed Purchases Analysis Report.
the displayed Purchases Analysis Report.
✓Email - Click the Email button ![]() to send the Report to an Email Address of your choosing.
to send the Report to an Email Address of your choosing.
✓To Exit the Preview tab and Close this Report dialog Form, Click the Close box ![]() on the right at the top of the Preview
on the right at the top of the Preview
•Data View - This view provides a tabular (spreadsheet style) presentation of the selected data.

Purchases Analysis Report - Data View tab
✓Export - Exporting the data from this Data View Form (note the "fly-over" help available on these buttons):
▪Export to CSV - Click the first button after the arrows to export the data to a Comma Separated Values (CSV) file format.
▪Export To Excel - Click the second button after the arrows to export the data to an Excel (.xls) file format.
▪Export To Html - Click the third button after the arrows to export the data to an HTML formatted file.
✓To Exit the Data View tab and Close this Report dialog Form, Click the Close box ![]() on the right at the top of the Data View tab.
on the right at the top of the Data View tab.