|
|
Cash Receipts Summary by MonthThis Help File Page was last Modified on 03/25/2017 |


|
|
Cash Receipts Summary by MonthThis Help File Page was last Modified on 03/25/2017 |
 Scroll to Top of Page
 Print Topic
 Email Feedback
 Show/Hide Expanders
❑The Cash Receipts Summary by Month lists each (or a specified) Batch Number and Amount, and the Total Amount posted as Receipts for Invoices (not including those monies posted as a Customer Deposit) for the specified Month and Year.
•There are two ways to access the Cash Receipts Summary by Month dialog:
a)From the Backstage Menu System Select Reports and Choose Receivable Reports, or
b)From the Quick Access Menu, Select Reports and Choose Receivable Reports.
✓Then, Select the Cash Receipts Summary by Month option.
❑ Cash Receipts Summary by Month Report tabs - There are two tabs on the Cash Receipts Summary by Month report dialog.
•Options - Initially only the Options tab is shown (until you make your Options selections and Select Print).
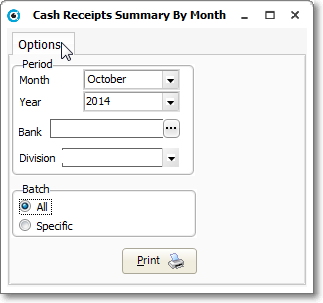
Cash Receipts Summary By Month - Options tab
✓Period and other Parameters:
▪Month - By default, this will be the current Month.
oTo change this default, use the Drop-Down Selection List provided, and Choose the desired Month to be reported.
▪Year - By default, this will be the current Year.
oTo change this default, use the Drop-Down Selection List provided, and Choose the desired Year to be reported.
▪Bank - By default, the Receipts posted to All Banks (using the selected Batch Number, if specified below) will be included.
i.You may limit Receipts to those posted to a specific set of (one or more) Bank(s).
ii.Click the Ellipse in the Bank field to open the Select Bank ID dialog.
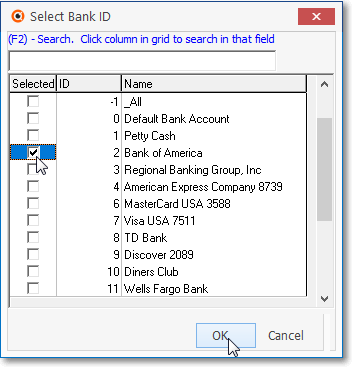
Select Bank ID dialog
iii.Check the Selected box for each Bank that is to be reported.
iv.Click the OK button to Close the Select Bank ID dialog.
v.This will insert the Selected Bank IDs into the Bank field.
▪Division - Receipts posted to any Division will be included.
oTo limit Receipts to those posted from Subscribers assigned to a specific Division or Division Group, use the Drop-Down Selection List provided to Choose the appropriate Division or Division Group.
✓Batch - By default, All Batch Numbers will be included for the selected Month and Year.
▪Specific - Click the Specific button to display the Batch field.
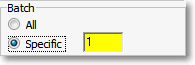
oEnter the specific Batch Number that is to be reported.
➢Note: See the "Batch Number Assignment" discussion in the Receipts chapter for more information about Batch Numbering.
✓Print - Click the Print button ![]() to Preview and optionally Print this Cash Receipts Summary by Month Report.
to Preview and optionally Print this Cash Receipts Summary by Month Report.
✓To Exit this Report dialog, Click the Close button ![]() toward the bottom of the Options tab.
toward the bottom of the Options tab.
•Preview - The Preview tab presents the report which resulted from the Options you've selected.
✓Up Arrow/Down Arrow - hi - Moves the report one line up, or one line down, respectively.
✓Page Up/Page Down - Moves the report to the previous or next page, respectively.
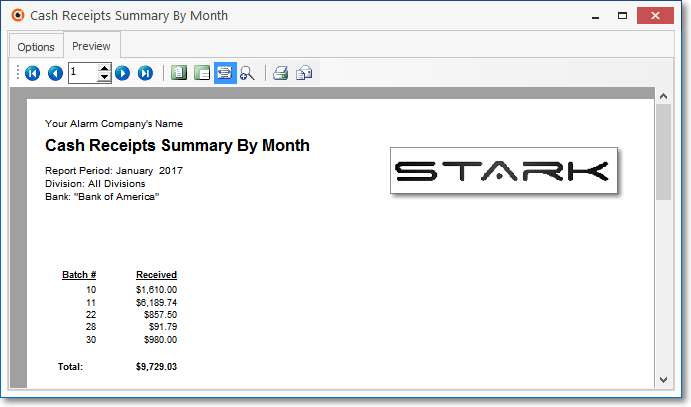
Cash Receipts Summary By Month report - Preview tab
✓Home - ![]() - Using either the screen Icon or your Keyboard's Home key, moves the report to the top of the first page.
- Using either the screen Icon or your Keyboard's Home key, moves the report to the top of the first page.
✓End - ![]() - Using either the screen Icon or your Keyboard's End key, moves the report to the bottom of the last page.
- Using either the screen Icon or your Keyboard's End key, moves the report to the bottom of the last page.
✓Arrows - The arrows allow you to move back and forth, from page to page.
✓Number - Indicates the page number you are viewing.
▪You may also type in a specific page number, Press 8 Enter and that page will be displayed immediately.
▪If you enter an invalid page number, it will be ignored.
✓Fit To Page - Click the first button after the arrows to size a full page of the report to fit the screen.
✓Zoom To 100% - Click the second button after the arrows to display the page at 100% (of the printed view).
✓Fit To Page Width - Click the third button after the arrows to size the page of the report to fit the full width of the screen.
✓Zoom To Percentage - Click the fourth button after the arrows to re-size the page of the report by percentage.
![]()
▪When you Click the Zoom To Percentage button, the Percentage selector will be displayed.
▪You may then Click the Up or Down ‚ arrow to set the exact amount of Zoom you want.
✓Print - Click the Print button to Print (to a File or a Printer) ![]() the displayed Cash Receipts by Salesman Report.
the displayed Cash Receipts by Salesman Report.
✓Email - Click the Email button ![]() to send the Report to an Email Address of your choosing.
to send the Report to an Email Address of your choosing.
✓To Exit the Preview tab and Close this Report dialog Form, Click the Close box ![]() on the right at the top of the Preview tab.
on the right at the top of the Preview tab.