
|
Bills on Payment HoldThis Help File Page was last Modified on 04/03/2017 |


|
|
Bills on Payment HoldThis Help File Page was last Modified on 04/03/2017 |
 Scroll to Top of Page
 Print Topic
 Email Feedback
 Show/Hide Expanders
❑There are times when you may want to Hold Payment owed to a Vendor for a specific Bill.
•This is done when you Check the Hold Payment box on the Bills Form which identifies that Bill as being on Payment Hold.
✓When a Bill is on Payment Hold, it will not be available for payment on either the Disbursements or the Allocations Form.
✓It will not appear on the Cash Requirements Report.
✓It will, however, appear on this Bills on Payment Hold report.
•There are two ways to access the Bills on Payment Hold dialog:
a)From the Backstage Menu System Select Reports and Choose Payable Reports, or
b)From the Quick Access Menu, Select Reports and Choose Payable Reports.
✓Then, Select Bills on Payment Hold.
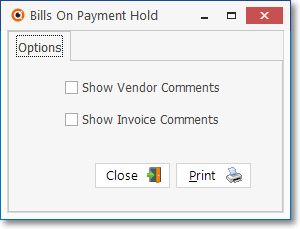
Bills On Payment Hold - Options tab
❑Bills on Payment Hold tabs - There are three tabs on the Bills on Payment Hold Report dialog.
•Options - Initially only the Options tab is shown (until you make your Options selections and Select Print).
✓Show Vendor Comments - Check this box to include the Comments field found on the Edit Tab of the Vendors Form.
✓Show Invoice Comments - Check this box to include the Comments entered in the Bills Form.
✓Print - Click the Print button  to Preview and optionally Print (to a File or a Printer) this Bills on Payment Hold report.
✓To Exit this Report dialog, Click the Close button  toward the bottom of the Options tab
•Preview - The Preview tab presents the report which resulted from the Options selected above.
✓Up Arrow/Down Arrow - h Moves the report up one line, i Moves the report down one line.
✓Page Up/Page Down - Moves the report to the previous or next page, respectively.
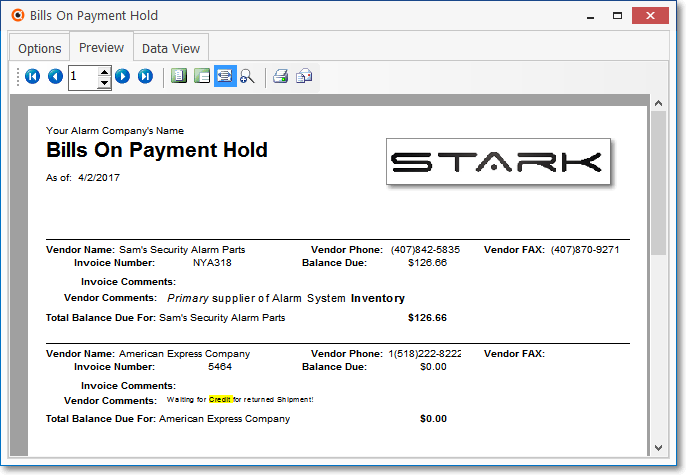
Bills On Payment Hold - Preview tab
✓Home -  - Using either the screen Icon or your Keyboard's Home key, moves the report to the top of the first page.
✓End -  - Using either the screen Icon or your Keyboard's End key, moves the report to the bottom of the last page.
✓Arrows - The arrows allow you to move back and forth, from page to page.
✓Number - Indicates the page number you are viewing.
▪You may also type in a specific page number, Press 8 Enter and that page will be displayed immediately.
▪If you enter an invalid page number, it will be ignored.
✓Fit To Page - Click the first button after the arrows to size a full page of the report to fit the screen.
✓Zoom To 100% - Click the second button after the arrows to display the page at 100% (of the printed view).
✓Fit To Page Width - Click the third button after the arrows to size the page of the report to fit the full width of the screen.
✓Zoom To Percentage - Click the fourth button after the arrows to re-size the page of the report by percentage.

▪When you Click the Zoom To Percentage button, the Percentage selector will be displayed.
▪You may then Click the Up or Down ‚ arrows to set the exact amount of Zoom you want.
✓Print - Click the Print button to Print (to a File or a Printer)  the displayed Bills on Payment Hold Report.
✓Email - Click the Email button  to send the Report to an Email Address of your choosing.
✓To Exit the Preview tab and Close this Report dialog Form, Click the Close box  on the right at the top of the Preview tab.
•Data View - This view provides a tabular (spreadsheet style) presentation of the selected data.

Bills On Payment Hold - Data View
✓Arrows - Click the arrows to move through the record.
✓Export - Exporting the data from this Data View tab (note the "fly-over" help available on these buttons):
▪Export to CSV - Click the first button after the arrows to export the data to a Comma Separated Values (CSV) file format.
▪Export To Excel - Click the second button after the arrows to export the data to an Excel (.xls) file format.
▪Export To Html - Click the third button after the arrows to export the data to an HTML formatted file.
✓To Exit the Data View tab and Close this Report dialog Form, Click the Close box on the right at the top of the Data View tab.