
|
SPA Setup - Receivers tabThis Help File Page was issued on 09/30/2017 This Help File Page was last Modified on 11/09/2022 |


|
|
SPA Setup - Receivers tabThis Help File Page was issued on 09/30/2017 This Help File Page was last Modified on 11/09/2022 |
 Scroll to Top of Page
 Print Topic
 Email Feedback
 Show/Hide Expanders
❑Receivers tab - Lists supported Receivers information and allows additional Receivers to be added to this list.
•By default, the "standard" Receivers are already listed.
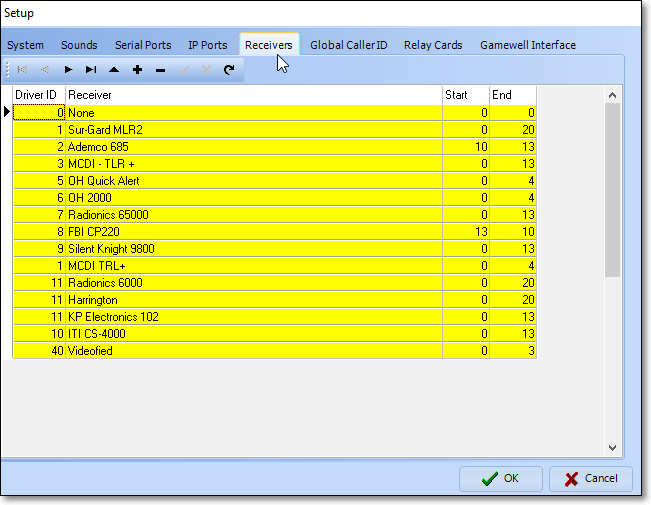
Receivers tab on the SPA Setup Form
✓Driver ID - Displays the internal Driver number.
▪The Driver number is used by SPA to know how to process signals from this type of Receiver.
▪Several Receivers may use the same Driver number (see ID above) because they all send information to the computer in the same manner.
✓Receiver - The Receiver's name within the SPA application
✓Start - Position of the first Character sent by this Receiver "introducing" a new alarm event Packet.
✓End - Last Character sent by this Receiver "closing" the latest alarm event Packet will be this number of characters after the first (Start) character.
•Adding a new Receiver to this Receivers tab - (see the three receivers using Driver ID number 11 in the illustration above, as an example):
✓Click Add ("+") Icon to insert a new line in the Receivers tab
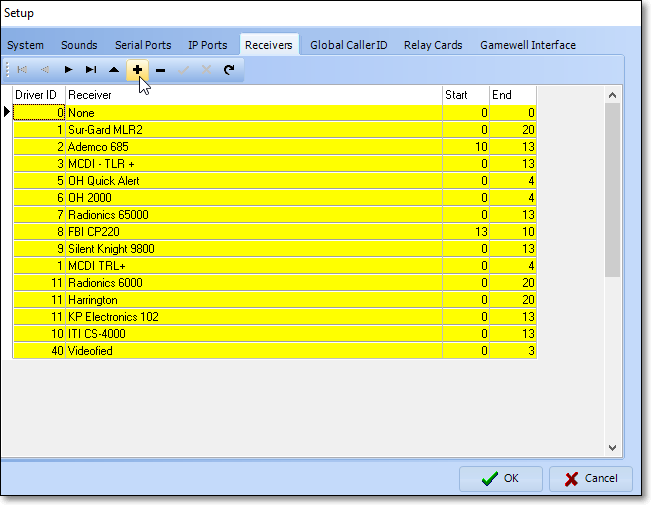
SPA Setup Form - Receivers tab - Add icon
✓The New Driver dialog will be displayed
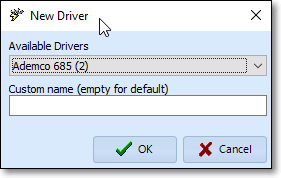
✓Available Drivers - Use the Drop-Down Selection List provided to Choose the appropriate Receiver Driver
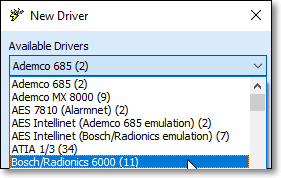
Driver Assignment dialog accessed from the Receiver field
▪Choose from among the 50+ Receiver Drivers available.
▪Click the OK button to save the required Receiver definition.
✓Setting up this new Receiver Driver:
▪Driver ID - The number of the selected Receiver will be inserted in the Receiver ID column.
▪Receiver - The (revised) name of the selected Receiver will be inserted in the Receiver column.
✓Once you have added this new receiver, be sure to defined the Start and End position numbers.
▪Start - Enter the Starting Position Number of this Receiver's Data Packet.
▪End - Enter the Ending Position Number of this Receiver's Data Packet.
✓Click the OK button to record your New Receiver Driver entry.

•Once a Receiver Assignment has been made, if you need to change this Receiver's name Click the Edit () Icon and modify as needed.
➢Note: Also, see the Xml MicroKey Receiver Driver for that information.