❑The Wells Fargo Positive File procedure is used to create an Export file containing specified Recurring Revenue Invoices for future collection by Wells Fargo Bank.
❑Accessing the Wells Fargo Positive File procedure:
a)From the Backstage Menu System Select Maintenance and Choose Receivables then Click the Pay Import option, then Select Regulus/Wells Fargo Import Menu, or
b)From the Quick Access Menu, Select Maintenance and Choose Receivables then Click the Pay Import option, then Select Regulus/Wells Fargo Import Menu
•Finally, Click on the Wells Fargo Positive File option.
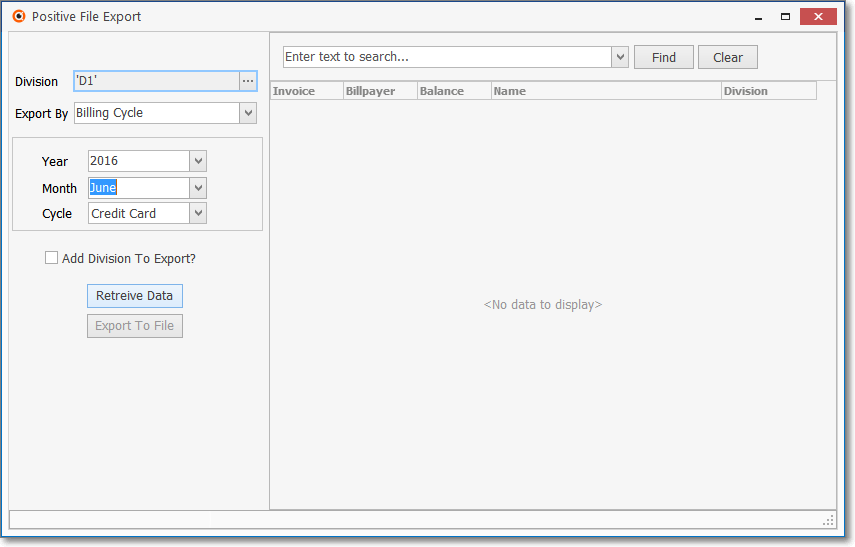
(Wells Fargo) Positive File Export - Export By Billing Cycle
•Parameters - Identify while Recurring Revenue Invoices will be included in the Export File.
✓Division - Click the Division field's Ellipse to open the Select Division dialog.
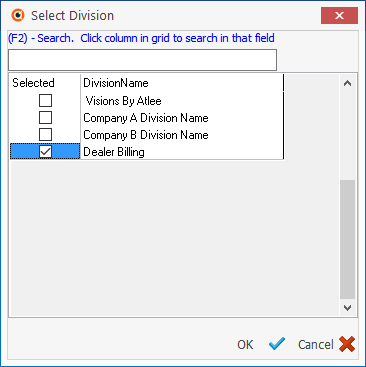
Select Division dialog
▪Check the Selected box for each Division whose Subscribers may have the desired Recurring Revenue Invoices
▪Click the OK ü button to Close the Select Division dialog and insert the Selected Division Code(s) in that field.
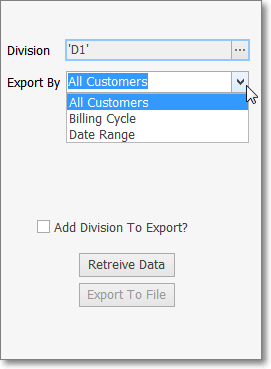
✓Export By - Using the Drop-Down Selection List provided, Choose the method to be used to specifically identify those Subscribers.
▪All Customers - As shown in the illustration immediately below, when this option is selected, no additional information is required.
Export By - All Customers option
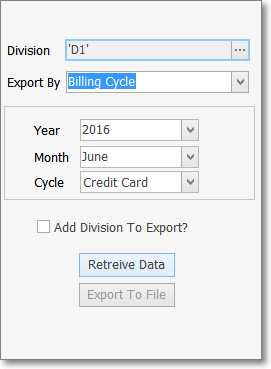
▪Billing Cycle - As shown in the illustration below, the Year, Month and Billing Cycle used to create the required Recurring Revenue Invoices has been specified.
Export By - Billing Cycle option
▪Specific Dates - As shown in the illustration below, the From and To Date Range have been selected using the Drop-Down Calendar/Date Entry field es provided.
a)Click on the Date field and type the desired Date using a MM/DD/YYYY format; or
b)Use the Drop-Down Calendar/Date Entry field provided to Choose the desired Date
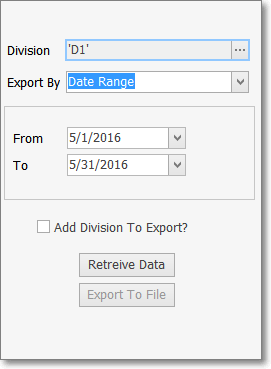
Export By - Specific Dates option
✓Add Division To Export? - If one Division Code has been selected, Check this box to have that Division Name added to each data line that is exported.
•Retrieve Data - Click the Retrieve Data Icon to locate the required Recurring Revenue Invoices.
✓The Invoices for those Subscribers that match the selected Division, and/or Export By parameters will be displayed.
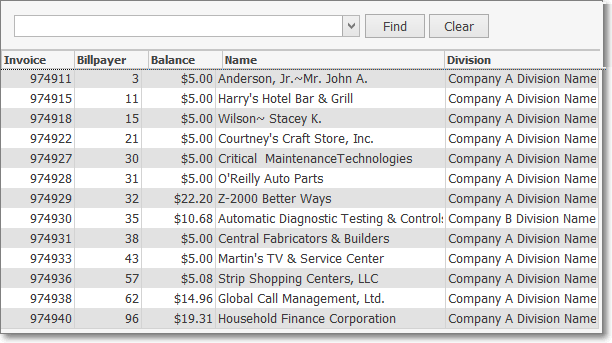
Positive File Export - Retrieved data sample
✓Filtering the List of Invoices:
▪The List of Invoices may be filtered based on a text entry, thus limiting those records that will be Exported.

Find - Enter "text to search for" and limit the List of Invoices to the specifically required record(s), then Click the Find option.
Clear - To remove the "text to search for" entry and so display the entire List of Invoices, Click the Clear option
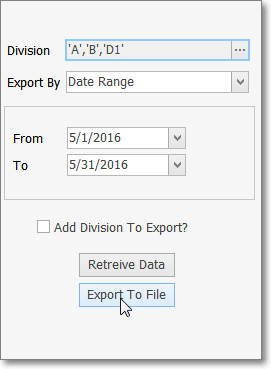
•Export To File - Once it is determined that the Retrieved Data meets the desired requirement, Click the Export To File button at the bottom of the Positive File Export Form
Export To File button
✓The standard Windows® Save As dialog will be displayed.
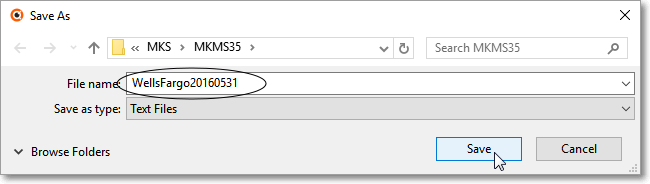
✓Select the Location, enter the File Name, and identify the File Type (Txt) using the Drop-Down Selecting List provided.
✓Save - Click the Save button to create the file.
