❑Click the View Icon on the Appointments Sub-Section of the Technicians Scheduling Form to designate the desired Planner View Options
![]()
Appointment related Icons (options)
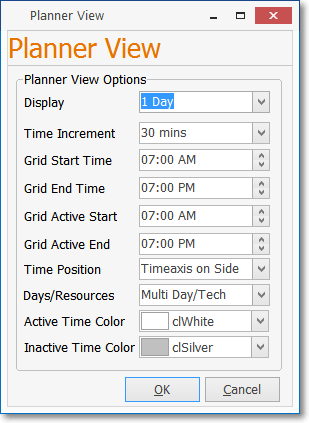
Technician Scheduling Form - Planner View
•Understanding the Planner View Form:
✓Display - Use the Drop-Down Selection List to Select the number of days to be displayed in the Technicians Scheduling Form's Technician Schedules Grid's Day View tab
▪1 Day, 2 Days, 3 Days, 5 Days, or 7 Days as the choices and 1 Day the default.
▪The Schedules for Multiple Technicians may be displayed for Multiple Days by setting the number of Days to View here in Planner View, and then Selecting the appropriate set of Multiple Technicians on the Visible Schedules Form.
✓Time Increment - Use the Drop-Down Selection List to Select the number of minutes each time block will contain in the Technicians Scheduling Form's Day View (1 Minute, 5 Minutes, 10 Minutes, 15 Minutes, 30 Minutes, or 60 Minutes are your choices with 60 Minutes being the default).
✓Grid Start Time - Enter the starting time for the Technician Schedules Grid's Day View tab.
✓Grid End Time - Enter the ending time for the Technician Schedules Grid's Day View tab.
✓Grid Active Start - Sets the Time when the the Technician Schedules Grid's Day View tab shows it is activated (by the color difference).
✓Grid Active End - Sets the Time when the the Technician Schedules Grid's Day View tab shows it is no longer activated (by the color difference).
✓Time Position - The Time Line on the the Technician Schedules Grid's Day View tab may be shown on the Top or Side of the Form.
▪Use the Drop-Down Selection List to Choose the preferred position.
✓Days/Resources - Use the Drop-Down Selection List to Choose the preferred format:
▪Multi Day/Tech (Show Multiple Days per Technician) - Display the schedule of each Technician who was Chosen in the Visible Schedules dialog for as many days as are being displayed (based on the Display option selected above), before displaying the next Technician's schedule.
Technician Scheduling Form - Multi Day/Tech option selected
▪Multi Tech/Day (Show Multiple Technicians per Day) - Display the schedules for all Technician who were Chosen in the Visible Schedules dialog for each Day that's being displayed (based on the Display option selected above), before displaying the next Day's schedule of Technicians.
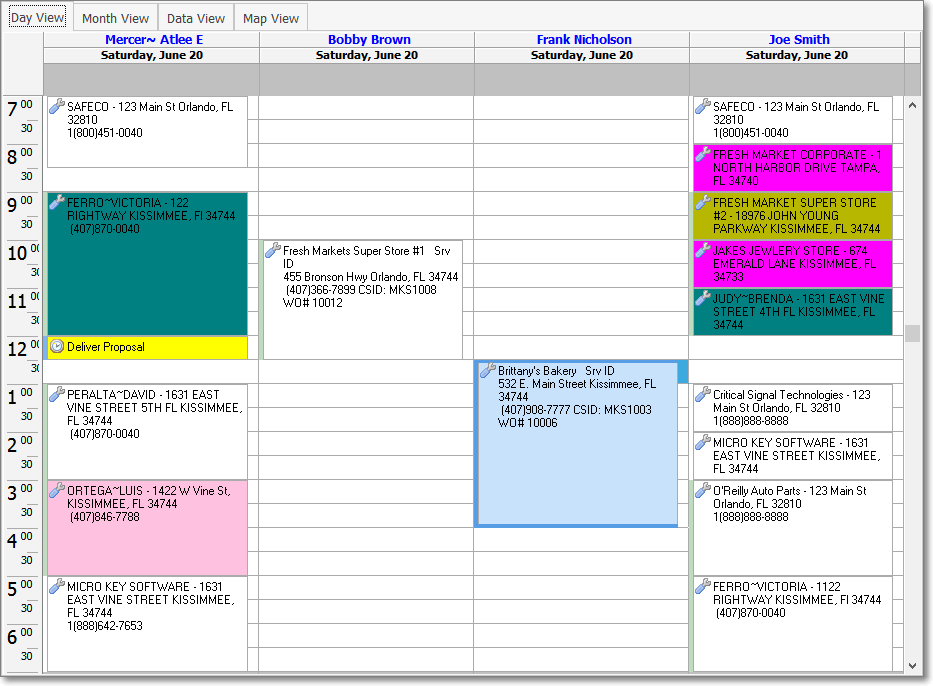
Technician Scheduling Form - Multi Tech/Day option selected
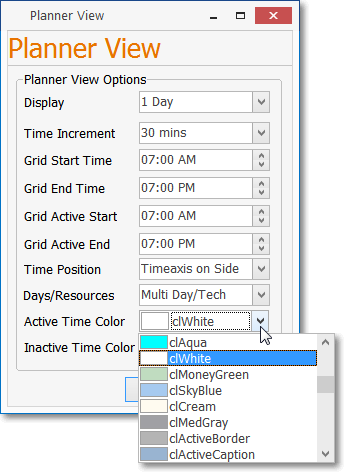
✓Active Time Color - Use the Drop-Down Selection List to Choose the Background Color of the Active Appointments Time Range (see the "Grid Active Start field" discussion above)
✓Inactive Time Color - Use the Drop-Down Selection List to Choose the Background Color of the Inactive Time Range (see the "Grid Start Time field" discussion above)
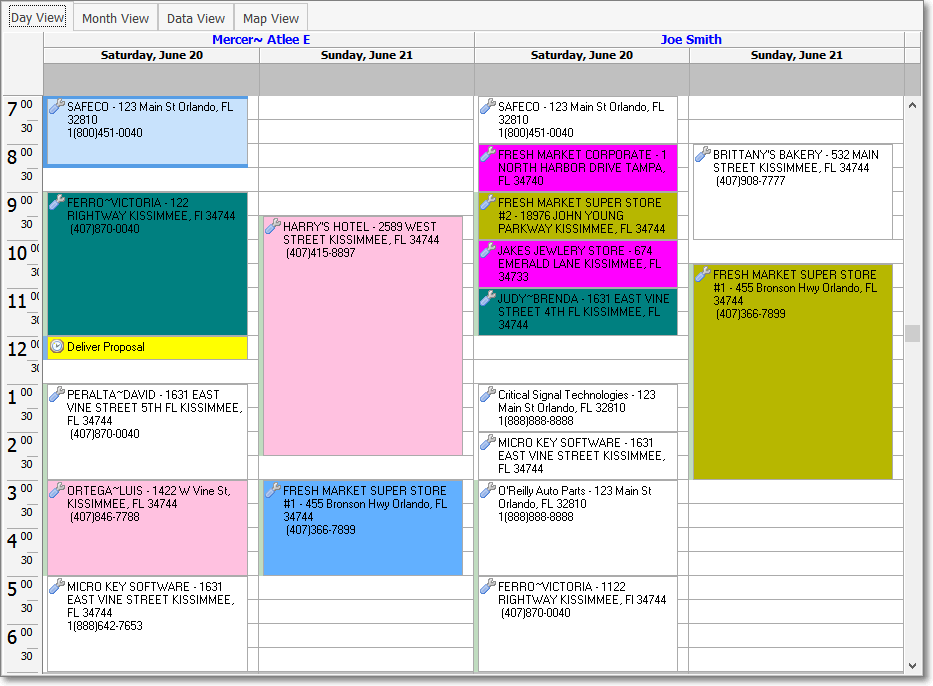
•Below is the Day View tab shown with the Time Axis on the Side and displaying 60 minute Time Increments.
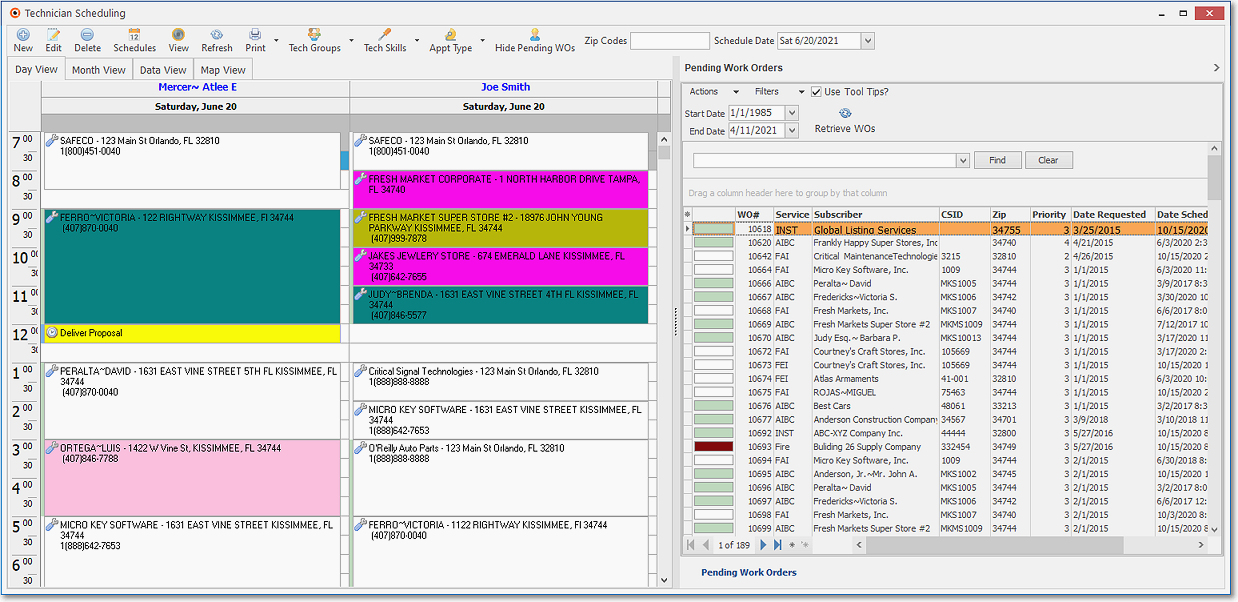
Day View with Time Axis on the Side showing 30 minute time increments with Two Techs and Two Days displayed simultaneously
•Below is the Day View tab shown with the Time Axis on the Top and displaying 30 minute Time Increments.
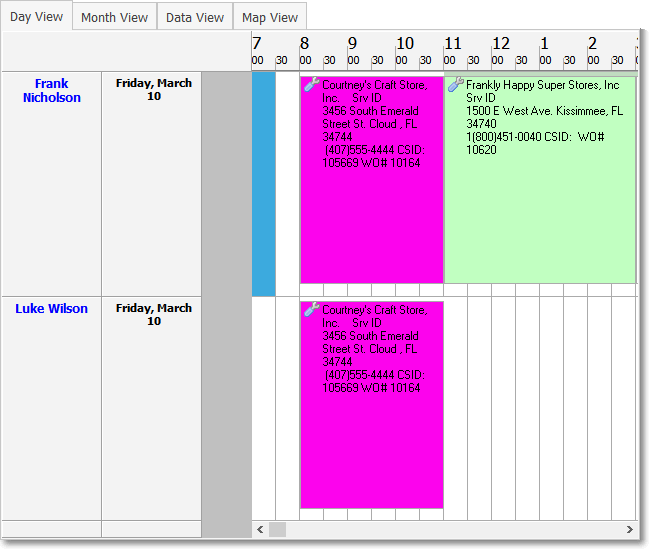
Day View with Time Axis on the Top showing 30 minute time increments
•OK - Click OK to save your preferences.
•Cancel - Click Cancel to abort your changes.