❑Each Subscriber's Alarm System that will be monitored with this Central Station Monitoring module, must be identified as a monitored account within the Central Station Data section of the Edit View's Monitoring tab on the Subscribers Form.
•As part of that process, each monitored Subscriber must be assigned an Alarm (Processing) Group code within the Central Station Data section, thus defining the Alarm (Processing) Group to which that monitored account is to be a member.
✓Alarm (Processing) Groups are defined in advance.
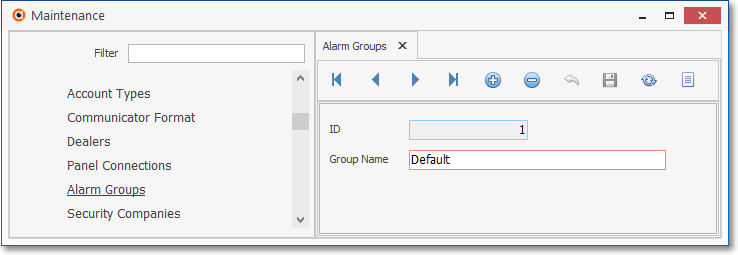
Alarm Groups Form
✓Assigning an Alarm Group to a Subscriber record assures that the Subscriber's signals are routed to Operators
a)who will better understand the type of system being monitored, and/or
b)who speaks the same language of the person to which she/he is currently responding.
▪Examples of an Alarm Group are Spanish Speaking, English Speaking, High Value Account, UL® Commercial, and Supervised for Open/Close. You may define as many Alarm Groups as appropriate for your Company's business model.
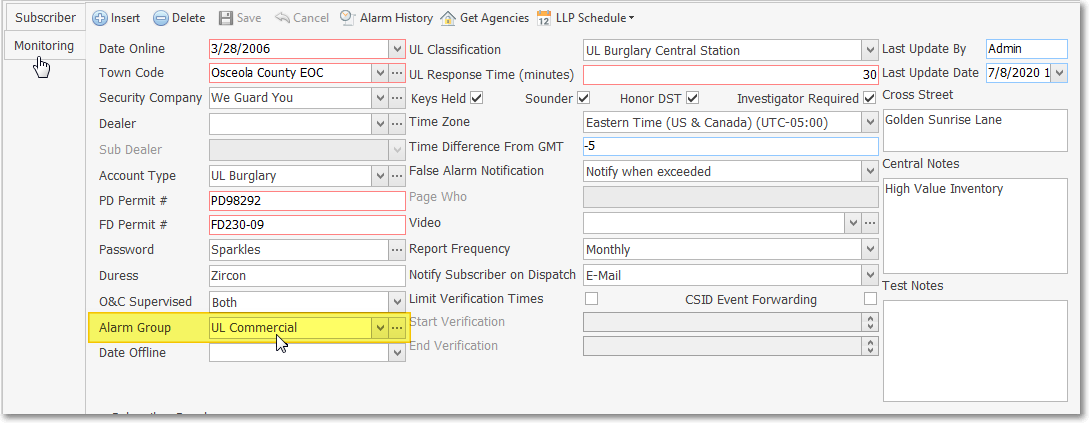
Subscriber Edit View - Monitoring sub-tab - Alarm Group field
✓Any Subscriber that does not need to be specifically assigned to a special Alarm Group must be assigned to the Default group.
▪Signals received from a Subscriber assigned to the Default Alarm Group may be processed by any available Operator.
✓The Alarm Group also provides a Special Filter code for the Subscriber Listing report, and a selection capability for many other Central Station Reports.
•You must also assign one (or more) of these Alarm Groups in the Employee Form's Alarm Groups tab to each Employee (Operator) who may be required to respond to signals received from that Alarm Group.
✓At a minimum, the Operator must be assigned to the Default group.
✓There is no limit to the number of Alarm (Processing) Groups to which an Employee (Operator) may be assigned.
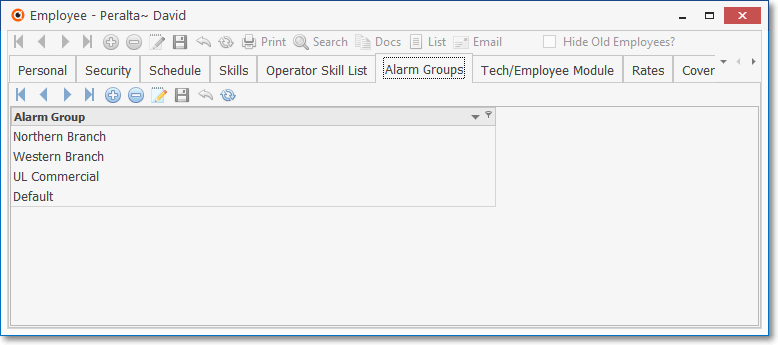
Employee Form - Alarm Groups tab
•From time to time you may need to transfer specific Subscribers into, or out of, one of these Alarm Processing Groups.
✓You will use this Alarm Group Maintenance Form to make those transfers.
❑Alarm Group Maintenance mass assignment procedures:
•To Access the Alarm Groups Maintenance Form:
a)From the Backstage Menu System Select Maintenance and Choose the Monitoring option, then select the Alarm Group Maintenance option, or
b)From the Quick Access Menu, Select Maintenance and Choose the Monitoring option, then select the Alarm Group Maintenance option
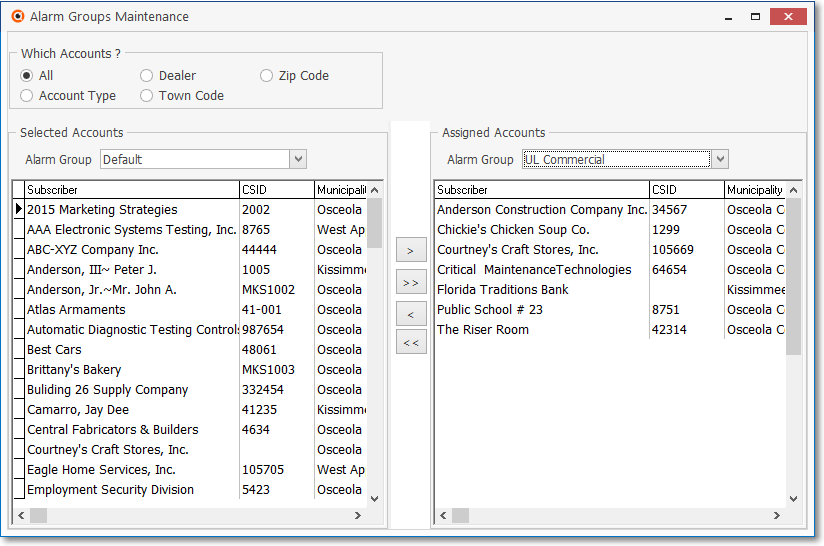
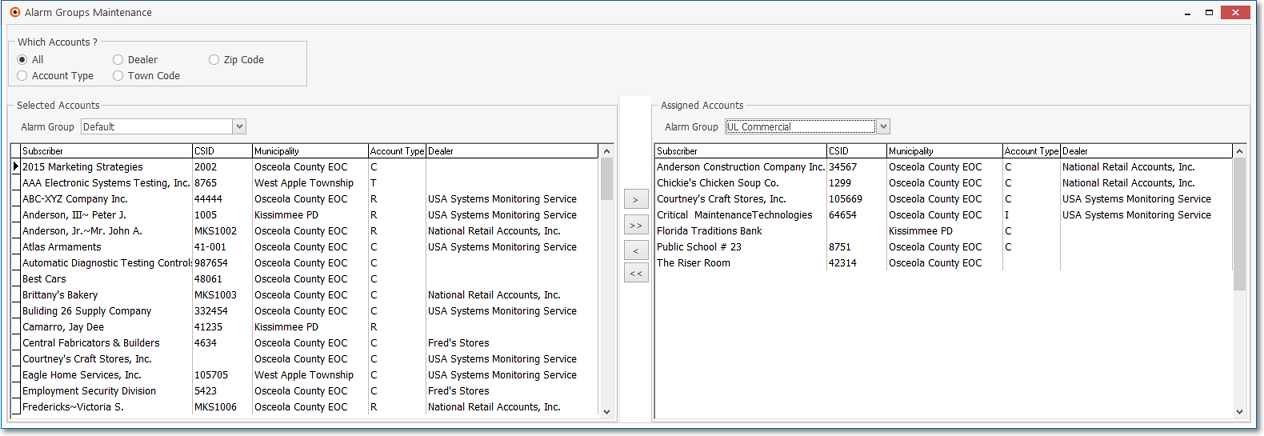
Alarm Group Maintenance dialog
➢Note: This Alarm Group Maintenance Form may be expanded to display all of the available columns by Dragging the center, vertical bar (see the hand pointer in the center of the illustration below) to the right to expand the Selected Accounts section, and/or by Dragging the right border of the Form to expand the Assigned Accounts section (see the hand pointer on the right side of the illustration below).
Expanded view of the Alarm Groups Maintenance dialog with all data columns showing
•Which Accounts? - Choose which Accounts will be available to be displayed in the columns within the Selected Accounts section.
✓All - The default - makes all Accounts available for selection.

Which Accounts? buttons - Select Which Accounts field - Dealer option
✓Any other choice will display the "Select Which Accounts" field (on the right) with an Ellipse (see the mouse pointer in the illustration above) that is used to access the appropriate Search dialog (or Zip Code entry field), based on the Which Accounts? choice made, as described below:
▪Account Type - Limit the Accounts available for selection within the Selected Accounts section to those assigned the Account Type chosen in the Search Account Types dialog.
oChoose the Search By field using the Drop-Down Selection List provided
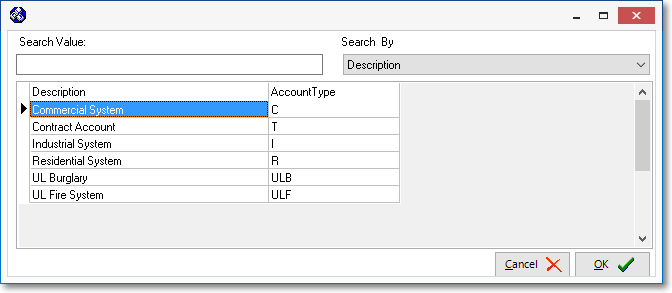
Search Account Types dialog
oEnter the appropriate Search Value to located the desired record.
oWhen the Record Pointer „ is directed at the required record, Click the OK ü button.
oThe Name of the Account Type that was selected will be inserted into the Select Which Accounts field (as shown below).

▪Dealer - Limit the Accounts available for selection within the Selected Accounts section to those assigned the Dealer Code chosen in the Search Dealers dialog.
oChoose the Search By field using the Drop-Down Selection List provided
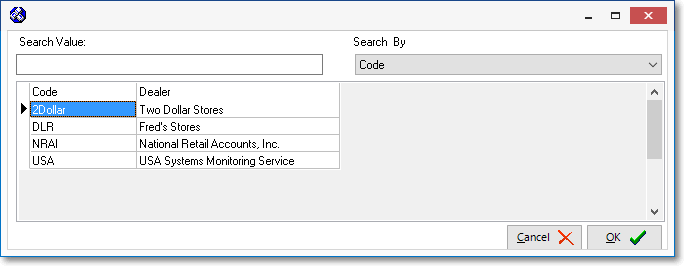
Search Dealers dialog
oEnter the appropriate Search Value to located the desired record.
oWhen the Record Pointer „ is directed at the required record, Click the OK ü button.
oThe Name of the Dealer Code that was selected will be inserted into the Select Which Accounts field (as shown below).

▪Town Code - Limit the Accounts available for selection within the Selected Accounts section to those assigned the Town Code chosen in the Search Town Codes dialog.
oChoose the Search By field using the Drop-Down Selection List provided
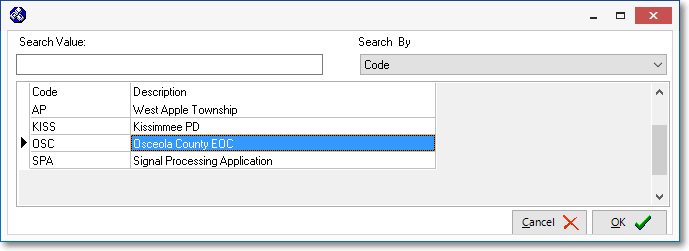
Search Town Codes dialog
oEnter the appropriate Search Value to located the desired record.
oWhen the Record Pointer „ is directed at the required record, Click the OK ü button.
oThe Name of the Town Code that was selected will be inserted into the Select Which Accounts field (as shown below).

▪Zip Code - Limit the Accounts available for selection within the Selected Accounts area to the one entered in the Zip Code entry box in the Select Which Accounts.
oEnter the
oYou must Click the Execute button after entering the desired Zip Code.

Zip Code entry with Execute button
•Selected Accounts - Once the "Which Accounts?" option is chosen to determine the Accounts that will be available to be displayed in the columns within the Selected Accounts section, the Accounts (i.e., Subscribers) that are actually listed in the Selected Accounts columns will be displayed based on two factors:
1.The Which Accounts? choice determines the "pool" of Accounts that are to be available for display in the Selected Accounts columns
2.The Alarm Group selection determines which of the Accounts in that "pool" will actually be displayed in the Selected Accounts columns
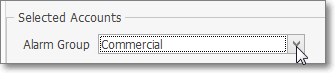
Selected Accounts - Alarm Group field
▪Alarm Group - Select an Alarm Group to filter the available "pool" of Accounts - based on the Alarm Group that was previously assigned to each of those Accounts - by using the Drop-Down Selection List provided.
▪Once the Alarm Group is chosen, the list of Selected Accounts will be updated (filtered) to reflect both the "Which Accounts?" selection, and the Alarm Group selection (see Assigned Accounts below).
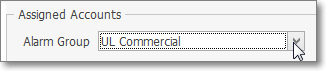
•Assigned Accounts - Next, using the Drop-Down Selection List provided in the Alarm Group field in the Assigned Accounts section, Select the Alarm Processing Group to which the (specifically selected sub-set of) Selected Accounts should now be assigned.
Assigned Accounts - Alarm Group field
•Move - Now that the appropriate set of Selected Accounts is being displayed, Choose which of those Accounts are to be reassigned to the Alarm Group chosen in the Assigned Accounts section:
✓Within the Selected Accounts list, Control+Click on each of the Account(s) to be assigned to a another Alarm Group.
▪After selecting the Accounts to be moved, be sure to Choose the appropriate Alarm Group to which these Account(s) should be assigned (see Assigned Accounts above).
✓Then Move Account(s) by Clicking either the single right arrow (> for moving only the selected Accounts), or the double right arrow (>> to move all Accounts within the Selected Accounts list) to the Assigned Accounts section.
▪This Move action will automatically update the Alarm Group field in the Subscriber's Central Station Data section within the Edit View of each of those Subscribers).
➢Note: This process may also be performed in reverse if you need to move Assigned Accounts back to the Selected Accounts section.
i.Select the appropriate Account(s)
ii.Click the left pointing arrow(s) to return them to the left side of the Alarm Group Maintenance Form.
07/08/2020